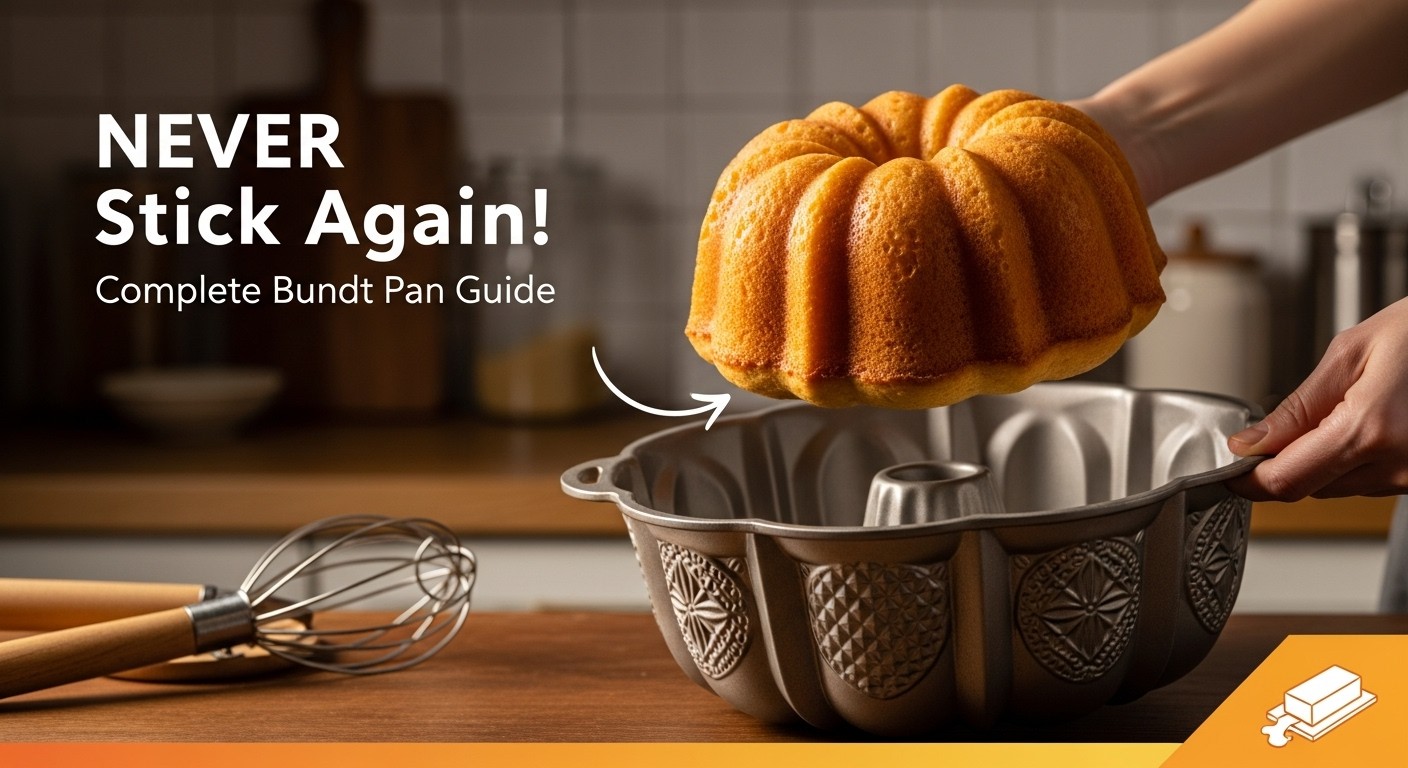
There's nothing quite like the sinking feeling of flipping over a beautifully baked bundt cake, only to have half of it stubbornly cling to the pan. I've been there more times than I'd like to admit, standing in my kitchen with a spatula in one hand and sheer disappointment on my face. Those intricate ridges that make bundt cakes so stunning? They're also the reason why proper pan preparation isn't just helpful—it's absolutely essential.
After years of bundt baking (and yes, a few disasters along the way), I've learned that the secret to a perfect release isn't luck. It's technique. Whether you're a first-time bundt baker or someone who's had one too many sticky situations, this guide will walk you through everything you need to know about preparing your bundt pan. By the end, you'll have the confidence to create those magazine-worthy cakes that slide out perfectly every single time.
Why Bundt Pan Preparation Actually Matters
Let me tell you something I wish someone had told me before my first bundt cake attempt: these pans are beautiful, but they're also uniquely challenging. Unlike a regular round cake pan with smooth sides, bundt pans have all those gorgeous grooves, ridges, and decorative details. That ornate design that makes your finished cake look so impressive? It's also creating dozens of little nooks where batter can lodge itself and refuse to let go.
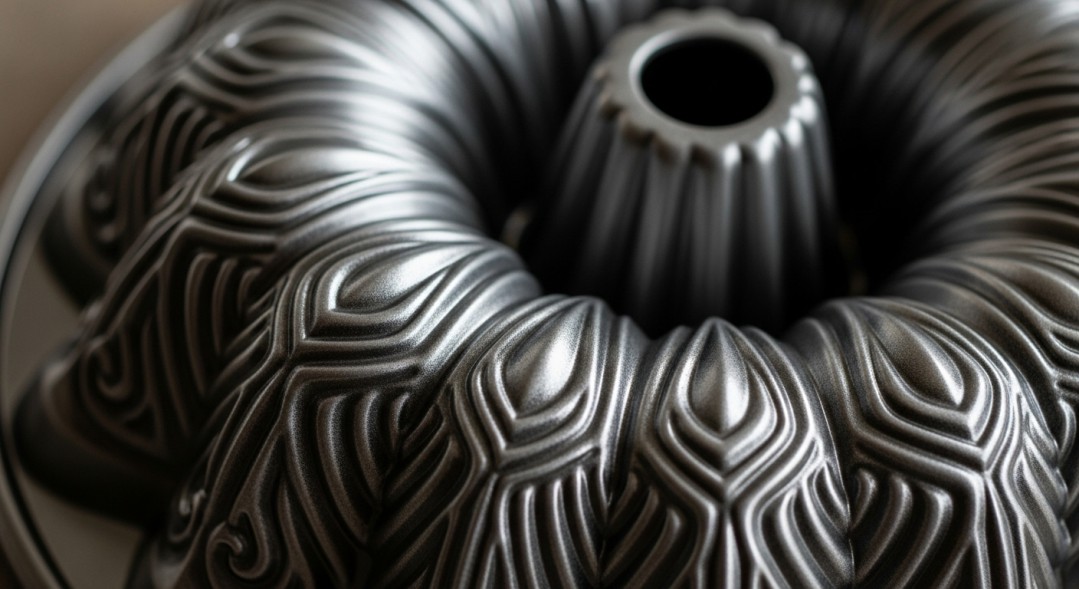
The center tube adds another layer of complexity. You're not just dealing with sides and a bottom—you've got this vertical column right in the middle that needs just as much attention. Miss even one small spot, and that's where your cake will stick. I learned this the hard way with a lemon poppy seed cake that left behind a trail of crumbs and my dignity.
The material of your pan matters too. My grandmother's old cast aluminum pan requires a completely different approach than my newer non-stick version. And don't even get me started on silicone—that's a whole different ballgame. The point is, understanding why bundt pans are sticky little troublemakers is the first step to outsmarting them.
The Basic Method: How to Grease a Bundt Pan
Let's start with the foundation: basic greasing. This is your first line of defense against the dreaded stuck cake, and getting it right makes all the difference.
Getting Started
First things first—timing matters. I grease my bundt pan right before I'm ready to pour in the batter, not hours in advance. I made that mistake once, and the grease just pooled at the bottom, leaving bare spots on the sides. Not ideal.
Grab yourself a tool for application. I've tried everything from my fingers to fancy silicone brushes, but honestly? A wadded-up paper towel or a pastry brush works best for me. The key is having something that can really get into those tight spaces.
What to Use for Greasing
Here's where people get overwhelmed by choices. Let me break down what I keep in my kitchen:
Vegetable shortening is my go-to for intricate bundt pans. It stays put better than butter, doesn't have water content that can create steam, and has a higher smoke point. I know it's not the most glamorous option, but it works.
Melted butter smells amazing and adds a lovely flavor to the crust of your cake. I use this for simpler bundt designs or when I'm feeling fancy. Just know that butter contains milk solids and water, which can sometimes work against you with really detailed pans.
Cooking spray or oil is quick and easy. A light coating of vegetable or canola oil applied with a paper towel can work beautifully, especially for non-stick pans.
Commercial baking sprays with flour (we'll talk more about this later) are honestly the lazy baker's best friend—and I mean that in the best possible way.
The Application Technique
Now here's where I get a bit obsessive, but trust me, it pays off. I start with the center tube, working my way up and down to coat it completely. Then I move to the sides, using small circular motions to ensure I'm covering every single ridge and groove. The bottom comes last.
Use more grease than you think you need. I'm talking a visible sheen everywhere—not pooling, but definitely not sparse. Pay extra attention to the sharp edges where the decorative ridges are most pronounced. Those spots are where cakes love to stick.
Run your finger around the entire pan afterward to check for any bare spots. If you see even a hint of un-greased metal, hit it with more grease. This is not the time to be conservative.
How to Grease and Flour a Bundt Pan: The Gold Standard
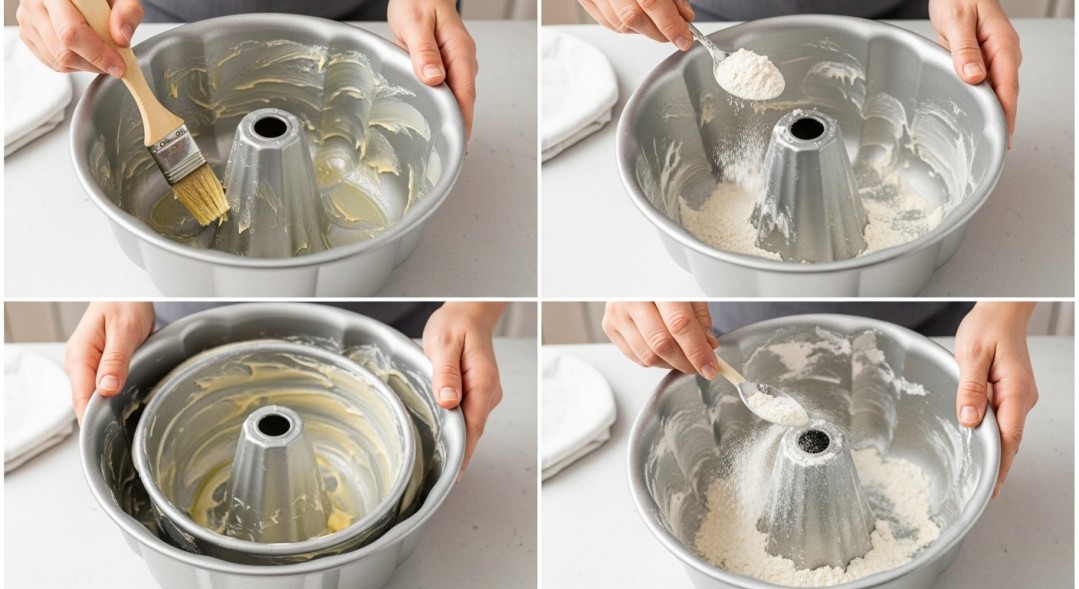
If basic greasing is your first line of defense, adding flour is like calling in reinforcements. This two-step process creates a barrier between your cake and the pan that's saved me more times than I can count.
Why the Flour Step Changes Everything
Flour creates a thin, dry layer that prevents the batter from making direct contact with the grease. Think of it like a protective coating. When the cake bakes and contracts slightly as it cools, that flour layer helps it release cleanly. I was skeptical about this extra step until I tried it—now I rarely skip it, especially for special occasions.
The Complete Process
Start by greasing your pan exactly as I described in the previous section. Don't skimp here—the flour needs something to stick to.
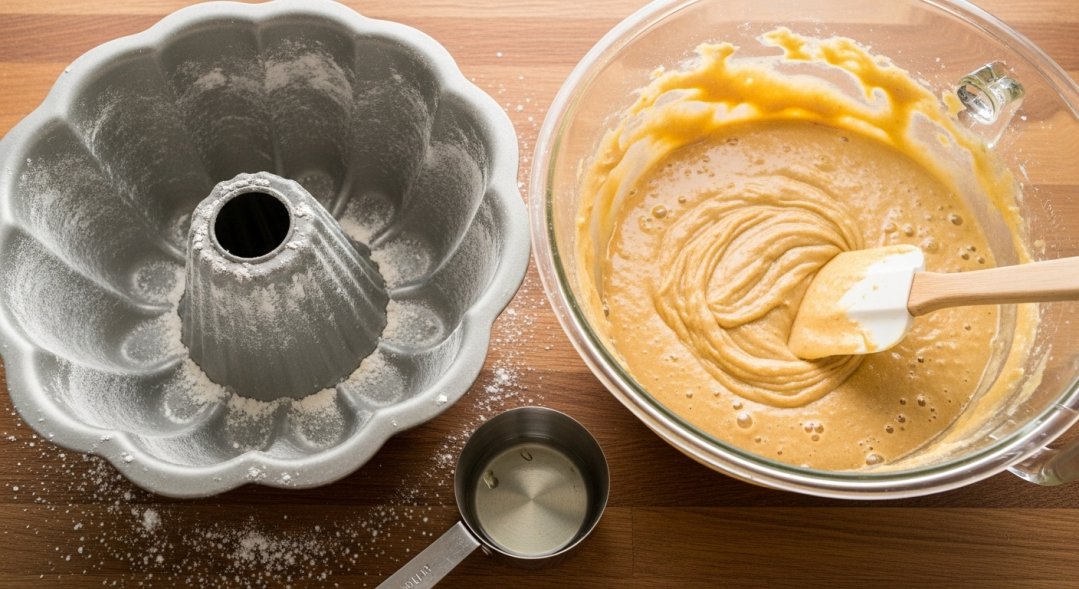
Once your pan is thoroughly greased, add about two to three tablespoons of all-purpose flour. Here's where it gets a little messy (in a fun way). Hold the pan over your sink or a large bowl and start rotating it, tilting it at different angles so the flour travels across all surfaces. Tap the sides gently as you go. You want the flour to coat every greased surface.
After you've coated everything, flip the pan upside down and tap it firmly over the sink. Excess flour will fall out, and that's exactly what you want. Too much flour creates a pasty coating on your finished cake—not cute.
Peer inside and look for any patches where you can still see grease without flour. Touch them up with a small pinch of flour and a gentle tap. I usually hold my pan up to a light to do this inspection because those bare spots can be sneaky.
Beyond All-Purpose Flour
Here's a fun trick I picked up from a baking blog years ago: match your coating to your cake. Baking a chocolate bundt? Use cocoa powder instead of flour. It creates the same protective barrier but won't leave white patches on your dark cake. The first time I tried this with a chocolate sour cream bundt, I felt like a genius.
For something different, try granulated sugar instead of flour. It gives you a slightly sweet, crispy crust that's absolutely delicious. I do this with citrus cakes especially.
Can You Use Butter to Grease a Bundt Pan?
The short answer is yes. The slightly longer answer is yes, but let's talk about how to do it right.
I love butter. It tastes incredible, it makes your kitchen smell like a bakery, and there's something satisfying about using it in every step of cake-making. That said, butter isn't always the MVP for bundt pan greasing.
The Butter Challenge
Butter contains about 15-20% water, and when that water heats up in the oven, it creates steam. In a regular cake pan, this isn't a huge deal. But in a bundt pan with all those intricate details? That steam can actually work against you, potentially causing sticking in those hard-to-reach spots.
The milk solids in butter can also burn at high temperatures, creating a sticky residue. I found this out the hard way with a bundt cake that baked at 350°F for over an hour—the butter had essentially caramelized in spots, and my cake was not budging.
When and How to Use Butter Successfully
That said, I do use butter to grease bundt pans—just strategically. For bundt pans with simpler designs (fewer intricate ridges), butter works beautifully. I also use it when I'm making cakes with higher sugar content, which naturally have more moisture and release more easily anyway.
The key is using softened butter applied with a pastry brush, not melted butter that will just run off the sides. I work it into every crevice, and I always follow up with flour. Always. That flour coating is non-negotiable when using butter.
If you want to get fancy, use clarified butter (ghee). It has the milk solids removed, which eliminates the burning issue and reduces the water content. I don't usually go through this extra step, but for a really special cake, it's worth considering.
Can You Use PAM to Grease a Bundt Pan?
Okay, let's talk about the elephant in the room—or rather, the spray can in the pantry. Can you just spray your bundt pan with PAM and call it a day? Actually, yes. With a caveat.
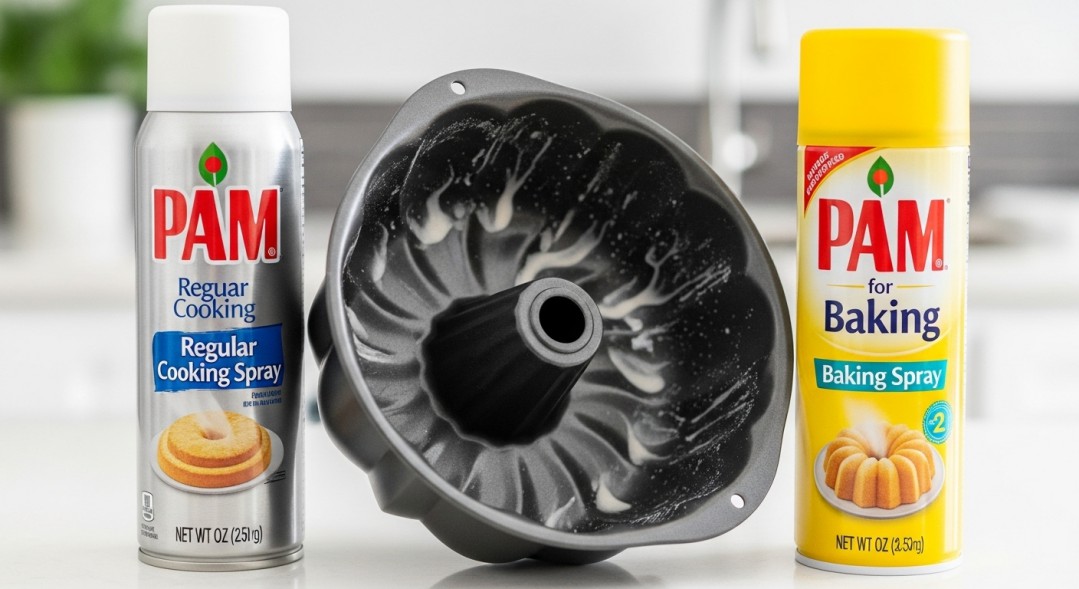
Not All Cooking Sprays Are Created Equal
Regular PAM cooking spray will work in a pinch, but here's what changed my bundt game: PAM for Baking. This stuff contains flour along with the oil, so you're essentially greasing and flouring in one step. The first time I used it, I was honestly shocked at how well my cake released. I felt like I'd been working too hard for yearsThe convenience factor is real. After a long day when I just want to get a cake in the oven without fifteen steps, this spray is my best friend. It gets into all those tiny grooves that are hard to reach with a brush or paper towel.
The Right Way to Spray
Even with spray, technique matters. Hold the can about six inches from the pan and use a sweeping motion. Don't just blast one area—that creates pooling and uneven coverage. I work in sections, rotating the pan as I go.
Make sure you get the center tube from top to bottom, and don't forget the very top rim of the pan. I've had cakes stick at the rim because I got lazy with my spraying.
One downside: if you're heavy-handed, sprays can create a slightly gummy residue on your pans over time. I give my bundt pans a really thorough wash after using cooking spray to prevent buildup.
My Honest Take
For everyday bundt baking, especially with pans I know well, PAM for Baking is my first choice. For special occasion cakes or when I'm using a new pan for the first time, I still do the traditional shortening-and-flour method. Call me paranoid, but I like having the visual confirmation that every surface is coated.
Do You Grease a Silicone Bundt Pan?
Silicone bundt pans are like the cool, modern cousin of traditional metal pans. They're flexible, come in wild colors, and supposedly solve all our sticking problems. But do they really?
The Silicone Situation
I bought my first silicone bundt pan about five years ago, attracted by the promise of naturally non-stick baking. The packaging said greasing was optional, and I believed it. My first cake? Stuck. Not catastrophically, but enough to lose some of the pretty edges.
Here's what I've learned: silicone is naturally non-stick, but "non-stick" doesn't always mean "foolproof." A lot depends on the quality of your pan, what you're baking, and how many times you've used it.
Brand-new silicone pans are usually more non-stick than ones that have been through the dishwasher fifty times. I've also noticed that denser batters (like pound cakes) release better than lighter, more delicate cakes.
My Approach to Silicone
I lightly grease my silicone bundt pan every time. Yes, even though the package says it's optional. A thin coating of neutral oil or a quick spray is all it takes, and it's insurance against disappointment.
The beauty of silicone is that it's so flexible—you can actually gently pull the sides away from the cake to help it release. Try that with a metal pan and you're asking for trouble.
One crucial tip: always place your silicone bundt pan on a sturdy baking sheet before filling it with batter. Silicone pans are floppy, and trying to carry a full pan to the oven is a disaster waiting to happen. I learned this when I sloshed cake batter all over my oven door.
Cooling Is Critical
With silicone, I let my cakes cool for about 15 minutes, then I start gently pulling the edges away from the sides. The flexibility of the pan means you can ease the cake out rather than relying on gravity alone. It's actually kind of satisfying.
Keep your silicone pans clean and avoid using sharp utensils on them. Once you scratch or damage that non-stick surface, it's never quite the same.
How to Line a Bundt Pan with Parchment Paper
Let me be upfront: lining a bundt pan with parchment paper is kind of a pain. But I'm including this section because sometimes—very occasionally—it's worth the effort.
When to Even Consider This
I've lined bundt pans with parchment exactly three times in my baking life. Once for an incredibly sticky caramel-laden cake, once for a pan I didn't trust at all, and once because I was feeling overly ambitious after watching too many baking shows.
The reality is that bundt pans and parchment paper aren't really designed for each other. Those curves and ridges that make bundt cakes beautiful? They make parchment lining nearly impossible.
The Practical Approach
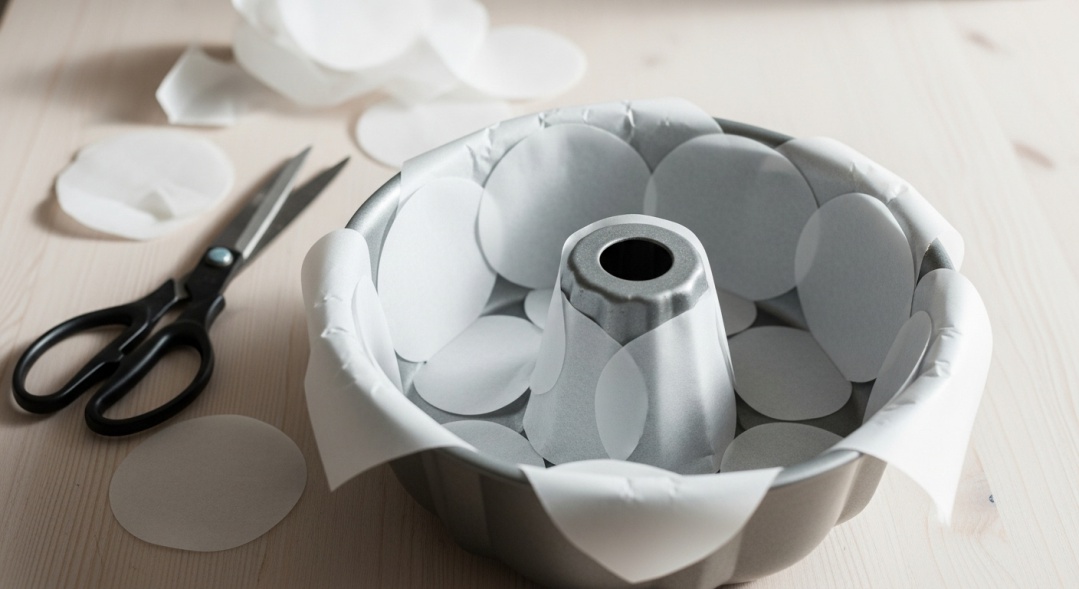
If you're determined to use parchment, here's what actually works: forget about lining the sides. Just don't. Instead, cut a circle of parchment for the bottom of the pan and a smaller circle for the base of the center tube.
Grease your pan first—the grease helps the parchment stick in place and still protects the sides. Press your parchment circles into place, then grease and flour over the parchment. Yes, you're still greasing and flouring. The parchment is just extra insurance for the bottom.
Some people try to create pleated parchment strips for the fluted sides. I tried this once. It took twenty minutes, looked terrible, and the cake still needed the grease and flour anyway. Not worth it.
The Honest Assessment
Is lining a bundt pan with parchment worth the effort? For 99% of cakes, absolutely not. Proper greasing and flouring works better and takes a fraction of the time. The only scenario where I'd do this again is if I had a cake with an extremely sticky topping or filling that I knew from experience was going to be problematic.
Save yourself the hassle and just nail your greasing technique instead.
How to Prepare a Bundt Pan: The Ultimate Best Practices
After all this discussion, let's bring it together with what I actually do in my kitchen. This is my foolproof method, refined through trial, error, and more than a few kitchen tears.
My Go-To Method
For most cakes, I use a combination approach that's never let me down: I spray my pan with PAM for Baking (or a similar flour-based baking spray), making absolutely sure I've covered every single surface. Then—and this is my secret weapon—I follow up with a light dusting of additional flour.
Is this overkill? Maybe. But you know what else it is? Effective. I haven't had a cake stick in over two years using this method.
When I'm feeling more traditional or when I don't have baking spray on hand, I use the shortening-and-flour method. I scoop out a generous tablespoon of vegetable shortening, warm it between my palms until it's really soft and spreadable, and then go to town with a pastry brush. Every ridge, every groove, every centimeter of that center tube gets attention.
Pan-Specific Adjustments
My cast aluminum bundt pan with the most intricate cathedral design? That one gets the deluxe treatment every time—shortening, flour, the works. I've learned not to trust that pan with anything less.
My non-stick Nordic Ware pan with the simpler design? A good spray with baking spray usually does the trick. I've even gotten away with just a light coating of butter and flour on that one.
The silicone pan gets a light oil coating, and I make sure it's sitting on a baking sheet before I add any batter.
Timing and Temperature
I prep my pan right before I'm ready to add the batter—not hours in advance. The one exception is if I'm baking in a very warm kitchen; then I might prep the pan and stick it in the fridge for a few minutes so the grease firms up slightly. This is an old baker's trick I picked up, and it actually helps.
Make sure your pan is completely clean and bone dry before you start. Any residual moisture or old batter residue will create sticking problems. I sometimes wipe my pan with a paper towel dampened with white vinegar, then dry it thoroughly before greasing.
Troubleshooting and Pro Tips That Actually Work
Even with perfect preparation, things can occasionally go wrong. Here's what I do when bundt cakes try to test me.
When Your Cake Sticks Anyway
First, don't panic. Let the cake cool in the pan for about 10 to 15 minutes after removing it from the oven. I know you're eager to see your creation, but patience is crucial. A cake that's too hot is more fragile and more likely to break when you try to remove it.
Place a wire cooling rack (or a serving plate) on top of the pan and flip the whole thing over in one confident motion. Let gravity do the work. Sometimes I'll tap the bottom of the pan gently or give it a little shake.
If the cake isn't budging, try this: place a warm, damp kitchen towel over the bottom of the pan (which is now facing up) for a few minutes. The steam can help release stubborn spots. This has saved me more than once.
As a last resort, you can try the freezer trick. Put the whole pan in the freezer for about 15 minutes. The extreme temperature change can cause the metal to contract just enough to release the cake. I've used this method twice, and it worked both times, though I was definitely stress-eating cookie dough while I waited.
Signs You Need a New Pan
If you've tried everything and your cakes consistently stick, it might be time to retire your pan. I had to say goodbye to a bundt pan last year that had developed a rough, pitted surface from years of use. No amount of grease was helping anymore.
Look for dark discoloration that won't wash off, rough patches, or areas where the non-stick coating has worn away. Old pans don't owe you anything—sometimes a fresh start is the answer.
My Secret Weapon
Here's something I don't use often, but when I absolutely, positively cannot have a cake stick (like for a fancy dinner party), I make homemade cake release paste. Mix equal parts shortening, oil, and flour into a spreadable paste. Brush this onto your pan. It's essentially a super-concentrated version of what's in those baking sprays, and it's bulletproof.
I keep a small container of this in my fridge, and it lasts for months. A little goes a long way.
The Cooling Rack Wisdom
Always invert your bundt cake onto a cooling rack, not directly onto a serving plate. The airflow around the cake prevents condensation from making the bottom soggy. Once the cake is completely cool, then you can transfer it to your beautiful serving platter.
Final Thoughts: Bundt Success Is Within Reach
After everything we've covered, here's what I want you to remember: preparing a bundt pan properly isn't about following rigid rules. It's about understanding what works for your specific pan, your recipe, and your baking style.
My grandmother always greased her bundt pans with butter and flour, and she never had a problem. My best friend swears by coconut oil spray. I'm a PAM for Baking devotee with a shortening backup plan. We're all right because we've found what works for us through experience.
Don't let fear of sticking keep you from baking bundt cakes. These beautiful creations are worth the small effort of proper pan preparation. Start with the greasing and flouring method, pay attention to those intricate ridges, and don't rush the cooling process. Master these basics, and you'll be pulling out perfect bundt cakes that look like they came from a fancy bakery.
The first time you flip your bundt pan and watch a flawless cake slide out, revealing every gorgeous ridge and detail? That feeling is worth every bit of greasing, flouring, and careful preparation. Trust me on this.
Now get in that kitchen and show your bundt pan who's boss. You've got this.
Quick FAQ
Can you grease a bundt pan the night before?
I don't recommend it. The grease can pool or separate, leaving bare spots. Prep your pan right before you add the batter for best results.
What's the best grease for non-stick bundt pans?
Even non-stick pans benefit from light greasing. A quick spray of baking spray with flour works beautifully and won't harm the coating.
Leave a Reply