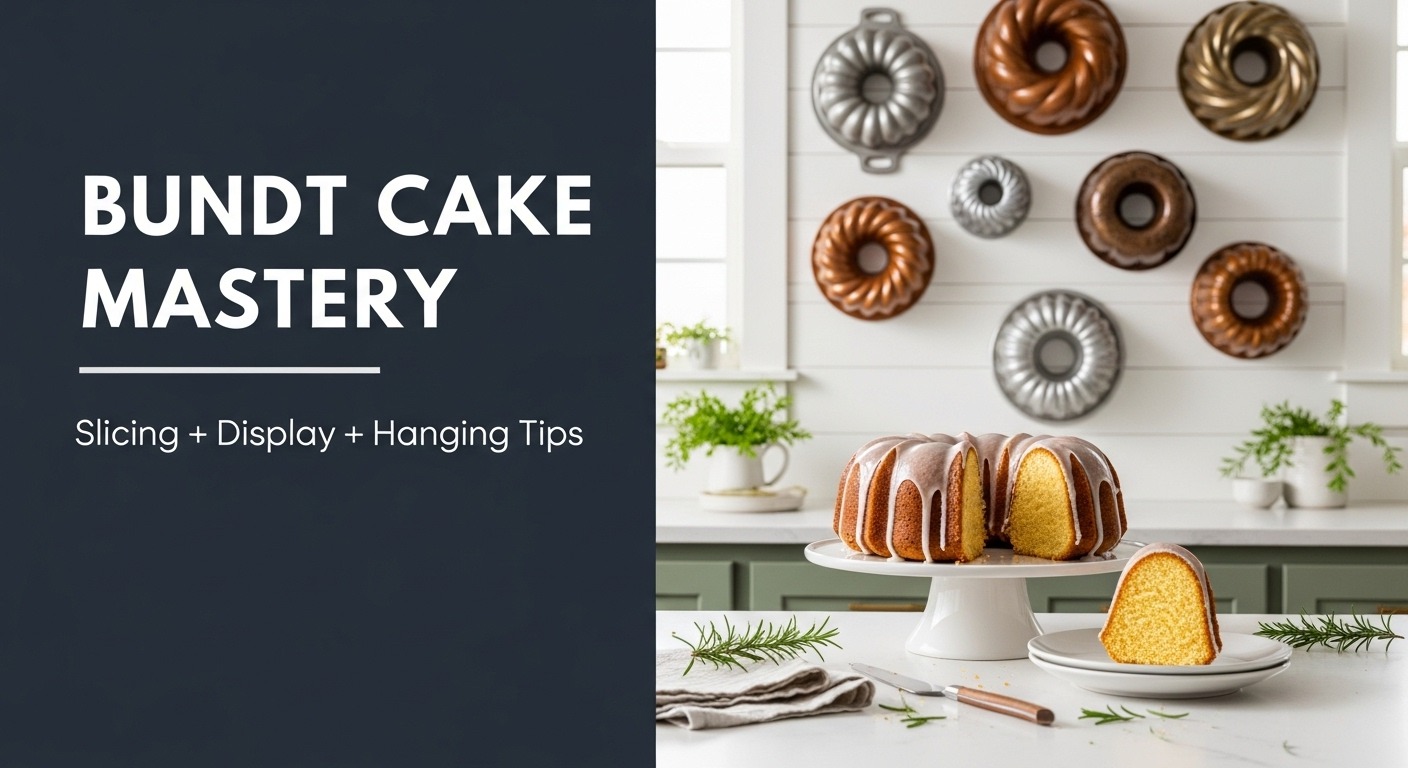
I'll be honest with you—I never thought I'd become the person who gets excited about bundt pans. But here I am, with seven of them hanging in my kitchen, and I couldn't be happier about it. What started as a simple baking hobby turned into a full-blown obsession with these gorgeous pans, and along the way, I learned that there's so much more to bundt cakes than just baking them.
Whether you've just pulled your first bundt cake from the oven and you're staring at it wondering how on earth to slice it evenly, or you've accumulated a collection of beautiful pans that are currently crammed in a cabinet where nobody can appreciate them, this guide is for you. I'm going to walk you through everything I've learned about slicing bundt cakes without turning them into a crumbly mess, displaying these stunning pans so they actually enhance your kitchen, and hanging them on your wall like the works of art they truly are.
Trust me, once you master these techniques, you'll wonder why you ever hid these beauties away in the first place.
How to Slice a Bundt Cake Like a Pro
Let me paint you a picture: It's my daughter's birthday, I've just unmolded what I think is the most beautiful chocolate bundt cake I've ever made, and I'm about to slice into it in front of 15 expectant guests. I grab a knife, make my first cut, and... the whole thing crumbles. The slice falls apart. My beautiful creation looks like it went through a blender.
That was five years ago, and I've learned a lot since then. Slicing a bundt cake is actually pretty straightforward once you know the tricks, but nobody really teaches you this stuff.
Essential Tools You Actually Need
You don't need a fancy cake knife set or any special equipment, but having the right basic tools makes all the difference. I use a long serrated knife—the kind you'd use for bread. The serrated edge grabs the cake without crushing it, which is exactly what you want. I learned this the hard way after trying to use my chef's knife and watching it compress the cake with every sawing motion.
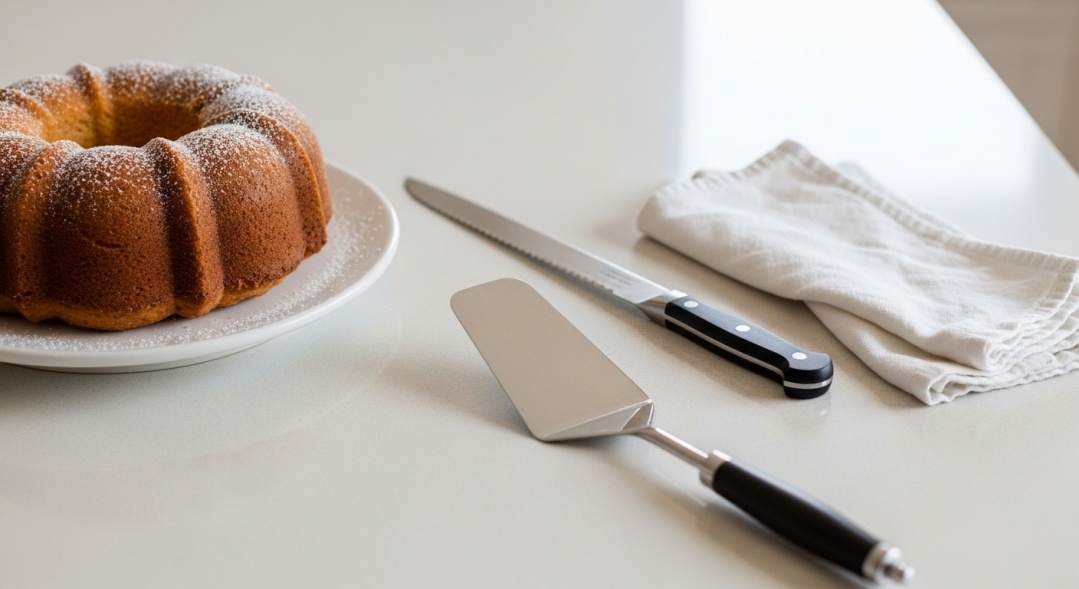
Keep a clean, damp kitchen towel nearby too. After each slice, I wipe the blade clean. It takes an extra ten seconds, but it's the difference between clean, bakery-worthy slices and messy ones with crumbs dragging through the frosting.
An offset spatula is my secret weapon for actually lifting and serving the slices. These angled spatulas slide under each piece without destroying it, and they cost maybe five dollars at any kitchen store.
The Waiting Game (Sorry, I Know You're Hungry)
This is the part that kills me every single time, but it's non-negotiable: your bundt cake needs to cool completely before you slice it. And I mean completely—at least two hours, sometimes three if it's a dense cake.
I know it smells amazing. I know you want to dig in. I've been there, standing in my kitchen, practically drooling over a warm lemon bundt cake. But warm cake is structurally weak. It'll fall apart under the knife, and you'll end up with a pile of delicious rubble instead of beautiful slices.
Here's what I do: I set a timer on my phone for two hours the moment I unmold the cake. Then I leave the kitchen. If I stay there looking at it, I'll convince myself it's "cool enough," and it never is.
The Step-by-Step Slicing Technique That Actually Works
Once your cake has cooled (you waited, right?), here's exactly how I slice it every time now.
First, I decide where to start. I always look for the least attractive side of the cake—maybe there's a small crack or a spot where the glaze didn't set perfectly. That side goes toward the back of the cake stand. Your first and last slices will come from there, so any imperfections get hidden.
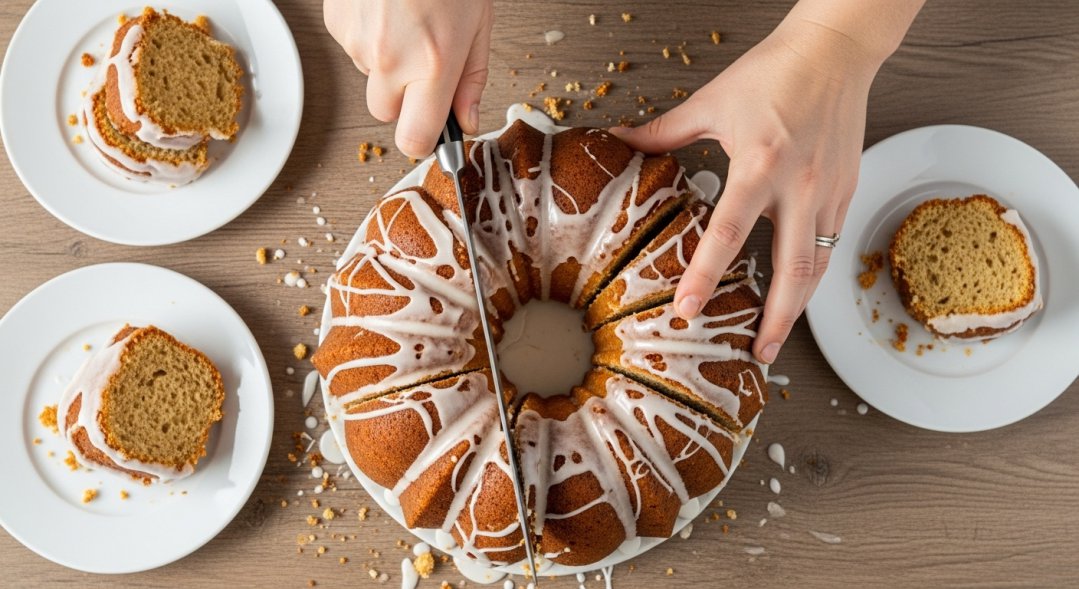
Now here's the technique that changed everything for me: vertical slicing. Position your knife completely vertical, perpendicular to your work surface. Start at the outer edge and draw the knife straight down and inward toward the center hole. Don't angle the knife—keep it straight up and down.
Make your slices about one to one and a half inches wide. I eyeball it now, but when I was learning, I actually used a ruler to mark the outer edge of the cake with toothpicks at regular intervals. A standard bundt cake gives you between ten and twelve slices this way, which is perfect for most gatherings.
After each cut, pull the knife straight up and out, wipe it with your damp towel, and make the next cut. This wiping step seems tedious until you see how much cleaner your slices look. The difference is dramatic.
When Things Don't Go According to Plan
Even with perfect technique, some cakes are just crumbly by nature. My aunt's famous sour cream bundt cake, for example, has the most incredible flavor but falls apart if you look at it wrong. For cakes like this, I've learned to chill them for about 30 minutes in the refrigerator before slicing. The cold firms everything up just enough to hold together under the knife.
Mini bundt cakes are their own category. For those, I usually just serve them whole—they're already individual portions. But if you need to slice them (maybe for sampling multiple flavors), cut them in half horizontally like a hamburger bun rather than trying to cut vertical slices.
Keeping the Rest Fresh
Here's something nobody tells you: once you make that first cut, the clock starts ticking on freshness. Air is the enemy. If I'm not serving the entire cake at once, I place the unsliced portion under a cake dome or cover it tightly with plastic wrap, making sure the cut edge is completely sealed.
For next-level freshness, I learned this trick from my neighbor who used to own a bakery: press a piece of plastic wrap or parchment paper directly against the cut surface before covering the whole cake. It creates a barrier that keeps everything moist.
Creative Ways to Display Bundt Pans
So here's where my bundt pan obsession really took off. I was at a flea market about three years ago and found this absolutely stunning vintage copper-toned bundt pan with the most intricate flower pattern. It cost me three dollars. Three dollars! I brought it home, washed it up, and then stood in my kitchen thinking, "There is no way I'm hiding this in a cabinet."
That was the beginning of the end. Or maybe the beginning of the beginning?
Why I Started Displaying My Pans (And Why You Should Too)
Look, I get it. Pans are tools, right? They belong in cabinets. That's what I thought too, until I realized that bundt pans—especially vintage ones—are genuinely beautiful. They're sculptural. Each one is designed to create a different pattern, and when you really look at them, they're little works of functional art.
Plus, let's be practical: displaying them frees up so much cabinet space. I used to have my bundt pans stacked inside each other in a deep cabinet, and every time I wanted the castle-shaped one on the bottom, I'd have to unstack all seven pans like some kind of frustrating puzzle. Now? I can see all of them at once and grab exactly what I need.
And honestly, they just make my kitchen feel more like my kitchen. When friends come over, they always comment on my pan display. It's become a conversation starter and a reflection of something I genuinely love doing.
Countertop and Shelf Display Ideas
My first display attempt was simple: I cleared off one shelf of my open bookshelf (yes, the one in my kitchen that's supposed to hold cookbooks) and arranged three pans on it. I placed the largest one in the back, medium in the middle, and smallest in front, creating this stepped visual effect that actually looked intentional.
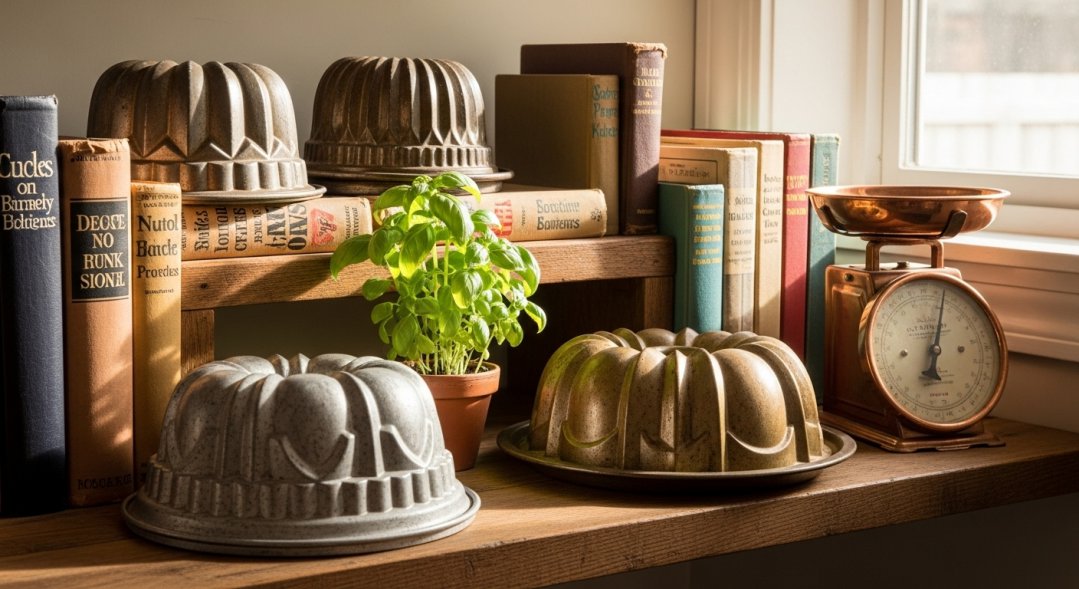
The key to shelf displays is treating your pans like decorative objects, not just tools. I mix mine with a few cookbooks, a small potted herb, and a vintage kitchen scale I inherited from my grandmother. The pans become part of a larger vignette instead of just looking like storage.
If you have the counter space, a tiered stand works beautifully. I've seen people use those three-tiered stands meant for serving appetizers to display smaller bundt pans. It looks especially good when you group pans by color—all the silver ones together, or a collection of colorful Nordic Ware pans arranged by shade.
The Pegboard Solution That Saved My Sanity
About a year into collecting pans, I had outgrown my shelf situation. I'd seen pegboard displays on Pinterest and always thought they looked too complicated, but I was desperate for more space. Turns out, they're incredibly easy.
I bought a 2x4 foot pegboard from the hardware store, painted it a soft sage green to match my kitchen walls, and mounted it above my counter. The whole project took maybe two hours, and most of that was waiting for paint to dry.
The beauty of pegboard is the flexibility. I can rearrange my pans whenever I want by just moving the hooks around. I organized mine by how often I use them—my go-to 10-inch classic bundt pan is right at eye level, while my special occasion cathedral pan is higher up.
Pro tip: When you're at the hardware store, buy more hooks than you think you need. I initially bought exactly six hooks for my six pans, then found an amazing Bundt pan at a garage sale the next weekend and had to make another trip to the store. Learn from my mistake.
Floating Shelf Arrangements
This is my current setup, and I'm borderline obsessed with it. I installed three floating shelves in a staggered pattern on my kitchen wall—not lined up evenly, but at different heights creating this asymmetrical, modern look.
Each shelf is about 10 inches deep, which is perfect for displaying pans while still being shallow enough that they don't stick out awkwardly into the room. I arranged my pans leaning at a slight angle rather than sitting flat, which lets you actually see the interior pattern of each pan. That's the whole point, after all.
The spacing between shelves is important. I have about 16 inches between each shelf, which gives each pan enough visual breathing room without wasting wall space. And here's something I didn't expect: the shadows that the pans cast on the wall at different times of day are actually beautiful. My husband thinks I'm crazy for noticing this, but it's true.
How to Hang Bundt Pans on the Wall
This is where it gets fun. Hanging bundt pans on the wall was intimidating at first because, let's be real, nobody wants to put holes in their wall only to have everything come crashing down at 2 AM. But I've now hung pans in three different houses (we moved twice), and I've figured out what works.
Planning Your Wall Display (Measure Twice, Drill Once)
The first time I hung pans, I just started putting holes in the wall wherever felt right. Bad idea. Really bad idea. I ended up with seven holes in my wall and pans that looked completely random and chaotic—and not in a charming way.
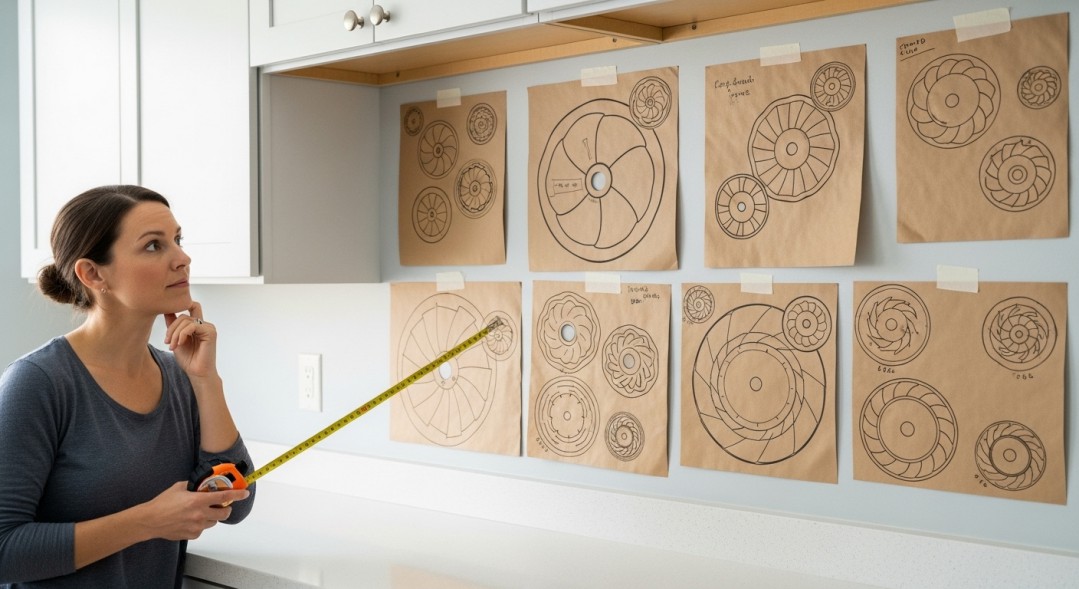
Now I plan everything out first. I use painter's tape to mark where each pan will go, then I step back and live with that arrangement for a day or two. I'll walk past it multiple times, make dinner, have my coffee in the morning, and see if the arrangement still feels right. Usually, I end up adjusting at least two or three positions before I commit to drilling.
For measuring, I trace each pan onto kraft paper or old newspaper, cut out the shapes, and tape those paper templates to the wall. This gives you a full-size preview of exactly how your display will look. It feels like extra work, but trust me—it beats filling holes and repainting later.
One thing I learned: consider the weight of your pans. My cast iron bundt pan weighs significantly more than my aluminum ones. That heavy pan needs either a stud or a heavy-duty anchor. Don't assume all pans can hang from the same type of hook.
The Hardware and Tools You'll Actually Need
Let's talk about what's in my pan-hanging toolkit, because having the right stuff makes this so much easier.
For renters or anyone nervous about putting holes in walls, Command hooks are legitimately great. I used them in my last apartment, and they held my lighter aluminum pans perfectly for two years. The key is to use the ones rated for at least double what your pan weighs—so if your pan is two pounds, use a hook rated for four pounds or more.
For permanent installations, I'm a big believer in wall anchors. Most of my kitchen walls are drywall, not plaster, so I use plastic expansion anchors for medium-weight pans and toggle bolts for my heavier ones. A stud finder is worth buying—they're like fifteen dollars, and hitting a stud means you don't need anchors at all.
My husband, who is handier than I am, installed the first few hooks for me. But now I do it myself with just a level, a pencil, a drill, and patience. It's honestly not that complicated once you do it once.
Hanging Methods That Work
There are a few different approaches to hanging bundt pans, and which one you choose depends partly on your wall and partly on your aesthetic preferences.
The Individual Hook Method is what I use most often. For each pan, I install one sturdy hook or screw right where the center hole of the pan will be. The pan hangs from its center tube opening, which displays it perfectly flat against the wall. This is the most secure method I've found, especially for heavier pans.
The trick is getting the hook positioned exactly where you want the center of the pan to be. I hold my paper template against the wall, mark through the center hole with a pencil, and that's my drilling spot. Then I install the appropriate anchor and hook for that pan's weight.
The Rail System is what my sister uses in her kitchen, and it looks fantastic. She installed two horizontal rails (basically just towel bars) on her wall, then hung her pans from S-hooks. The advantage here is flexibility—she can slide the pans back and forth along the rails to adjust spacing without drilling new holes.
This works especially well if you're still collecting pans and aren't sure how many you'll ultimately have. My sister started with four pans on her rails and now has nine, and she never had to install any additional hardware.
Step-by-Step Installation (The Way I Actually Do It)
Okay, here's my exact process for hanging a bundt pan, refined through trial and error and one time when a pan fell off the wall while I was watching TV and scared me half to death.
First, I hold the pan up against the wall at various positions until I find the spot that feels right. I mark that spot lightly with a pencil, then I put the pan down and use my paper template to confirm the exact center position. I mark through the center hole of the template.
Next, I use my stud finder to check if there's a stud behind my mark. If there is—jackpot! I can use a simple screw hook and I'm done. If there's no stud (which is usually the case), I drill a pilot hole and install the appropriate wall anchor for my pan's weight.
Before I hang the actual pan, I test the hook with something heavy—maybe I'll hang a cast iron skillet on it for a few minutes to make sure it holds. I know this sounds paranoid, but it beats having a pan fall.
Once I'm confident the hook is secure, I hang the pan and use my level to make sure it's not tilted. This part is crucial—an off-kilter pan just looks wrong. If it's tilted, sometimes I can adjust how it sits on the hook. Other times, I've had to reinstall the hook at a slight angle to compensate.
Arrangement Ideas That Actually Look Good
The arrangement is where you get to be creative, and honestly, there's no single "right" way to do this. But I can tell you what's worked for me.
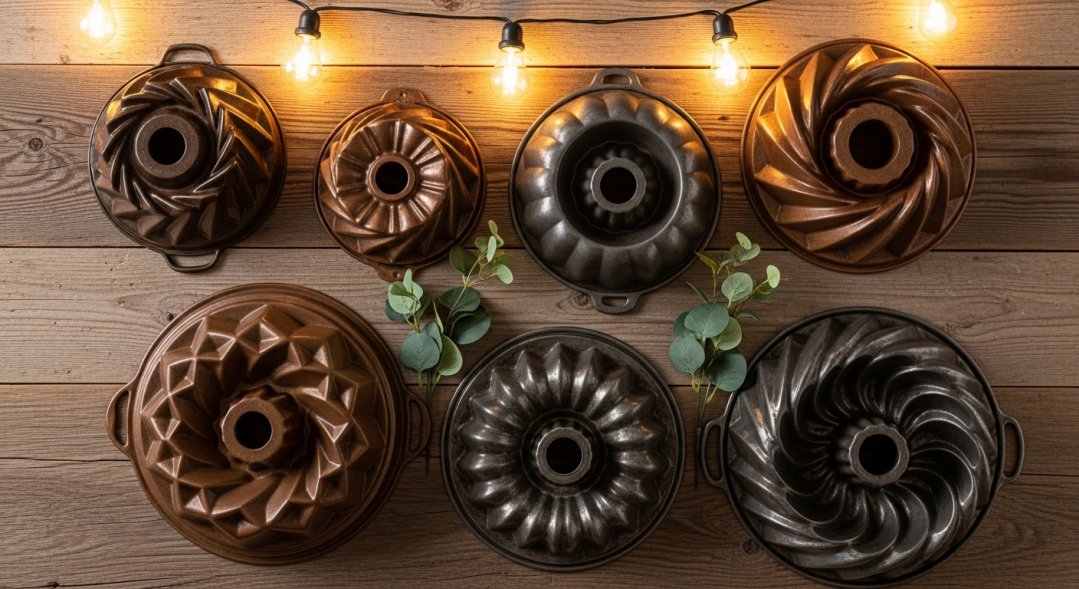
My current display is asymmetrical—I have five pans arranged in a loose cluster with varied spacing. The largest pan is slightly left of center, with smaller pans surrounding it at different heights. It looks organic, like the pans just naturally arranged themselves that way (even though I spent an entire Saturday moving those paper templates around).
I've seen gorgeous symmetrical arrangements too, though. My friend has six identical-sized pans arranged in two perfectly even rows of three. It's very orderly and modern, which suits her minimalist kitchen perfectly.
If you're mixing different sizes, a general guideline I follow is to group them so the largest pan is your visual anchor. Your eye should be drawn to that first, then wander to the smaller pans around it. Think of it like a solar system—the big pan is the sun, the others are orbiting planets.
Color coordination matters more than I initially thought. I have mostly silver and copper-toned pans, and they look cohesive together. When I added a bright red silicone bundt pan to the display, it stuck out like a sore thumb. I ended up moving it to a different spot in my kitchen where it didn't clash with the metallics.
Keeping Everything Safe and Secure
Here's the maintenance routine I follow, because I don't want to come home one day to find my pans on the floor.
Every few months, I gently wiggle each pan to make sure the hook is still secure. I'm looking for any looseness or shifting. If anything feels off, I take that pan down immediately and check the anchor. Sometimes drywall anchors work themselves loose over time, especially if you've been taking pans down to use them and then re-hanging them.
For cleaning displayed pans, I just wipe them down with a damp cloth once a month or so. They're not getting the same kind of grease exposure that my cooking pans get, so they stay pretty clean. If dust builds up in the crevices, I use a soft paintbrush to get it out.
One thing I learned: if you're actually using your displayed pans for baking (which I do), make sure they're completely dry before you hang them back up. I once hung a pan that still had tiny water droplets inside, and over time, it developed some water spots on the wall. Not a huge deal, but easily preventable.
Styling Tips: From Baking to Display
The line between "functional baking tool" and "decorative display piece" is blurrier than you might think. Some of my pans do both jobs beautifully.
I keep my most-used pans—my standard 10-inch and 12-inch pans—in an easy-to-reach spot on my display. They're the workhorses of my bundt collection, and I pull them down at least twice a month. My more decorative pans, like the vintage cathedral pan and the pan shaped like a castle, hang in less accessible spots because I use them maybe twice a year.
Mixing new and vintage pans creates the most interesting displays, I think. My collection includes brand-new Nordic Ware pans with their sharp, crisp patterns alongside pans from the 60s and 70s with a softer, more worn patina. The contrast actually highlights what's special about each piece.
Your kitchen's overall style should guide your display choices. My kitchen leans farmhouse-casual, so my bundt pan wall fits right in alongside my open shelving and butcher block counters. If you have a sleek, modern kitchen, you might want a more minimal display—maybe three pans in a perfect row rather than an eclectic gallery wall.
Here's something fun I started doing seasonally: During the holidays, I hang small sprigs of evergreen or a string of tiny lights around my pan display. In spring, I've tucked small dried flower bundles between pans. It sounds cheesy, but it actually looks charming and festive without much effort.
Bringing It All Together
Looking back, I never imagined that bundt pans would become such a source of joy in my kitchen. But they have. There's something deeply satisfying about taking these beautiful, functional objects and giving them the spotlight they deserve.
Whether you're slicing your first bundt cake for a family gathering, arranging a few pans on a shelf, or drilling that first hook into your wall for a full display, remember that there's no single right way to do any of this. I've shared what works for me, but your kitchen, your pans, and your style are all your own.
The best advice I can give you is to start small. Bake a cake and practice that vertical slicing technique. Display one pan on a shelf where you'll see it every day. Hang a single pan on the wall and see how it makes you feel. I'm willing to bet you'll love it.
And if you're anything like me, that one pan will become two, then four, then suddenly you're the person with a bundt pan collection and a blog article's worth of opinions about displaying them. Trust me, there are worse obsessions to have.
Now if you'll excuse me, I just saw a gorgeous vintage pan on an online marketplace, and I need to figure out where exactly it's going to fit on my wall.
Leave a Reply