I'll never forget the first time I confidently poured my angel food cake batter into a springform pan. I thought I was being clever—no more struggling to extract delicate cakes from regular pans, right? Wrong. So incredibly wrong. That experience taught me an expensive lesson about which cakes actually belong in a springform pan and which ones absolutely don't.
If you've ever stood in your kitchen, springform pan in hand, wondering whether your cake recipe will work in it, you're not alone. I've been there more times than I care to admit, and I've learned through trial (and plenty of error) which combinations are match made in heaven and which are destined for disaster.
The truth is, springform pans are amazing tools, but they're not universal cake solutions. That removable bottom and expandable side design that makes them so appealing also creates some serious limitations. Let me walk you through everything I've learned about baking different types of cakes in springform pans, so you can skip the mistakes I made.
Understanding Springform Pans: What Makes Them Different
Before we dive into specific cakes, let's talk about what actually makes a springform pan tick. I remember being fascinated when I first bought mine—that satisfying click when you lock the clasp, the way the sides expand perfectly to release your cake. It felt like magic.
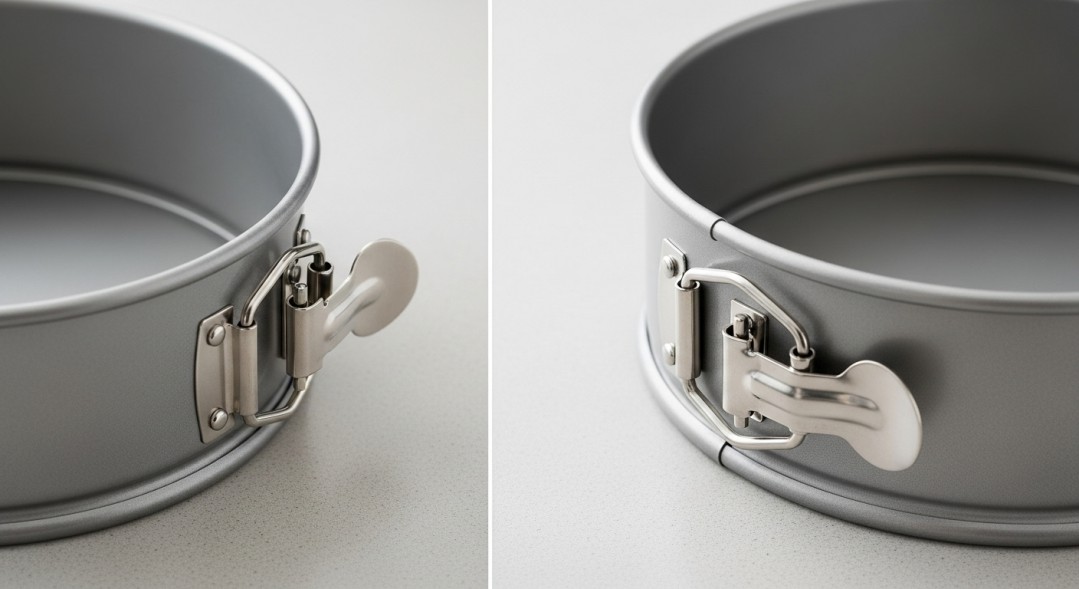
But here's what I quickly discovered: that same two-piece design that makes removal so easy also creates a fundamental weakness. The seam where the base meets the sides isn't completely sealed. With my regular cake pans, I never thought twice about this. But springform pans? They're basically begging thin batters to leak all over your oven.
The base sits in a groove in the expandable collar, held together by tension rather than a permanent seal. This design is brilliant for cheesecakes and certain dense cakes, but it's a nightmare for anything too liquidy. I learned this the hard way when I had to spend an hour scrubbing caramelized batter off the bottom of my oven.
The batter consistency is everything. Thick, dense batters stay put beautifully. Thin, pourable batters? They'll find every microscopic gap and escape. I've started doing a quick "water test" with new springform pans—fill it with water over the sink and see if any drips through. If water leaks, batter definitely will.
Quick Reference: Springform Pan Compatibility at a Glance
Over the years, I've mentally ranked every cake I've tried in my springform pan. Here's what my experience has taught me:
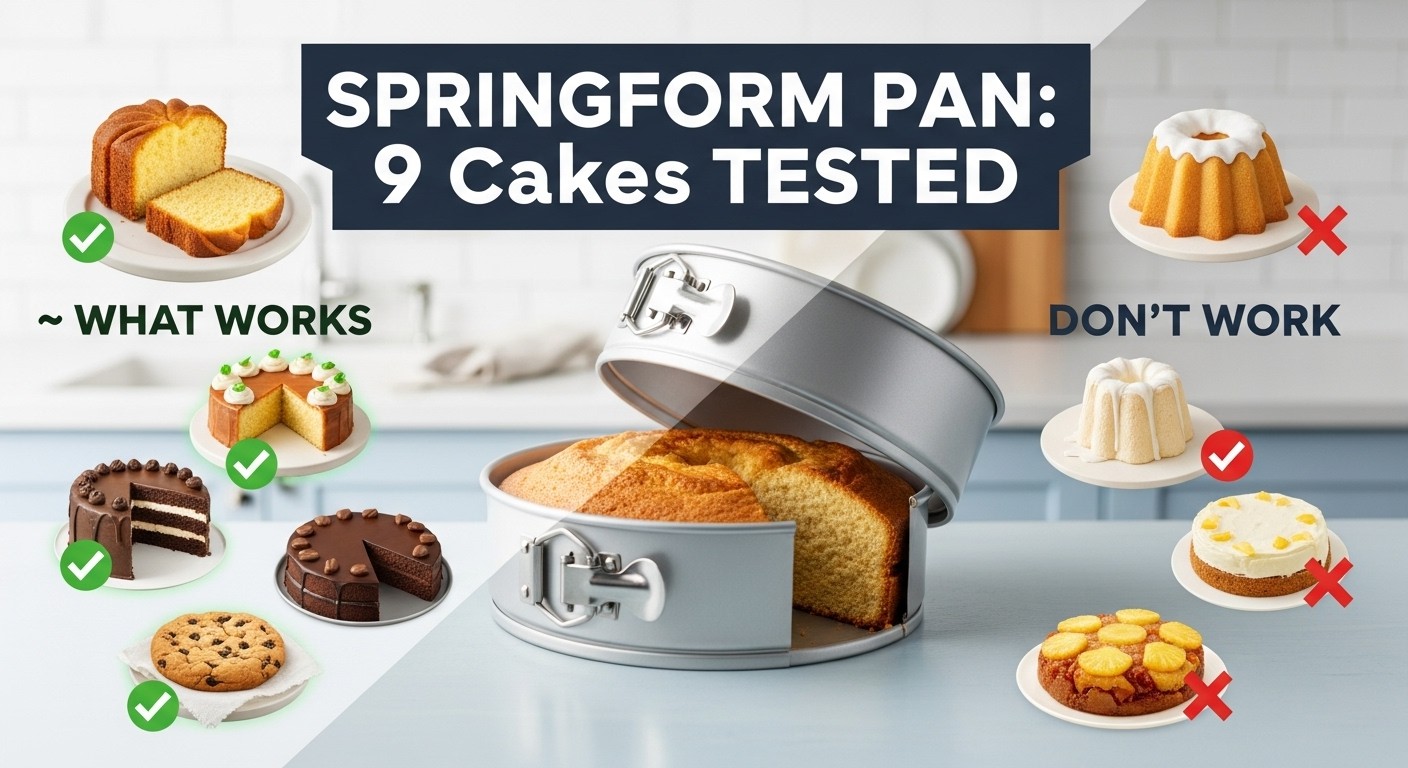
Works Beautifully: Pound cake, carrot cake, chocolate cake (most types), cookie cake, some sponge cakes
Avoid at All Costs: Angel food cake, chiffon cake, pineapple upside down cake
Possible But Questionable: Bundt cake recipes, very thin sponge cakes
Now let's get into the details, because the "why" behind each of these matters just as much as the verdict.
Angel Food Cake: The Biggest Springform Mistake You Can Make
Remember that disaster I mentioned at the beginning? Yeah, that was an angel food cake. I was so confident, too. I'd just bought a gorgeous 9-inch springform pan, and I thought, "Why wrestle with a tube pan when I have this beautiful option?"
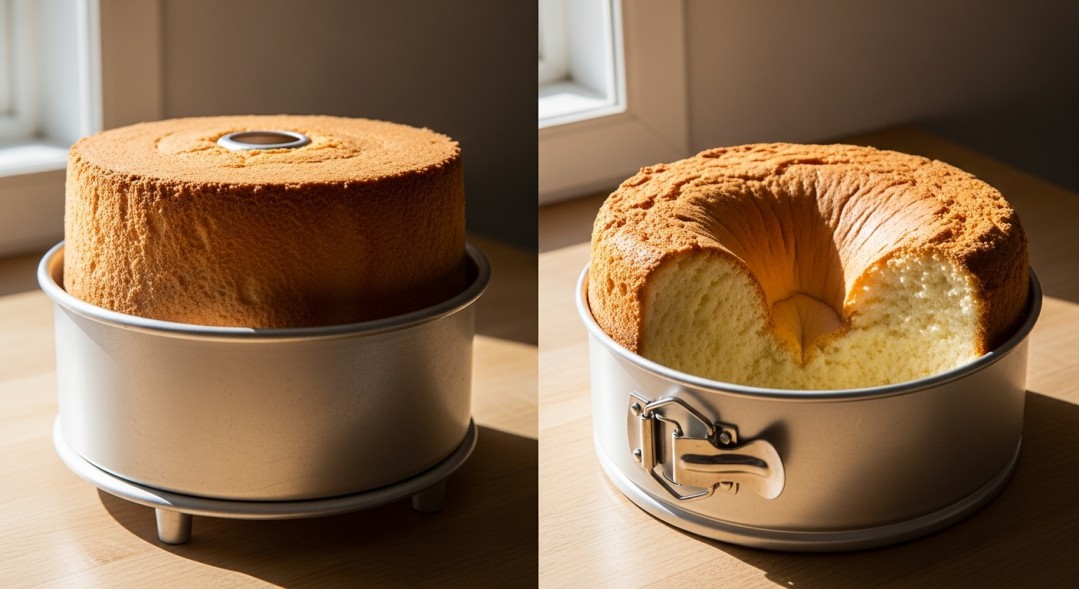
The answer became painfully clear about forty-five minutes into baking. Angel food cakes need to be inverted immediately after baking—you literally flip them upside down to cool. This prevents the delicate, airy structure from collapsing under its own weight. Try doing that with a springform pan. Go ahead, I'll wait.
The tube pan isn't just traditional—it's structural engineering. That center tube allows heat to reach the middle of the cake, ensuring even baking. It also gives the batter something to cling to as it rises. Angel food cake needs to climb up the sides and center tube, creating that characteristic height and texture.
Without that center support, my springform angel food cake rose initially, then collapsed into a dense, rubbery mess as it cooled right-side up. The texture was all wrong—more like a weird sponge than the cloud-like delicacy I was hoping for. I ended up throwing the whole thing away, which hurt both my pride and my grocery budget.
My advice? Don't even think about it. Angel food cakes belong in tube pans, period. If you don't have one, they're worth the investment if you love angel food cake. Trust me, I bought a proper tube pan the very next day.Chiffon Cake: Another Hard Pass
Chiffon cakes are angel food's slightly richer cousin, and unfortunately, they share the same dealbreaker requirements. I attempted a lemon chiffon cake in my springform pan after my angel food disaster, thinking the higher fat content might help. Spoiler alert: it didn't.
Chiffon cakes also need to cool upside down, and they also require that center tube for proper structure and heat distribution. The batter is light and airy, relying on beaten egg whites for its rise. Without the ability to cool inverted, you'll end up with a deflated, dense cake that bears no resemblance to the light, tender texture chiffon is known for.
I watched helplessly as my lemon chiffon cake sank in the middle, creating this weird crater effect. The edges were okay, but the center was practically pudding. The flavor was there, but the texture was completely wrong—heavy instead of fluffy, compact instead of tender.
Save yourself the frustration and the wasted ingredients. Chiffon cakes need tube pans just as much as angel food cakes do. No shortcuts, no substitutions.
Sponge Cake: Proceed with Caution
Now we're getting into more nuanced territory. Sponge cakes are tricky because "sponge cake" actually covers a wide range of recipes with varying textures and techniques. I've had both successes and failures here, so let me break down what I've learned.
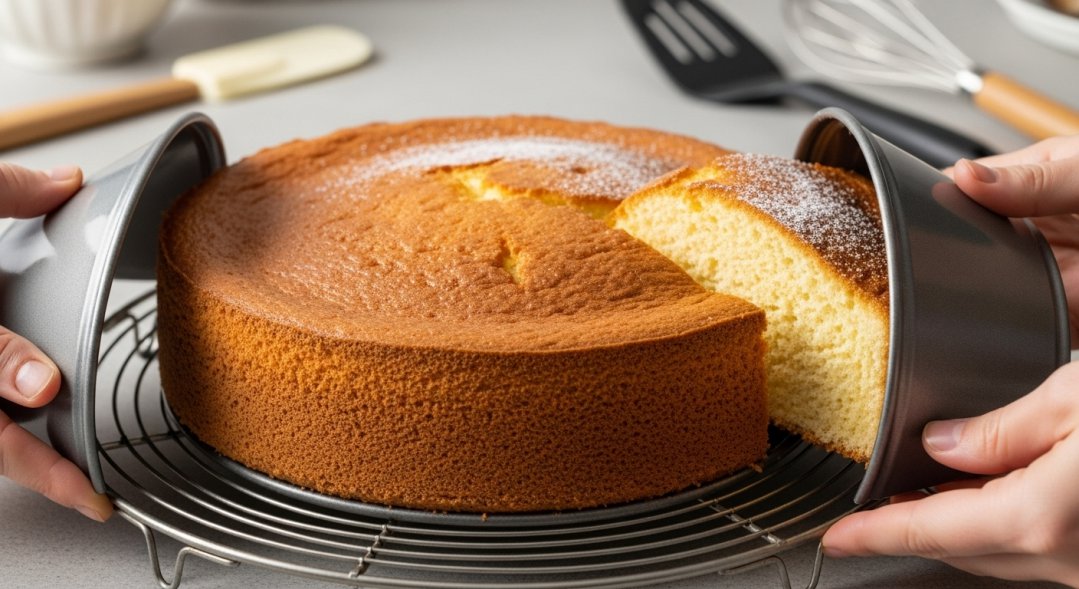
Traditional European sponge cakes—like a classic Victoria sponge—tend to have a thicker batter and don't require inverted cooling. These can actually work quite well in a springform pan. I made a lovely Victoria sponge for my daughter's birthday last year, and the springform pan made it incredibly easy to assemble the layers with jam and cream. The cake released perfectly, and I didn't lose any of the delicate edges.
However, lighter Asian-style sponge cakes or those made with mostly egg whites are a different story. I tried making a Japanese cotton cheesecake-style sponge in my springform pan (with a water bath, which was its own adventure), and while it worked, the cake was noticeably less fluffy than when I'd made it in a regular round pan.
The key is looking at your specific recipe. If the batter is relatively thick—similar to a standard cake batter—your springform should work fine. If it's very thin or the recipe specifically calls for inverted cooling, stick with a regular cake pan or tube pan.
My practical test: If I can make a figure-eight with the batter falling from the spoon, it's thick enough for the springform. If it pours like water, I'm choosing a different pan.Pound Cake: A Perfect Match
Finally, we get to talk about a success story! Pound cakes are absolutely wonderful in springform pans, and this is one combination I use regularly without any reservations.
The traditional pound cake formula—a pound each of butter, sugar, eggs, and flour—creates a dense, thick batter that isn't going anywhere. I've never had even a drop of leak from a pound cake in my springform pan. The batter is so thick that it just sits there happily while it bakes.
What I really love about using a springform pan for pound cake is how cleanly it releases. Pound cakes can be delicate on the edges despite their dense crumb, and I used to lose little chunks when turning them out of regular pans. With the springform, I just unclasp the sides, and the cake stands there perfectly intact. It's incredibly satisfying.
I also appreciate being able to see the sides of the cake as it bakes. With pound cakes, that golden-brown crust on the edges is important to me, and I can actually monitor it through the sides of the springform pan without opening the oven.
One tip I've learned: I still line the bottom with parchment paper, even though pound cake typically doesn't stick much. It makes sliding the cake off the base onto a serving plate much easier. I trace the base onto parchment, cut it out, and place it in before adding the batter.
Baking time consideration: I've noticed that pound cakes in springform pans sometimes need about 5-10 minutes longer than the recipe states for a regular pan. I think the metal conducts heat slightly differently. I always do the toothpick test regardless of timing.Bundt Cake: Why Would You, Though?
This is a weird one because technically, yes, you can bake a Bundt cake recipe in a springform pan. But I'm going to be honest—I don't really understand why you would want to.
I tried this once when my sister asked me to make her favorite Bundt cake recipe for a party, but she wanted it to be a layered cake instead of a Bundt shape. The springform pan worked fine from a technical standpoint. The batter was thick enough (most Bundt cakes are), it baked evenly, and it released cleanly.
But here's the thing: Bundt cakes are designed to be Bundt cakes. That beautiful shape isn't just aesthetic—the center tube helps with even baking, and the fluted edges add surface area that creates those delicious crispy bits. Taking a Bundt cake recipe and baking it in a springform pan is like... well, it's like buying a sports car and only driving it in school zones. You're missing the point.
The only scenario where this makes sense to me is if you genuinely don't have a Bundt pan and you really need to make that specific recipe. Or if you're testing a new recipe and want to see how it bakes before committing to the whole Bundt production. Otherwise, save the Bundt recipes for Bundt pans.
If you do go this route, be prepared to adjust your baking time. Without that center tube, the middle will take longer to bake through. I'd check it at least 10-15 minutes earlier than the recipe states, then keep checking every 5 minutes until it's done.
Carrot Cake: An Absolute Winner
Carrot cake in a springform pan is one of those combinations that just makes sense on every level. I actually prefer making carrot cake in my springform pan now, and I'll tell you exactly why.
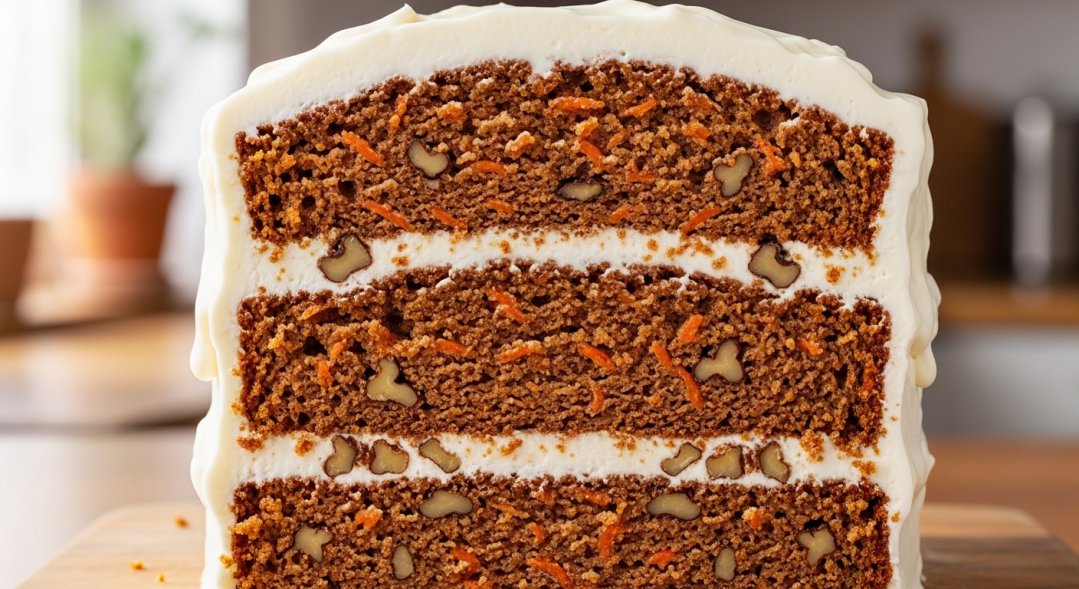
First, the practical stuff: carrot cake batter is beautifully thick and dense. All those grated carrots, nuts, and often pineapple or raisins create a batter that absolutely will not leak. I've never once had an issue with seepage, even without wrapping the pan in foil.
But the real magic happens when you're assembling layers. Carrot cake traditionally comes with cream cheese frosting, and let me tell you, trying to frost a delicate, moist cake that you've just wrestled out of a regular pan is stressful. The cake is so moist that it's fragile, and I've broken more than one layer trying to move it.
With a springform pan, I bake two layers in separate pans (I own two springforms now, specifically for this reason). When they're cool, I just pop the sides off and the cakes are sitting there, perfect and level, ready to be stacked and frosted. No flipping, no hoping they don't break, no stress.
I also love that I can spread the cream cheese frosting right to the edge without worrying about the cake breaking apart. The structural integrity is just better when the cake hasn't been manhandled out of a traditional pan.
Pro tip from my kitchen: If you're making a tall, multi-layer carrot cake, you can actually assemble it on the springform base, frost the whole thing, and then slide the entire cake onto your serving plate. The parchment paper on the bottom makes this possible. It's been a game-changer for fancy occasions.Pineapple Upside Down Cake: Don't Do It
I'm going to save you from a mistake that created one of the biggest messes in my baking history. Pineapple upside down cake in a springform pan sounds like it should work, right? Dense batter, easy release for flipping—what could go wrong?
Everything. Everything can go wrong.
The problem isn't the cake batter itself. It's all that caramelized brown sugar and butter mixture at the bottom (which becomes the top) and the pineapple juice. Even though I carefully wrapped my springform pan in two layers of heavy-duty aluminum foil, that sugary liquid found its way out.
I opened my oven door to check on the cake, and I was greeted by the smell of burning sugar. The bottom of my oven had a pool of caramelized sugar mixture that had dripped through the seam, despite my foil fortress. It burned, it smoked, and it took forever to clean. The cake itself baked fine, but the whole experience was absolutely not worth it.
Even if you avoid the leakage issue, there's another problem: flipping the cake. The whole point of pineapple upside down cake is that beautiful, caramelized top. But getting a cake out of a springform pan requires removing the sides first. How exactly are you supposed to flip it? You'd need to remove the sides, place a plate on top, flip everything, and then remove the base. It's awkward and risky.
My strong recommendation: Use a cast iron skillet or a regular cake pan. Both are designed to handle the liquid and the flipping. Cast iron is my personal favorite because you can make the caramel right in the pan on the stovetop, and it creates the most amazing caramelization. Save your springform pan for cakes that appreciate what it does best.
Cookie Cake: A Match Made in Heaven
Here's a delightful surprise I discovered completely by accident. I was making a giant chocolate chip cookie cake for my son's birthday, and I grabbed my springform pan without really thinking about it. It turned out to be absolutely perfect.
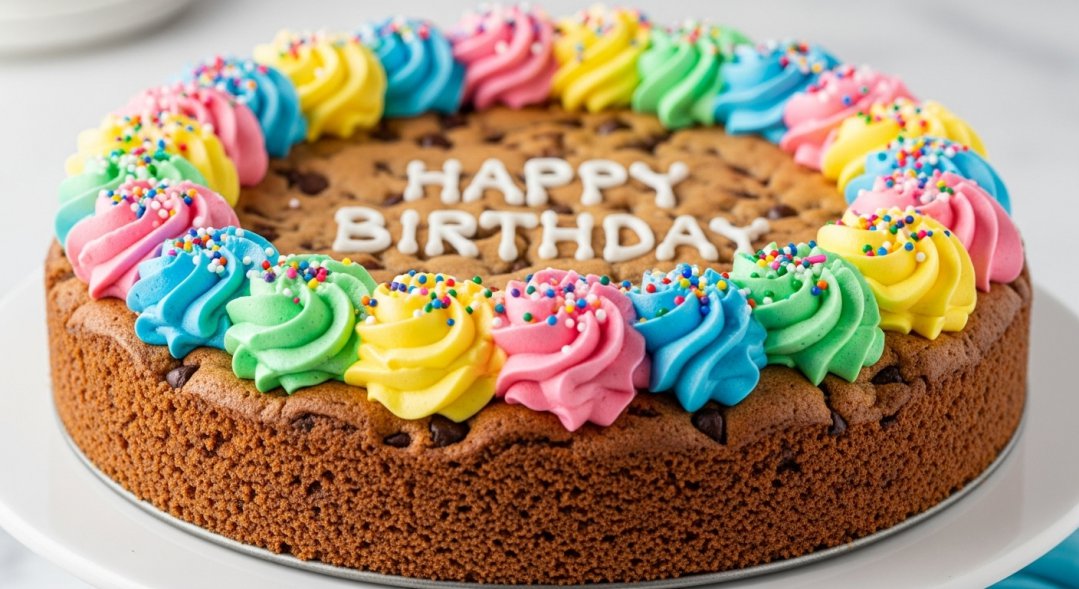
Cookie dough is thick—sometimes almost too thick to spread in a regular pan. But that thickness means zero leakage issues in a springform pan. I pressed the dough into my greased springform pan, baked it according to the recipe, and when it was cool, I just unclasped the sides. The cookie cake stood there in all its glory, edges intact, ready to be decorated.
What I really love about this method is how easy it makes decorating and serving. With a regular cake pan, you either have to flip the cookie cake out (risky with something that fragile) or try to frost and decorate it while it's still in the pan (awkward). The springform pan solves both problems.
I frost my cookie cakes right on the springform base. The edges are exposed and perfectly smooth, making it easy to spread frosting or pipe decorations all around. When it's time to serve, I just slide the whole thing onto a serving board or cake stand. If I'm taking it somewhere, I can even put the springform sides back on for transport and remove them at the party.
Baker's bonus: The springform pan creates a slightly thicker edge that bakes a bit more than the center, giving you that perfect combination of crispy edges and soft center that makes cookie cakes so irresistible.Chocolate Cake: Generally Great, with Some Caveats
Chocolate cake and springform pans are generally best friends, but I've learned there are some important exceptions to be aware of. The success really depends on what type of chocolate cake you're making.
Standard chocolate layer cakes—like a classic devil's food cake or a basic chocolate birthday cake—work beautifully in springform pans. The batter is usually thick enough to prevent leaks, and the release is so clean that you preserve every bit of that tender crumb. I make chocolate cake in my springform pans all the time, especially when I'm making a layered cake with filling.
I particularly love using springform pans for flourless chocolate cakes and chocolate tortes. These are often baked in water baths (wrapped in foil to prevent water from seeping in), and the springform pan makes unmolding these delicate cakes so much easier than trying to get them out of a regular pan.
However, I learned to check my batter consistency before committing. I once made a chocolate cake recipe that called for coffee in the batter, and the resulting mixture was quite thin—much more liquid than I expected. I should have wrapped the pan in foil, but I didn't think of it until I saw the first drip on my oven floor.
Now I have a rule: if the batter pours easily and looks thin, I wrap the pan in heavy-duty foil, even if I don't think it will leak. It's a simple precaution that takes thirty seconds and has saved me from multiple cleaning disasters.
Steer clear of: Molten chocolate cakes or lava cakes in springform pans. These have intentionally liquid centers and are asking for trouble. Use ramekins or small cake pans instead.
The best chocolate cakes for springform pans are those dense, fudgy ones—they release like a dream and look professional when you remove the sides. For fancy dinner parties, I make a chocolate espresso cake in my springform pan, and it always looks like I bought it from a bakery.
Pro Tips for Springform Pan Success
After years of springform pan adventures, I've developed a system that works reliably. These are the lessons I wish someone had told me before I started experimenting.
Always test for leaks before you commit. This is especially important with newer or cheaper springform pans. Fill your pan with water and let it sit over the sink for a few minutes. Any leaks will show up immediately. I've caught several potential disasters this way.
Prep your pan like you mean it. I grease the sides and bottom thoroughly, then line the bottom with parchment paper. For extra insurance with sticky cakes, I also flour the sides after greasing. Yes, it's more work than a quick spray, but I've learned that thorough prep is the difference between a cake that releases perfectly and one that loses chunks when you unclasp the sides.
I trace the bottom of the pan onto parchment paper, cut it out, and press it into the greased base. Then I grease the top of the parchment too. It sounds fussy, but it literally takes two minutes and guarantees success.
Temperature matters more than you think. I used to remove cakes from springform pans while they were still warm, thinking the sides would release more easily. Wrong. Now I let them cool completely—and I mean completely—before I touch the clasp. Warm cakes are structurally weaker and more likely to crack or crumble.
For some cakes, especially cheesecake-style desserts or anything very moist, I actually refrigerate them in the pan for at least an hour before releasing. The cold firms everything up and makes for cleaner release.
The foil wrap technique is your friend. For any batter that seems even slightly thin, I wrap the entire outside of the springform pan in heavy-duty aluminum foil. I use a large piece, set the pan in the center, and bring the foil up around the sides, crimping it tightly. This creates a barrier against leaks without affecting how the cake bakes.
Some bakers double-wrap for extra protection, especially for water baths. I've found that one layer of heavy-duty foil is usually sufficient, but if I'm making something expensive with lots of ingredients, I'll double up for peace of mind.
Release technique matters. When it's time to remove the sides, I run a thin knife or offset spatula around the edge first, even if I've greased well. This breaks any seal that might have formed and ensures the cake won't stick or tear. Then I unclasp slowly—not all at once, but gradually, working my way around the circle. I've found this prevents the sides from suddenly pulling away and taking cake chunks with them.
Keep it on the base for storage. One of the best things about springform pans is that you can serve and store cakes right on the base. I slide the base onto a cake stand or serving plate, but I leave the cake on it for refrigerator storage. It's stable, it protects the bottom of the cake, and it makes serving so much easier.When NOT to Use a Springform Pan
Let me be really clear about the situations where a springform pan just isn't the right tool, because I've ignored these warnings before and regretted it every time.
Avoid for any cake that needs inverted cooling. We covered angel food and chiffon cakes, but this applies to some sponge cakes and specific recipes that call for flipping the pan upside down. The springform design makes this impossible without creating a massive mess.
Skip it for high-liquid recipes. If your recipe includes thin custards, a lot of fruit juice, or wet toppings that will pool at the bottom, think twice. Yes, you can wrap the pan in foil, but at a certain point, you're working against the tool rather than with it. Pineapple upside down cake is my prime example here.
Wrong choice for very delicate batters. Some French sponge cakes and Japanese-style cakes are so delicate that even the slight seam from the springform base can leave a mark or create unevenness. For these technical bakes, a seamless regular pan is better.
Not for high-heat baking. Some springform pans have plastic or silicone components in the clasp mechanism that can't handle temperatures above 400°F. I've melted more than one cheap springform pan by not paying attention to this. If your recipe calls for high heat, check your pan's temperature rating first.
I keep both springform pans and regular cake pans in my kitchen because they serve different purposes. My rule of thumb is simple: if the recipe has a thick batter, doesn't require flipping, and would benefit from easy release, the springform pan is probably a good choice. If any of those conditions aren't met, I reach for a traditional pan.
My Final Thoughts from Years of Trial and Error
Looking back at all my springform pan adventures—the successes, the disasters, and everything in between—I can honestly say this is one of my most-used kitchen tools. But it took time to learn what works and what doesn't.
The cakes that shine in springform pans are those with thick batters and delicate structures: pound cakes, carrot cakes, most chocolate cakes, cookie cakes, and some sponge cakes. These are the recipes where the easy release really matters and where the springform design solves real problems.
The cakes that absolutely don't work are those requiring special cooling methods or those with very thin, liquid batters: angel food, chiffon, and pineapple upside down cakes. No amount of wishful thinking or creative problem-solving will make these combinations successful. I've tried, and I've learned to accept defeat gracefully.
My advice to anyone just starting with springform pans is to begin with the easy wins. Make a pound cake or a carrot cake first—something with thick batter where success is almost guaranteed. Build your confidence and get familiar with how the pan releases and how it bakes in your specific oven.
Then, as you get comfortable, you can start experimenting with more borderline recipes. But always, always check your batter consistency before committing, and never be too proud to wrap that pan in foil if you have even the slightest doubt.
The springform pan isn't a universal solution for every cake, but for the right cakes, it's absolutely invaluable. I wouldn't give up mine for anything—yes, even after the pineapple upside down disaster. You just have to know when to use it and when to reach for a different tool.
What cakes have you tried in your springform pan? I'd love to hear about your successes and failures in the comments. We're all learning together, and sometimes the best lessons come from shared disasters. Happy baking!
Leave a Reply