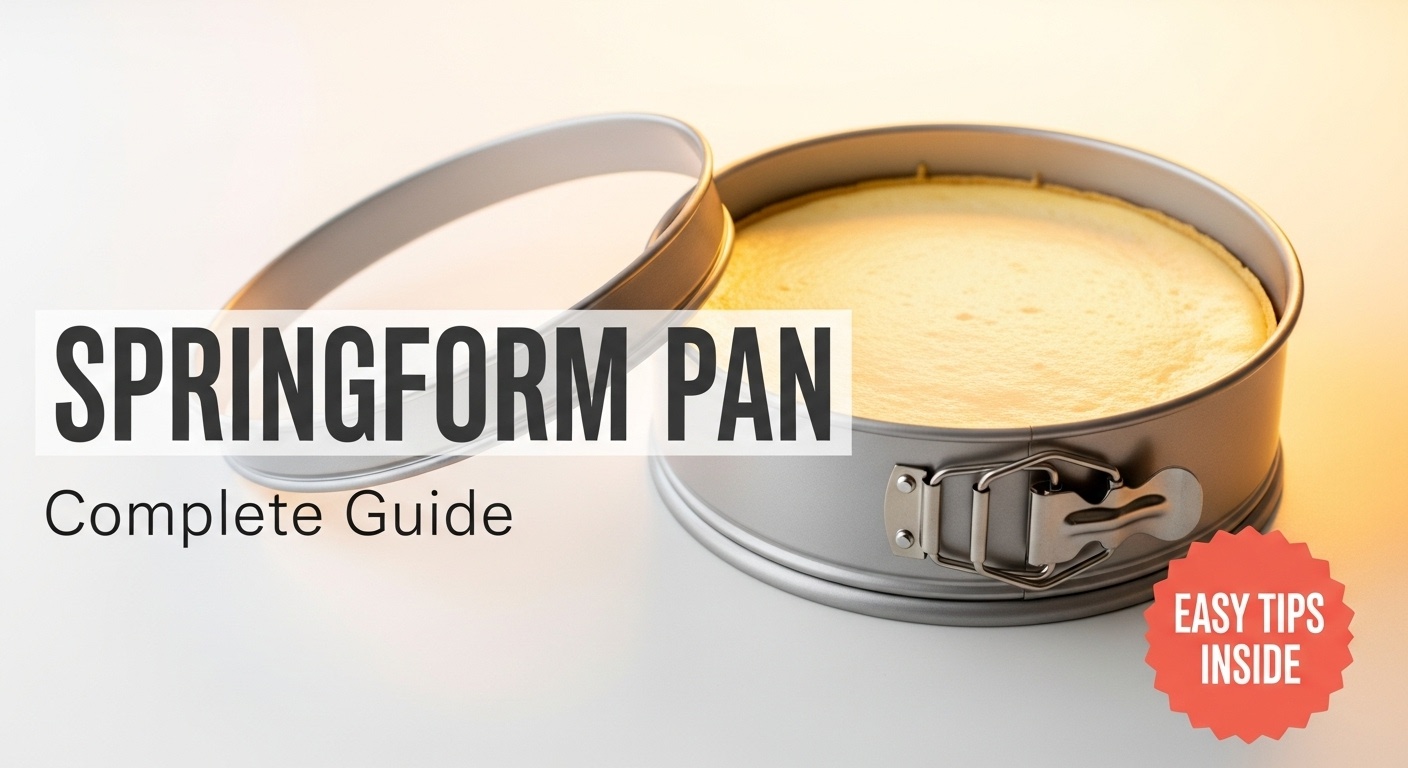
I'll never forget the first time I tried to remove a cheesecake from a regular cake pan. Let's just say it involved a lot of spatula work, some creative language, and a dessert that looked like it had survived a small earthquake. My mother-in-law took one look at the crumbled mess on the serving plate and gently suggested I might want to invest in a springform pan. Best $15 I ever spent.
If you've ever wondered whether you really need this particular piece of bakeware taking up space in your kitchen, you're in the right place. After years of using mine for everything from classic New York cheesecakes to savory quiches, I'm here to walk you through everything you need to know about springform pans—what they are, how they work, and why they might just become your new favorite baking tool.
What Is a Springform Cake Pan?
A springform cake pan is essentially a baking pan that comes apart. Unlike traditional cake pans that are one solid piece, a springform pan has two separate components: a flat base and a removable ring that forms the sides. The magic happens with a latch or clasp on the side of the ring that you can open and close.
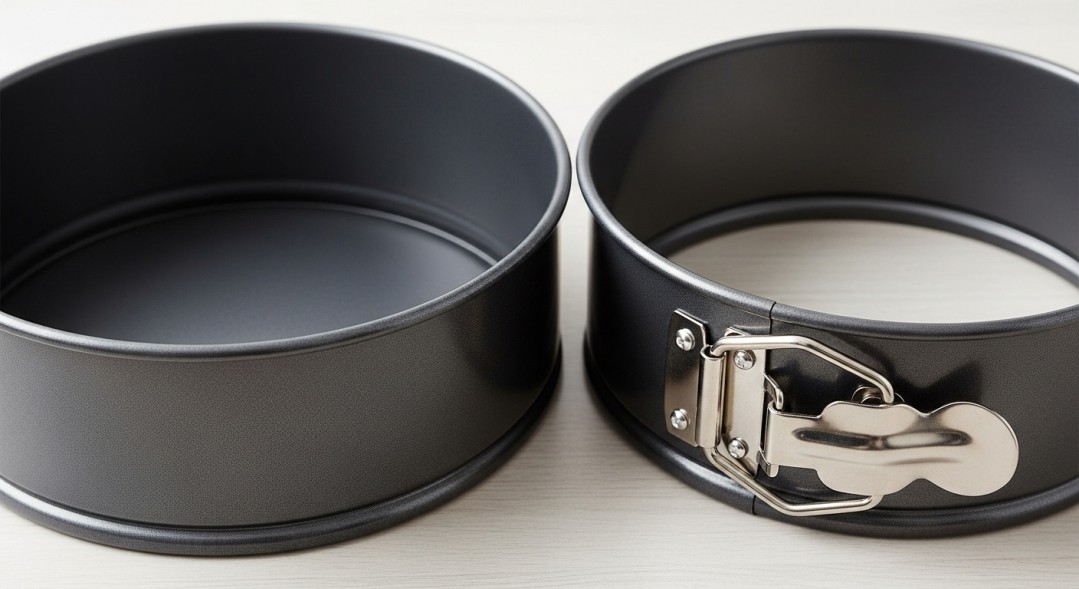
When the latch is closed, it tightens the ring around the base, creating a secure seal. When you're ready to serve your creation, you simply open the clasp, and the sides spring away—hence the name. The bottom stays put with your cake on top, giving you a clean, professional presentation without any of the usual pan-removal gymnastics.
These pans typically come in sizes ranging from 4 inches (perfect for individual desserts) up to 12 inches, though the 9-inch version is the standard size you'll find in most recipes. Most are made from aluminum or have a non-stick coating, and some newer models even feature silicone rings instead of metal. I've tried both, and honestly, the traditional metal ones still work best for me—they feel sturdier and create a better seal.
How Do Springform Cake Pans Work?
The engineering behind a springform pan is surprisingly simple, which is part of what makes it so reliable. The ring has two ends that overlap slightly, and when you close the latch, it forces these ends together, tightening the entire ring around the base. Think of it like a belt—when you buckle it tighter, the whole thing contracts.
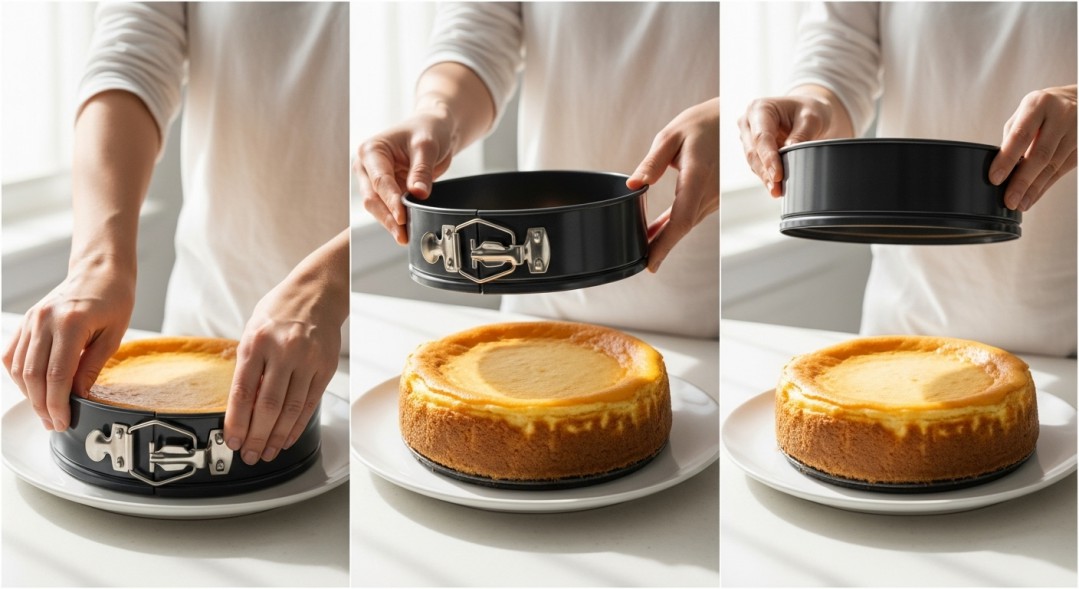
The latch mechanism itself usually works on a simple hinge principle. When you flip it from open to closed, it pulls a small piece of metal that draws the ring ends closer together. The pressure this creates is what keeps the ring firmly attached to the base while you're baking.
When your cake or cheesecake is done and properly cooled (patience is key here—I learned this the hard way), you simply reverse the process. Flip open the latch, and you'll feel the ring loosen. Gently lift the ring straight up, and it slides right off, leaving your dessert sitting pretty on the base.
The removable bottom is what really sets this pan apart from others. Instead of trying to flip your delicate creation upside down or pry it out with a spatula, the cake stays exactly where it is. You can serve it directly on the base, or if you want to get fancy, slide a large spatula or cake lifter underneath and transfer it to a serving plate. I usually just leave mine on the base—fewer dishes to wash, and it's perfectly presentable.
One thing I've noticed over years of use: the seal isn't completely watertight, which is why recipes that involve water baths always tell you to wrap the bottom in foil. More on that later.
What Are Springform Cake Pans Used For?
Let's start with the obvious: cheesecake. This is what springform pans were basically born to do. Cheesecakes are notoriously delicate and prone to cracking, and trying to flip one out of a traditional pan is asking for disaster. The springform's gentle release means your cheesecake stays intact with smooth, professional-looking sides. I've made dozens of cheesecakes in mine—from classic New York style to chocolate marble to seasonal pumpkin—and I honestly can't imagine attempting any of them in a regular pan.
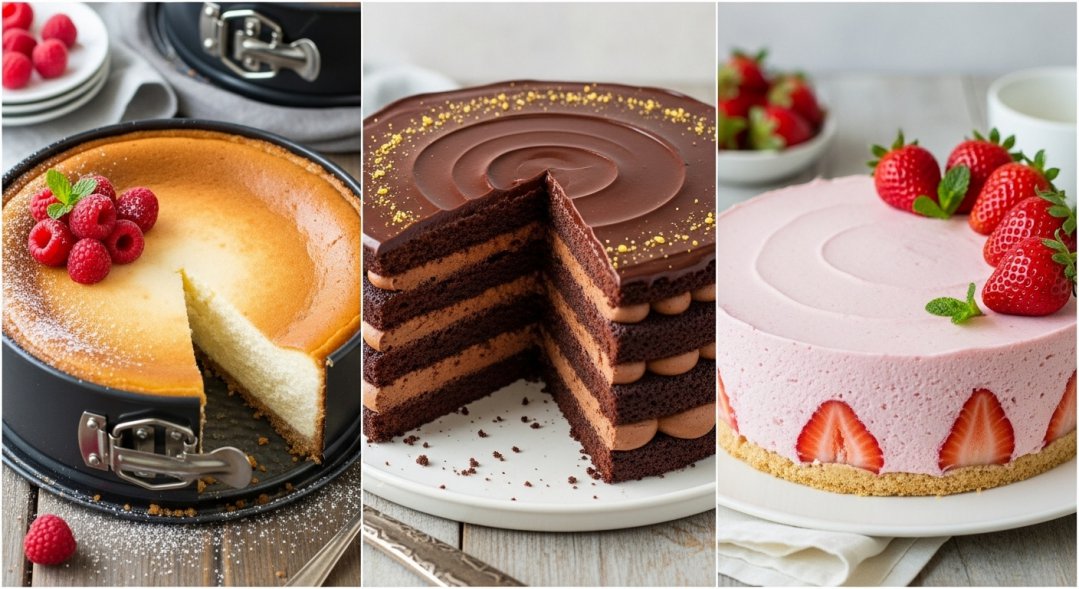
But here's where it gets interesting: springform pans are useful for way more than just cheesecake. I use mine for tortes, especially those European-style layered affairs with delicate cake layers, mousse, and ganache. The last thing you want when you've spent an hour assembling a twelve-layer dobos torte is to have it fall apart during unmolding.
No-bake desserts are another perfect use case. Icebox cakes, mousse cakes, and those trendy no-bake Oreo cheesecakes all benefit from the easy release. I made a layered tiramisu in mine last summer, and being able to remove the sides without disturbing all those delicate ladyfinger layers was a game-changer.
Then there are the savory applications that most people don't think about. Deep-dish quiches? Perfect. I've made spinach and feta quiches for brunch that were at least three inches tall and sliced beautifully thanks to the clean release. Savory cheesecakes (yes, they're a thing—think goat cheese with herbs) work wonderfully. I've even used mine for deep-dish pizza when I'm feeling ambitious.
A friend of mine uses hers for layered appetizers—things like seven-layer dips or molded salads that need to hold their shape. Pack your layers in, chill it, remove the ring, and you've got an impressive presentation for potlucks.
Why Use a Springform Cake Pan?
The most obvious benefit is damage prevention. I can't count how many cakes I ruined in my pre-springform days trying to coax them out of regular pans. Even with proper greasing and parchment paper, delicate cakes can stick, crack, or crumble. With a springform, you're not fighting gravity or trying to flip something that was never meant to be inverted.
The edges you get with a springform are remarkably clean. When you lift that ring away, you're left with smooth, even sides that look bakery-quality. No bumps, no tears, no awkward patches where you tried to cover up damage with extra frosting. This matters more than you might think—presentation isn't just about showing off (though that's fun too), it's about taking pride in something you've made.
There's also a psychological element I didn't expect. Using a springform pan eliminates so much of the anxiety around that critical unmolding moment. You're not holding your breath and saying a little prayer as you flip the pan. You're not standing there with a spatula wondering if this is going to work. You just open the latch, lift, and you're done. For newer bakers who are still building confidence, this peace of mind is huge.
I've also found that springform pans actually encourage me to try more ambitious recipes. When I know I have a reliable tool that's going to make my life easier, I'm more willing to attempt that complicated Austrian chocolate torte or that three-layer mousse cake. The pan removes one major variable from the "what could go wrong" equation.
Choosing and Using Your Springform Pan
Selecting the Right Pan
Not all springform pans are created equal, and I learned this lesson after buying a cheap one from a discount store that leaked like a sieve and warped in the oven. When you're shopping, pay attention to the clasp mechanism. It should feel sturdy and substantial, not flimsy. Open and close it a few times—it should move smoothly but with some resistance. If it feels loose or wobbly, keep looking.
The seal between the base and the ring matters too. When the pan is closed, run your finger along the inside where these two pieces meet. You shouldn't feel a significant gap. Some high-quality pans have a slight lip on the base that helps create a better seal. This won't make the pan completely leak-proof, but it helps.
For size, start with a 9-inch pan if you're only going to own one. It's the standard size for most recipes, and it's versatile enough to handle everything from cheesecakes to quiches. I eventually added a 7-inch to my collection for smaller desserts and a 10-inch for when I'm feeding a crowd, but the 9-inch does most of the heavy lifting.
As for non-stick coating, I'm somewhat ambivalent. My first pan had a non-stick surface, and it definitely made cleanup easier, but over time the coating started to chip. My current pan is plain aluminum, and I've had no problems with sticking as long as I grease it properly. The choice really comes down to personal preference.
Best Practices
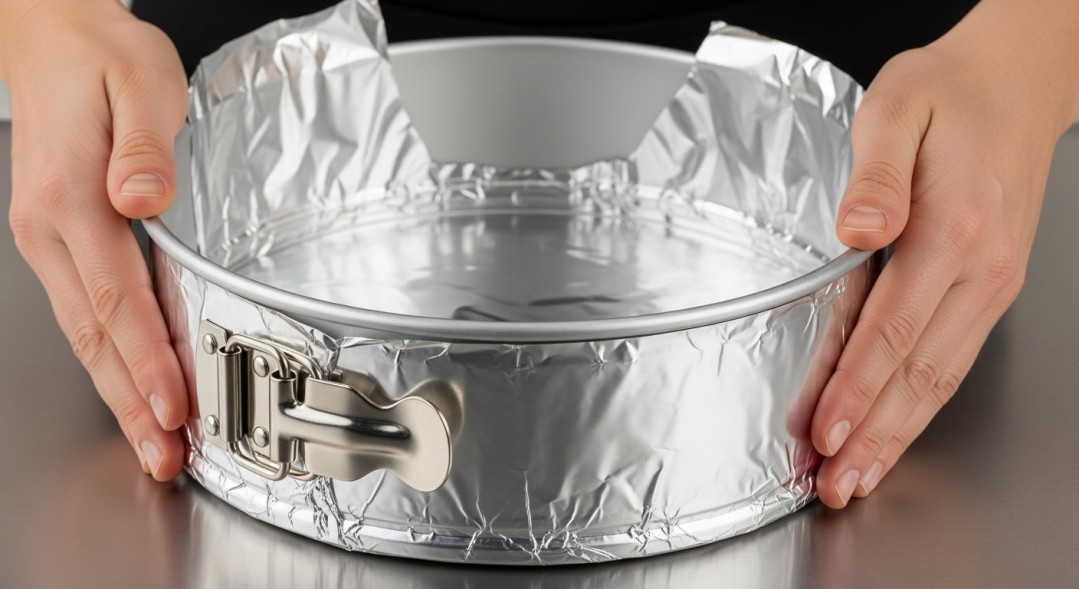
Here's something they don't always tell you: springform pans and water baths require extra preparation. Because that seal between the base and ring isn't watertight, water will seep in if you're not careful. I learned this the soggy way. Now, whenever I'm making a cheesecake that needs a water bath, I wrap the entire bottom of the pan in two layers of heavy-duty aluminum foil, making sure it comes up the sides at least halfway. Some people swear by placing the wrapped springform inside a slightly larger pan as double insurance. It sounds fussy, but five minutes of wrapping beats a waterlogged crust every single time.
Greasing is crucial, even with non-stick pans. I use a light coating of butter or cooking spray on the bottom and sides, then line the bottom with a circle of parchment paper. This might seem like overkill, but it provides an extra insurance policy for easy release. For cheesecakes, I skip the parchment on the sides because I actually want the batter to cling a bit as it rises—it helps prevent cracking.
The hardest lesson I had to learn was patience. You absolutely must let whatever you've baked cool completely before you even think about opening that latch. Hot cakes are structurally unstable—they need time to set up. I've rushed this process exactly twice, and both times resulted in desserts that slumped or cracked the moment I released the ring. Now I bake in the evening and don't unmold until the next morning. For cheesecakes, they need at least four hours of cooling time, preferably overnight in the refrigerator.
When you're finally ready to release the ring, run a thin knife or offset spatula around the edge first. Even with proper greasing, there might be spots where the cake has adhered slightly. This gentle loosening step takes ten seconds and prevents tears or pulls when you lift the ring away.
For storage, I keep my springform pan assembled with a paper towel between the base and ring. This prevents scratches and keeps everything together so I'm not hunting for the base when I need it. Some people store theirs taken apart, which is fine too—just make sure you're not stacking heavy things on top that could warp the ring.
Common Mistakes to Avoid
The most common mistake I see (and absolutely made myself) is opening the clasp too soon. I know it's tempting when you've just pulled a beautiful cheesecake from the oven and you want to see the final result, but resist that urge. Warm desserts are fragile, and releasing them early can cause cracks, slumping, or complete structural failure. I now have a post-it note stuck to my refrigerator that says "PATIENCE" just to remind myself.
Skipping the greasing step is another recipe for heartbreak. Even if your pan claims to be non-stick, even if you've used it successfully before without greasing, don't get cocky. It only takes one stuck cake to remind you why this step exists. I'm speaking from experience here—I got lazy one time making a chocolate torte, figured the batter was buttery enough, and ended up with half the cake adhering to the sides when I lifted the ring. Not my finest moment.
Using a damaged or warped pan will sabotage you before you even start. If you drop your springform pan and the base gets dented, or if the ring gets bent out of shape, the seal won't work properly anymore. I held onto a warped pan for way too long, trying to make it work by adjusting the latch or being extra careful, but it kept leaking and causing problems. Sometimes you just need to accept that a pan has reached the end of its useful life and invest in a replacement.
Overfilling is a sneaky mistake because it doesn't seem like a problem until it is. Most recipes will tell you to fill the pan no more than two-thirds full, and there's a good reason for that. I once ignored this guidance while making a ricotta cheesecake, and the batter puffed up in the oven, oozed over the sides, and made an absolutely spectacular mess in my oven. Not only did I have a cleanup nightmare, but the cheesecake itself didn't bake evenly and ended up with a weird texture. Lesson learned: respect the fill line.
Final Thoughts
After years of regular use, my springform pan has become one of those tools I genuinely appreciate every time I pull it out. It's not flashy, it doesn't have any bells and whistles, and it does exactly one thing—but it does that thing really, really well.
The beauty of a springform pan lies in its simplicity and reliability. It takes what used to be the most stressful part of baking—getting the finished product out of the pan intact—and turns it into the easiest step of the entire process. Whether you're a nervous beginner making your first cheesecake or an experienced baker tackling ambitious multi-layer creations, a springform pan removes that moment of "oh please don't fall apart" anxiety.
I honestly wish I'd discovered this tool years earlier. Think of all the cakes I could have saved, all the desserts that would have looked presentable instead of like they'd been through a disaster. But that's the thing about cooking and baking—we're always learning, always discovering tools and techniques that make our lives easier.
If you've been on the fence about whether you need a springform pan, I'd say this: if you've ever baked something delicate and worried about getting it out of the pan, you need one. If you've ever wanted to make cheesecake but felt intimidated by the process, you need one. If you enjoy baking and want a tool that will expand what you feel confident attempting, you definitely need one.
So go ahead, pick one up, and give that cheesecake recipe you've been eyeing a try. Take it slow, follow the tips I've shared, and enjoy that satisfying moment when you flip the latch and lift away the ring to reveal your perfect creation. Trust me, it never gets old.
Leave a Reply