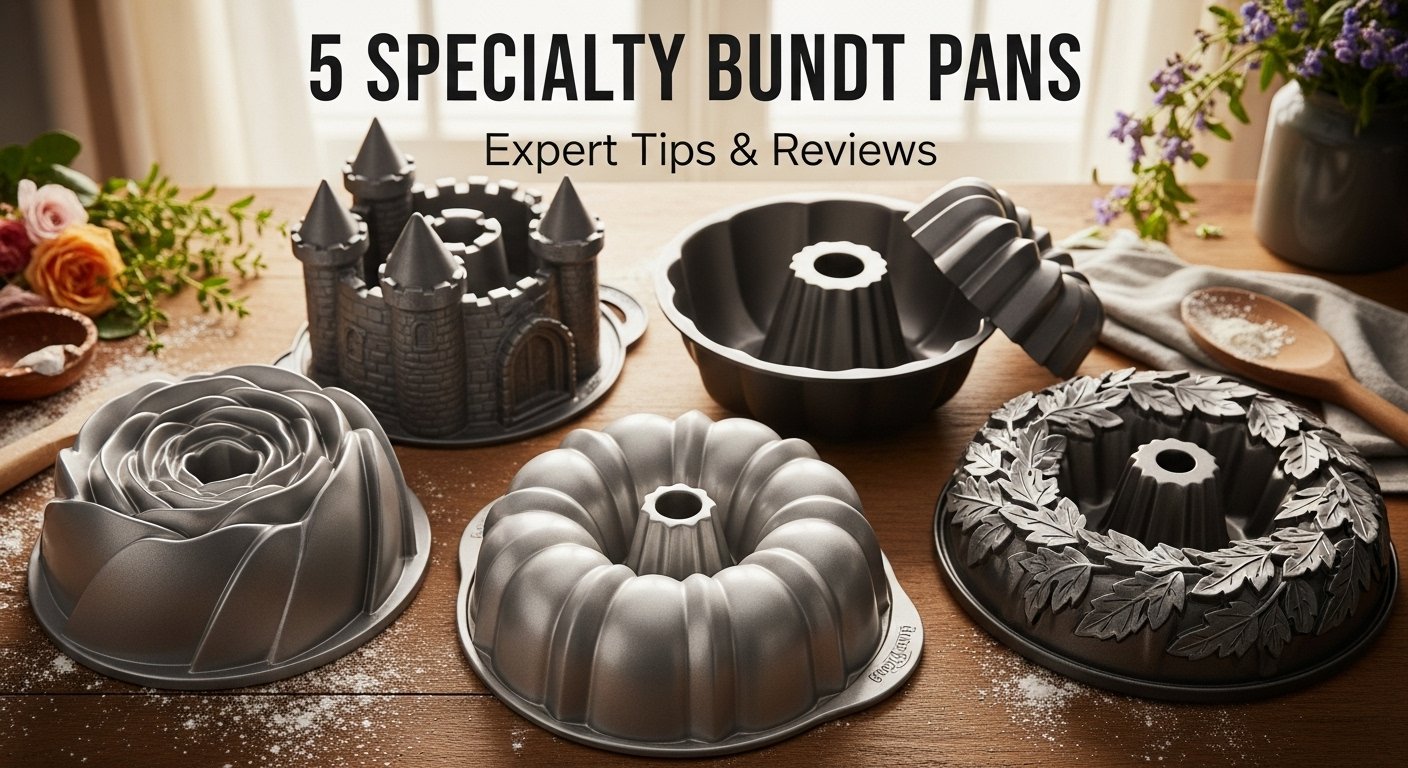
There's something magical about pulling a bundt cake out of the oven. That moment when you flip the pan over, hold your breath, and watch as an intricately designed cake emerges is pure baking joy. I still remember the first time I used a specialty bundt pan—it was a rose design, and I was terrified I'd end up with a sticky mess. But when that gorgeous cake released perfectly, with every petal intact, I was hooked.
If you've been baking with the same old round cake pans, let me tell you: specialty bundt pans will completely change your game. They turn ordinary cake recipes into conversation-starting centerpieces without requiring any fancy decorating skills. And trust me, after years of collecting these pans and testing them in my own kitchen, I've learned which ones are truly worth your money and counter space.
Today, I'm walking you through five specialty bundt pan styles that have earned permanent spots in my baking cabinet. Whether you're a nervous beginner or a confident baker looking to expand your collection, you'll find exactly what you need to know about each one
Two Piece Bundt Pan: The Baker's Best Friend
What Makes It Special
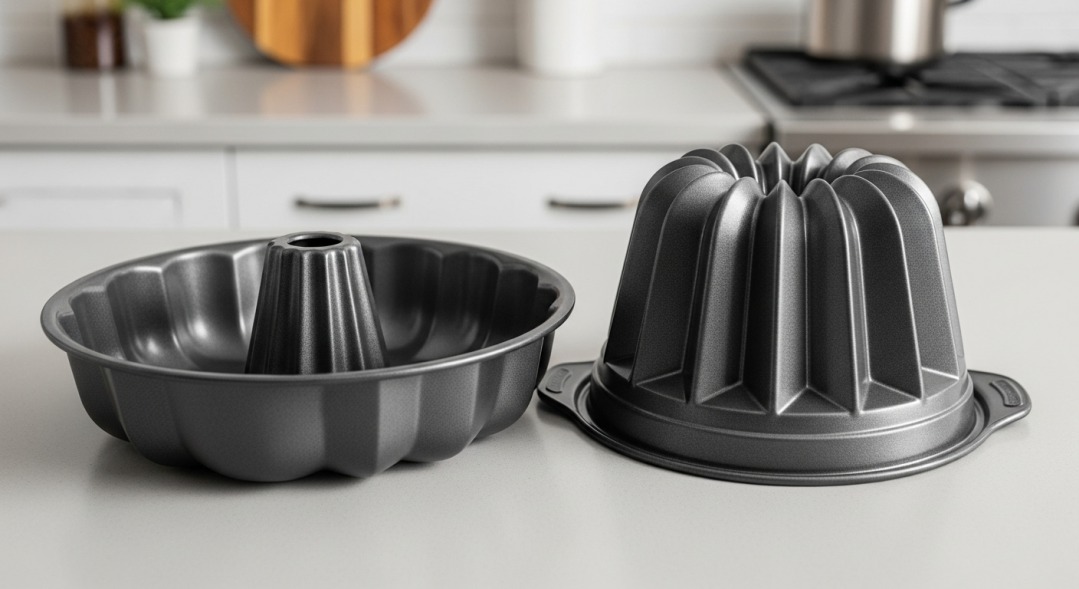
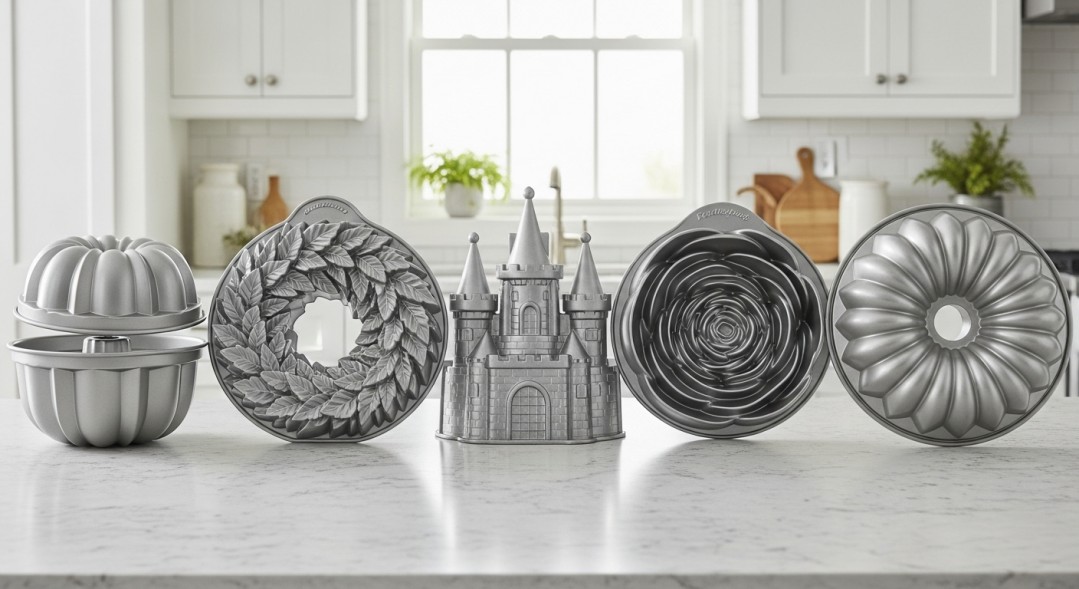
Let me start with the pan that literally changed my relationship with bundt baking: the two-piece bundt pan. Unlike traditional one-piece pans where you're stuck crossing your fingers and hoping your cake releases cleanly, these genius designs split into two parts—a base and a removable center tube.
The first time I used one, I felt like I was cheating. It was almost too easy. The bottom and sides separate completely, which means you can literally lift the tube out and watch your cake stay perfectly intact on the base. No more digging out stuck corners with a butter knife or crying over a cake that broke into three pieces.
Why I Reach for It Again and Again
Here's the honest truth: I was skeptical about needing yet another bundt pan. But after my sister gifted me a two-piece version for Christmas, it became my go-to for almost everything. The reasons are pretty simple.
First, cake release is practically foolproof. Even when I've slightly under-greased the pan (we've all been there on busy mornings), my cakes still come out beautifully. The two-piece construction means you're not fighting gravity and suction at the same time.
Second, cleaning is ridiculously easier. With traditional pans, I'd spend ten minutes scrubbing around all those crevices and curves. With a two-piece pan, everything lies flat and accessible. I can actually see what I'm cleaning, and nothing gets left behind in hidden corners to turn into cement by next week.
I also love using this pan for really moist cakes—think chocolate with sour cream or anything with fruit puree. Those super-tender cakes that tend to fall apart? They stay together beautifully with a two-piece pan because you're not yanking and shaking to get them out.
What to Look For When Buying
Not all two-piece bundt pans are created equal, and I learned this the hard way. My first cheap one had a flimsy center tube that wobbled, and cake batter actually leaked through the seam during baking. What a mess.
Look for pans with a tight-fitting seal between the base and tube. The connection should feel solid and secure. I prefer heavy-duty aluminum with a quality non-stick coating—it conducts heat evenly and releases cakes like a dream. You'll pay a bit more upfront (usually $30-50 for a good one), but it's absolutely worth it when you're not throwing away broken cakes.
Size-wise, most two-piece pans hold about 10-12 cups of batter, which is perfect for standard bundt recipes. If you're feeding a crowd regularly, look for the 15-cup versions. Just make sure you've got the oven space for the larger size.
Wreath Shaped Bundt Pan: Holiday Elegance Year-Round
A Design That Tells a Story
My wreath bundt pan gets more use than any other specialty pan I own, and that's saying something. Yes, it's stunning for Christmas—dusted with powdered sugar, it looks like it came straight from a Victorian holiday card. But here's what surprised me: I use it all year long.
The wreath design typically features delicate leaves, berries, or floral patterns arranged in a circle. Mine has gorgeous embossed holly leaves that show up beautifully in the finished cake. The level of detail is impressive, and unlike some fussy decorative pans, this one actually releases the cake with all those details intact.
Beyond December
I'll be honest—I almost didn't buy this pan because I thought it would sit unused for eleven months of the year. I'm so glad I ignored that doubt. In spring, I make a lemon pound cake in it and tuck fresh flowers and strawberries in the center. It's become my signature Easter dessert.
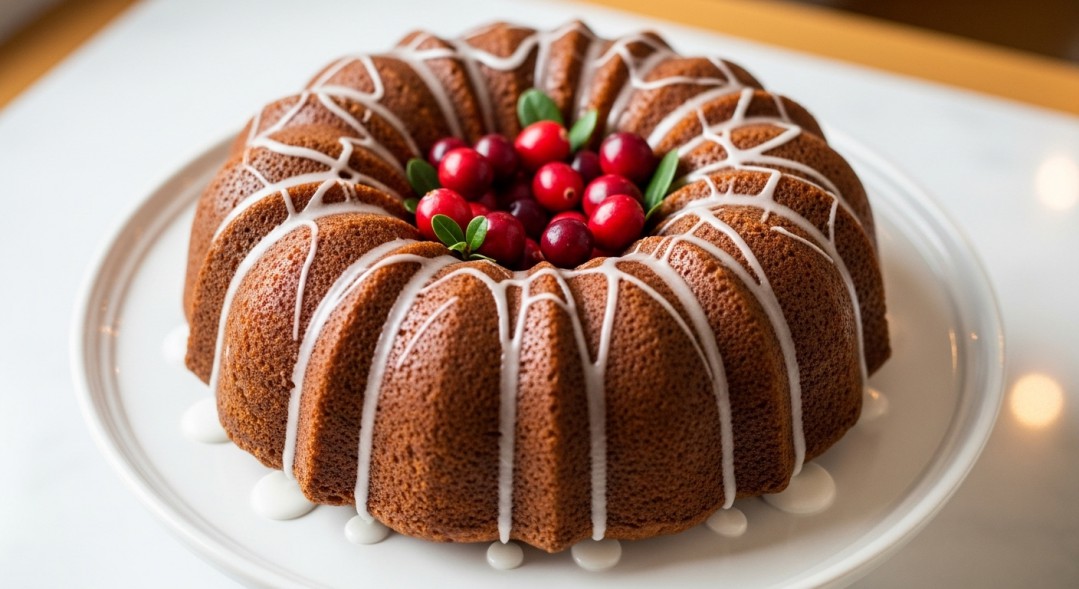
For summer garden parties, I fill the center with fresh berries after turning it out. The wreath shape creates a natural "bowl" in the middle that's perfect for fruit, whipped cream, or even edible flowers. Last summer, I made a vanilla cake with a lemon glaze and filled the center with blueberries and mint—everyone thought I'd hired a caterer.
Fall is when this pan really shines for me. Apple spice cakes, pumpkin with cream cheese glaze, cranberry orange—they all look absolutely stunning in the wreath shape. For Thanksgiving last year, I made a brown butter cake with maple glaze, and my mother-in-law asked for the recipe three times. She didn't even realize the secret ingredient was just the gorgeous pan.
Making the Most of Your Wreath Pan
The key to success with a wreath bundt pan is embracing simplicity in your decorating. The pan does all the heavy lifting design-wise, so you don't need to go overboard with frosting and fondant.
My favorite approach is a simple glaze that drips down into the crevices and highlights all those leaf details. A classic powdered sugar glaze with a splash of vanilla or almond extract works beautifully. For holidays, I'll add a drop of food coloring—pale green for spring, deep red for Christmas.
Fresh garnishes are your friend here. Rosemary sprigs tucked into the center look incredibly elegant and smell amazing. Sugared cranberries for winter, edible pansies for spring, fresh figs for fall—you get the idea. The wreath naturally draws your eye to the center, so use that space intentionally.
One thing I learned the hard way: don't overfill this pan. The intricate design means there are lots of curves and valleys, and batter needs room to rise evenly. I stick to about 2/3 full, and my cakes always have perfect definition in the pattern.
Castle Bundt Pan: Fairy Tale Baking
When Practical Meets Whimsical
I'll admit it—I bought my castle bundt pan specifically for my daughter's sixth birthday party. She was deep in her princess phase, and I wanted to make a cake that would make her gasp. Mission accomplished. But what started as a one-time novelty purchase has become one of my most treasured pans, especially now that I'm a designated birthday cake baker for half the neighborhood kids.
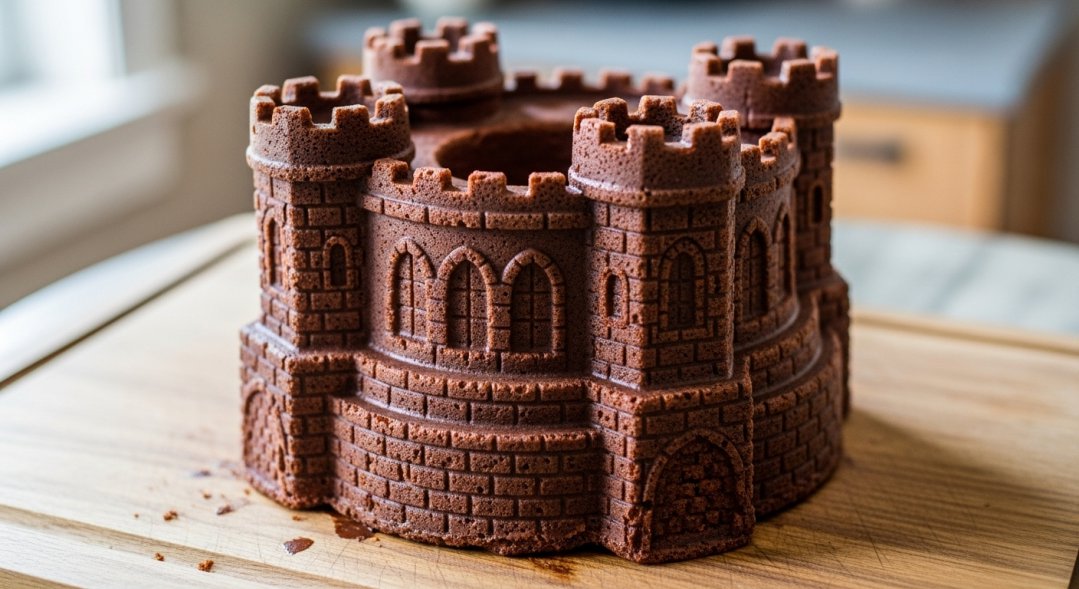
The castle bundt pan creates a three-dimensional fortress complete with turrets, arched windows, and brick-textured walls. Mine has four towers of varying heights that surround the center tube, creating a dramatic, architectural cake. It's basically a mini edible castle, and kids absolutely lose their minds over it.
Not Just for Kids
Here's something that might surprise you: adults get just as excited about castle cakes as children do. I've made them for book club meetings when we read fantasy novels, for a friend's Game of Thrones finale party, and even for a medieval-themed wedding shower. There's something universally appealing about a cake shaped like a castle—it taps into everyone's inner child.
The detail on these pans is remarkable. When you glaze or dust the cake, the brick pattern and window indentations become incredibly pronounced. I've found that a darker cake (chocolate or spice) with lighter glaze creates the most dramatic contrast and really makes the architectural features pop.
Decorating Your Fortress
This is where you can really have fun and get creative. For kids' parties, I go all out with candy decorations. Fruit roll-ups become flags for the turrets (just cut triangles and attach them to toothpicks). Ice cream cone tips make perfect pointed roofs. Chocolate rocks or crushed graham crackers around the base create a cobblestone courtyard effect.
For more sophisticated occasions, I keep it elegant. A smooth ganache coating with edible gold dust on the towers looks incredibly regal. Fresh flowers or herbs arranged around the base of the castle add natural beauty without childish overtones.
One practical tip: the varying heights of the turrets mean this cake takes a bit longer to bake than a standard bundt. I always add about 10 extra minutes to my usual baking time and test multiple towers with a toothpick. The tall center tower usually needs the longest, so that's where I do my final doneness check.
The Release Factor
I won't lie to you—getting a castle cake out intact requires some patience. Those turrets can be stubborn. My method: I grease and flour every single millimeter of this pan, paying extra attention to the tower peaks and window indentations. I use the flour-and-butter method rather than spray, because I find it gives more complete coverage on these complicated shapes.
After baking, I let the cake cool in the pan for exactly 15 minutes—not more, not less. Too short and it falls apart; too long and it sticks. Then I put a large plate over the top, say a little prayer, and flip. A gentle wiggle and tap, and then I very slowly lift the pan off, watching to make sure those turrets are coming along for the ride.
Rose Bundt Pan: Romantic and Elegant
Love at First Sight
My rose bundt pan might be the most beautiful piece of bakeware I own. When I first saw one at a kitchenware store, I stood there staring at it for probably five minutes. The intricate layers of petals spiraling around the center, each one catching the light differently—it was like a sculpture that happened to also bake cakes.
I bought it that day, even though I didn't have a specific occasion in mind. Sometimes you just know you need something in your life, you know?
The design mimics a fully bloomed rose when you turn the cake out, with overlapping petals that create incredible depth and dimension. Mine has probably 30-40 individual petal shapes, each one carved with delicate veining and curves. When you run your finger along the pan, you can feel how much thought went into the design.
Perfect Occasions for Rose Cakes
This pan has become my secret weapon for occasions when I really want to impress. I made a rose cake for my best friend's bridal shower, filled the center with fresh roses, and people were taking photos before we even cut into it. The bride actually got a little teary-eyed, which made me teary-eyed, and suddenly we were both crying over a cake.
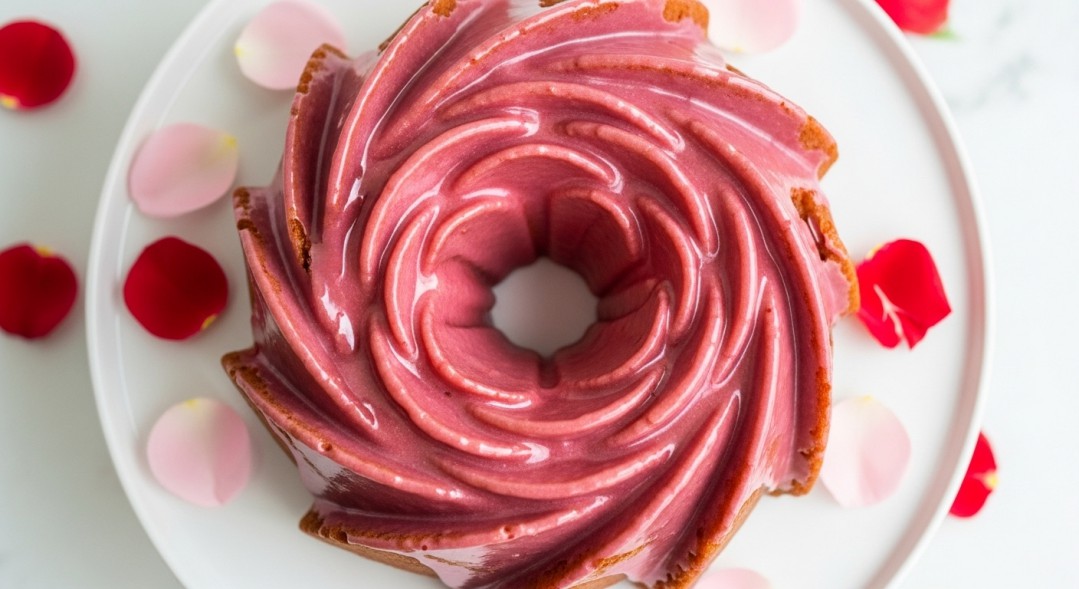
Mother's Day is another natural fit. Last year I made a vanilla bean cake with a pale pink glaze for my mom, and she said it was too pretty to eat (she ate two slices anyway). Valentine's Day, anniversaries, engagement parties—any celebration of love and romance becomes more special with a rose-shaped cake as the centerpiece.
But here's my hot take: you don't need a special occasion. I've made rose cakes for regular Sunday dinners just because I felt like seeing something beautiful on the table. Life's too short to save your pretty pans for once-a-year events.
Flavor and Finish Combinations
The rose shape practically begs for certain flavors and colors. I've had the most success with:
Rosewater and pistachio cake with white glaze—it sounds fancy, but it's just adding rosewater extract to a basic butter cake. The subtle floral flavor complements the shape perfectly, and the pistachios add gorgeous green flecks.
Chocolate raspberry has been a crowd-pleaser every single time. The deep brown cake with a bright red or pink glaze is visually stunning, and everyone understands that flavor combination.
Lemon lavender is my personal favorite for spring. The pale purple glaze settles into all those petal crevices and creates an ombre effect that looks almost airbrushed.
When it comes to decorating, less is definitely more with this pan. The rose design is the star of the show. I usually stick with a simple poured glaze in complementary colors—blush pink, ivory, pale gold, or soft lavender. A dusting of edible pearl luster dust on the petal edges adds just enough shimmer without looking overdone.
The Reality Check
I need to be real with you: this pan requires some commitment. Those intricate petals mean lots of nooks and crannies for batter to stick to. The first time I used it, I under-greased, and I lost about half the petal details when the cake came out. Heartbreaking.
Now I know better. I take my time greasing every single petal with softened butter and a pastry brush, getting into all the curves. Then I dust with flour, tap out the excess, and double-check that every surface is covered. It takes an extra five minutes, but perfect petals are worth it.
The other challenge is that this cake can be a bit fragile right after baking because of all the thin petal sections. I let it cool for a full 20 minutes before attempting to unmold, and I always use a serving plate rather than a cooling rack for the flip. The plate provides more support and catches any pieces that might want to escape.
Heritage Bundt Pan: Classic Elegance with Timeless Appeal
The Foundation Piece
If you only ever buy one bundt pan in your entire life, make it a heritage pan. I know I've just spent several paragraphs gushing about fancy specialty designs, but this classic fluted pattern is the workhorse of bundt pans, and every baker needs one in their arsenal.
My heritage bundt pan was actually my grandmother's. She used it for decades, and when she passed, my mom gave it to me along with Grandma's handwritten recipe cards. There's something deeply satisfying about using the exact same pan that made the cakes I ate as a child. Every time I pull it out, I remember standing on a stepstool in Grandma's kitchen, watching her pour golden batter into those distinctive ridges.
The heritage design features elegant vertical flutes that run from the center tube to the outer edge, creating a pleated or fan-like appearance. It's the bundt pan most people picture in their minds when they hear the word "bundt." There's a reason this design has stuck around for so long—it's absolutely timeless.
Why It Works for Everything
The beauty of a heritage bundt pan is its incredible versatility. It doesn't pigeonhole you into specific occasions or themes. A chocolate cake baked in a castle pan is clearly for a party, but that same chocolate cake in a heritage pan? It works for Tuesday night dessert, a church potluck, a birthday celebration, or Christmas dinner.
I've used mine for pound cakes, coffee cakes, monkey bread, even savory dishes like herb-crusted bread. The simple fluted design lets the cake itself be the star rather than competing with an elaborate shape. This is especially nice when you're making a heavily decorated cake with lots of glaze, frosting, or toppings—you don't want visual chaos.
The flutes also serve a practical purpose beyond aesthetics. They increase the pan's surface area, which means more of the cake touches the hot pan. This creates a slightly crispy, caramelized crust while keeping the interior tender and moist. That contrast in texture is part of what makes bundt cakes so delicious.
Recipe Flexibility
One thing I've learned over years of baking is that some recipes work better in certain pan shapes. The heritage bundt pan is the most forgiving when it comes to recipe testing and experimentation. The simple design means consistent heat distribution and predictable baking times.
I've successfully made everything from traditional vanilla pound cake to adventurous flavor combinations like chai tea with honey glaze, olive oil cake with citrus, brown butter bourbon bundt, and even a savory cheddar and chive version for brunch. The heritage pan handles it all with grace.
This is also the best pan for recipes that include mix-ins like chocolate chips, nuts, or dried fruit. The straightforward flutes don't have tiny crevices where mix-ins can get stuck or create air pockets. Everything distributes evenly and releases cleanly.
The Perfect Starting Point
If you're new to bundt baking, start here. Master this pan before you move on to more elaborate designs. Learn how your oven bakes, figure out your preferred greasing method, practice the flip and release technique. Once you're consistently getting perfect results from a heritage pan, you'll have the confidence and skills to tackle those trickier specialty shapes.
My advice to beginners is always the same: buy a quality heritage bundt pan in a standard 10-cup or 12-cup size. Use it at least a dozen times with different recipes. Get comfortable with the process. Then, when you're ready, add one specialty pan that speaks to your style or needs.
Choosing the Right Pan for Your Needs
Honest Questions to Ask Yourself
After collecting bundt pans for years, I've developed a mental checklist for deciding whether to buy a new one. Let me walk you through the questions I ask myself—they'll help you figure out which pans deserve your money and cabinet space.
First, how often will you actually use it? I'm not saying save everything for special occasions, but a $40 castle pan that you'll use twice a year should probably wait until you've worn out your everyday pan. On the other hand, a heritage or two-piece pan that works for weekly baking? That's an investment that pays for itself quickly.
Second, what's your skill level honestly? I see beginners get discouraged because they jumped straight to the most intricate pan and had a disaster. There's no shame in starting simple. Some of my most beautiful cakes have come from basic pans, and some of my biggest failures have come from complicated ones when I rushed the process.
Third, where will you store it? Bundt pans are bulky. I learned this lesson when I had five pans and one cabinet. Now I have a dedicated drawer, but think about your actual storage situation before you buy pan number four.
Material Matters More Than You Think
I've baked with aluminum, steel, silicone, and even ceramic bundt pans. The material makes a bigger difference than most people realize, especially with specialty designs.
Heavy-duty aluminum with a good non-stick coating is my personal preference. It conducts heat evenly, which means no overcooked edges while the center stays raw. The weight also provides stability—cheaper lightweight pans tend to warp over time, and a warped bundt pan is basically useless because the shape gets distorted.
I've had mixed results with silicone. The flexibility makes for incredibly easy cake release, which is tempting. But I've never gotten the same crispy, caramelized exterior that I love from bundt cakes. The cakes always come out slightly pale and soft all over. For intricate designs like the rose or castle, I definitely prefer metal pans that hold fine details better.
Non-stick coating quality varies wildly. The cheap stuff scratches if you look at it wrong and starts flaking within a year. I've learned to spend extra on pans with PFOA-free, durable non-stick finishes. They cost more upfront but last significantly longer and perform better.
Size Considerations
Most bundt pan recipes are written for standard 10-12 cup capacity pans. This is the sweet spot for most home bakers. It serves 12-16 people comfortably and fits in standard ovens without issue.
I also keep a mini bundt pan set (six individual bundts) for portion control or when I want to give cakes as gifts. The specialty designs I've talked about mostly come in standard sizes, though I have seen mini versions of the heritage and wreath styles.
If you regularly cook for large gatherings, the 15-cup bundt pans are worth considering. Just know that baking times increase significantly, and you need to be more vigilant about the center cooking through before the edges burn.
Essential Tips for Bundt Pan Success
The Greasing Method That Changed Everything
Can we talk about greasing bundt pans? Because this is where most bundt disasters happen, and nobody talks about it enough. I ruined at least a dozen cakes before I figured out the right technique.
Forget the cooking spray. I know it's convenient, and the can says it's made for baking, but it's not reliable for intricate bundt pans. The spray creates an uneven coating, pools in crevices, and often leaves sticky spots that become your cake's worst enemy.
Here's my foolproof method: I use room-temperature butter (the softened stick kind, not melted) and apply it with a pastry brush. I can see exactly where I've covered and where I've missed. I go over every ridge, valley, curve, and corner. For really detailed pans, I'll use my finger to make sure I'm getting butter into the deepest parts of the design.
Then comes the flour. I add about two tablespoons of flour to the greased pan and rotate it, tapping and tilting, until every buttered surface has a light dusting. Then I tap out the excess. This creates a barrier between the batter and the pan that ensures clean release every single time.
For chocolate cakes, I use cocoa powder instead of flour. Otherwise, you get unattractive white spots on your dark cake. Same technique, just swap in cocoa.
Baking and Timing Tricks
Bundt pans conduct heat differently than standard cake pans because of the center tube. That tube acts like a heat conductor, helping the cake bake from the inside out while the outside bakes from the pan walls. This is actually brilliant engineering—it's why bundt cakes stay moist in the center and develop that slightly crispy exterior.
But it also means you can't just follow the baking time from a recipe written for layer cakes. Bundt cakes typically need 10-15 minutes longer than the same batter would in a 9x13 pan.
My rule of thumb: start checking at the earliest time mentioned in the recipe, but expect to add time. I test doneness with a long wooden skewer inserted into the deepest part of the cake. It should come out with just a few moist crumbs, not wet batter.
Oven temperature matters too. I always bake bundt cakes at 325°F or 350°F, never higher. Higher temperatures risk over-browning the outside before the inside is done, especially in specialty pans with varying thicknesses.
The Critical Cooling Window
Timing the cooling period is genuinely important, and it took me a while to figure out the sweet spot. Too short, and your cake is structurally unsound and will crumble when you flip it. Too long, and the cake contracts and sticks to the pan like glue.
For most bundt pans, 15 minutes is the magic number. I set a timer immediately when the pan comes out of the oven. During those 15 minutes, the cake firms up and pulls slightly away from the pan sides. The residual heat is still keeping things loose enough for easy release.
While the cake cools, I prepare my serving plate and keep it near the oven so I'm not scrambling around at flip time. I also use this time to run a thin knife or offset spatula around the edges of the cake, including around the center tube. This isn't strictly necessary if you've greased well, but it's insurance.
At the 15-minute mark, I place my serving plate over the top of the pan and flip the whole thing in one confident motion (fake it till you make it). I let it sit inverted for a minute, then lift the pan slowly and carefully. If I feel any resistance, I'll gently tap the pan sides or give it a little shake before lifting further.
Cleaning Without Destroying Your Pan
The way you clean your bundt pan affects how it performs over time. I've seen people scrub their non-stick pans with steel wool and then wonder why cakes stick. Don't be that person.
I clean my bundt pans as soon as they're cool enough to handle comfortably. Waiting until later means baked-on batter becomes cement. I use hot soapy water and a soft sponge or brush, paying attention to get into all the crevices. For really stubborn bits, I let the pan soak for 10 minutes rather than scrubbing aggressively.
Never put bundt pans in the dishwasher, even if the manufacturer says it's okay. The harsh detergents and high heat degrade non-stick coatings surprisingly fast. Hand washing takes an extra three minutes and adds years to your pan's life.
I dry my pans immediately and thoroughly. Water left sitting in the grooves can lead to mineral deposits or even rust on certain finishes. I'll even run a paper towel through all the crevices to make sure everything is completely dry.
Storage-wise, I don't stack my bundt pans inside each other anymore. I used to, and it scratched the non-stick coating on several pans. Now I store them individually or separated by dish towels.
Building Your Bundt Pan Collection
Start Here
If you're building a collection from scratch, I recommend this order of acquisition: First, get a quality heritage bundt pan. Use it until you're confident with the entire bundt baking process. This might be two months or two years depending on how often you bake—there's no rush.
Second, add either a two-piece bundt pan or a wreath-shaped pan, depending on your needs. The two-piece if you're still nervous about cake release or frequently make delicate recipes. The wreath if you love entertaining and want that wow factor.
Third, choose a specialty design that matches your interests. For me, that was the rose pan because I love elegant desserts. For you, it might be the castle if you have kids or the heritage pan in a different size if you cook for crowds.
When to Splurge vs. Save
I've bought $15 bundt pans and $75 bundt pans. Here's what I've learned about when the price difference matters.
For heritage and two-piece pans that you'll use frequently, spend more on quality. The better construction, superior non-stick coating, and even heat distribution are worth the investment. These are your workhorses, and cheap versions will frustrate you and possibly give up after a year.
For highly specialized designs like the castle that you might only use a few times a year, mid-range pricing is fine. You don't need the absolute top-of-the-line model, but don't go bottom-barrel either. Look for good reviews and solid construction, but you can save $20-30 on these occasional-use pans.
Where to Find Great Bundt Pans
I've bought bundt pans from kitchen specialty stores, big-box retailers, and online. Each shopping method has pros and cons.
Kitchen stores let you examine the pan in person, feel the weight, and assess the quality of details. I like being able to touch the non-stick coating and see how the pan is constructed. The downside is limited selection and often higher prices.
Online shopping offers the widest selection by far. You can find vintage designs, specialty imports, and seasonal shapes that never hit store shelves. Read reviews carefully though—what looks gorgeous in photos might have quality issues in reality. I always check for comments about sticking, warping, or coating problems before buying.
Estate sales and thrift stores can be goldmines for vintage bundt pans, especially heritage styles. I've found beautiful old pans for $3-5 that would cost $40 new. Just inspect carefully for rust, damage, or coating deterioration before buying.
Your Journey Starts Here
Looking back at my bundt pan collection, I realize each one represents not just a tool but a collection of memories. The heritage pan from my grandmother, the rose pan I bought after my first promotion to celebrate success, the castle pan that's been to more birthday parties than I can count—they're part of my story.
Your story will be different, and that's the beauty of it. Maybe you'll fall in love with the wreath pan and make it your signature for every holiday. Maybe the two-piece pan will finally give you the confidence to bake for your intimidating mother-in-law. Maybe the castle pan will become a birthday tradition your kids remember decades from now.
The point isn't to collect all the pans or become a bundt expert overnight. The point is finding one or two pans that inspire you to bake, that make you excited to preheat the oven and pull out your mixing bowl. Life is too short for boring cakes, and specialty bundt pans are one of the easiest ways to transform something ordinary into something memorable.
Start simple. Choose one pan that speaks to you. Learn its quirks and personality. Share cakes with people you love. And if you end up with seven bundt pans like me, gradually taking over your entire kitchen storage? Well, there are worse problems to have.
Now if you'll excuse me, I have a rose-shaped lemon cake calling my name. Happy baking!
Leave a Reply