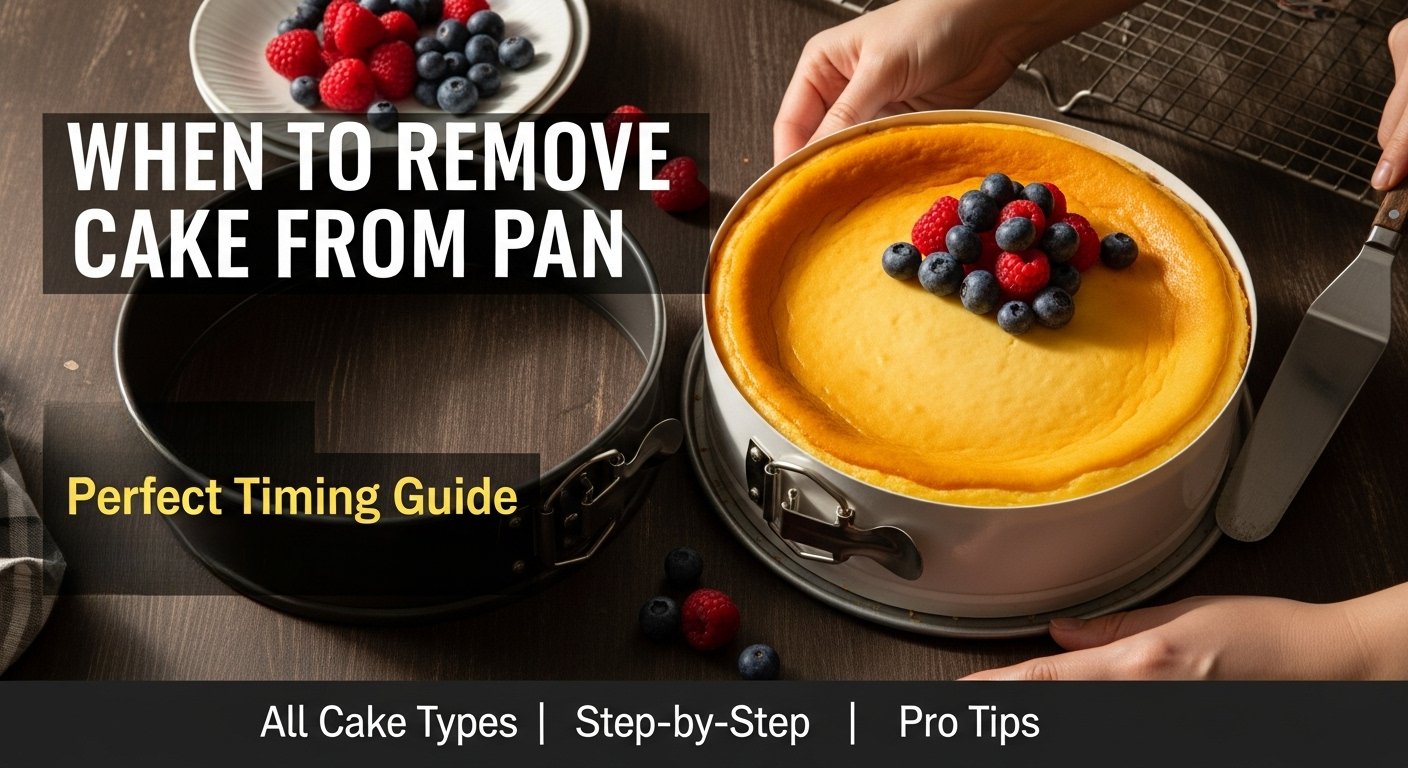
You know that sinking feeling when you've just baked the most gorgeous cheesecake of your life, carefully released the springform clasp, and watched in horror as the sides crumble inward? Yeah, I've been there. Multiple times, actually, before I finally figured out the timing that makes all the difference.
The truth is, knowing when to remove a cake from a springform pan isn't just about following a recipe—it's about understanding what's actually happening inside that cake as it cools. Get the timing right, and you'll have a picture-perfect dessert. Get it wrong, and you might be serving "deconstructed cake" to your dinner guests (trust me, they won't be impressed by the creativity).
In this guide, I'm going to walk you through everything I've learned from years of springform pan victories and disasters. By the end, you'll know exactly how long to wait before releasing that clasp, and you'll understand why different cakes need different cooling times.
What Makes Springform Pans Different?
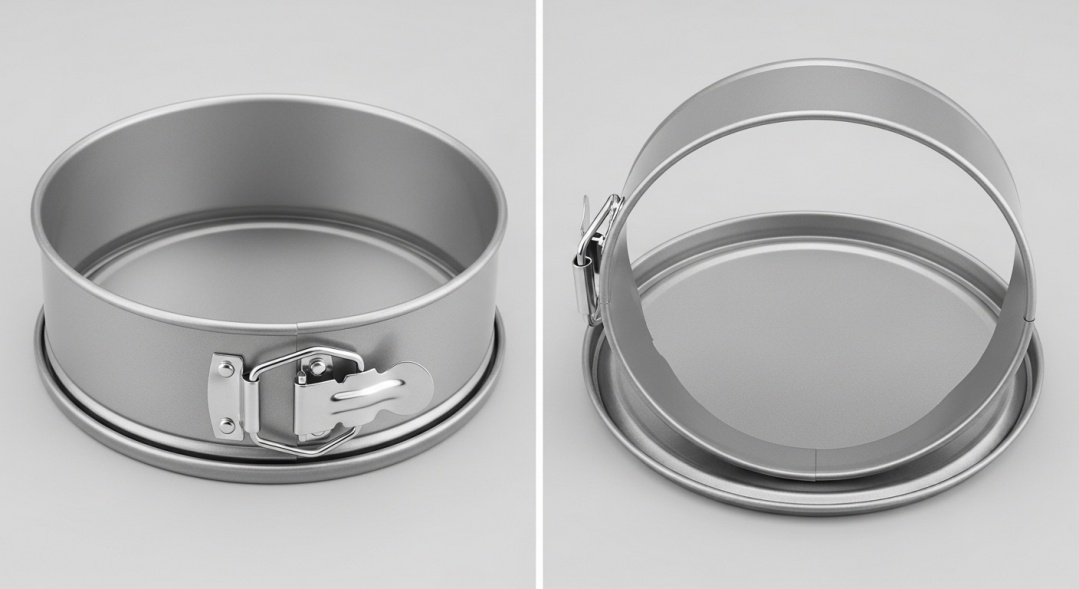
Before we dive into timing, let's talk about why springform pans are special little troublemakers. Unlike your regular cake pan where you can just flip the whole thing over and give it a gentle tap, springform pans come apart in pieces. There's the ring that holds the sides and the flat bottom plate that slides right out.
This design is brilliant for delicate cakes that would never survive being flipped upside down. Cheesecakes, tortes, and fancy layered creations all benefit from this gentle release method. But here's the catch: because you're removing support from the sides while the cake is still in the pan, timing becomes absolutely critical.
I learned this the hard way with a chocolate torte I made for my sister's birthday. I got impatient, released the sides after just five minutes, and the whole middle section sagged like a sad soufflé. The cake was still structurally unstable, and without those metal sides holding it together, gravity did its thing.
The other tricky part? That removable bottom means there's potential for sticking issues on two surfaces instead of just one. I've had cakes release beautifully from the sides only to stubbornly cling to the base like their life depended on it.
The Golden Rule: General Cooling Timeline
Here's what I wish someone had told me from the beginning: for most cakes, you want to wait about 10 to 15 minutes after removing the pan from the oven before you even think about touching that clasp.
During those first crucial minutes, your cake is doing some important work. The structure is setting as the proteins firm up and the starches crystallize. The temperature is gradually dropping, which helps everything stabilize. And all that moisture that was bubbling away in the oven? It's redistributing itself throughout the cake, creating that perfect texture we're after.
I always set a timer now because I used to just eyeball it, and my internal clock is apparently terrible. Ten minutes feels like forever when you're excited to see your creation, but I promise it's worth the wait.
So how do you know when your cake is actually ready? I use a combination of tests. First, I gently press the top near the edge—it should feel firm and spring back slightly. If your finger leaves an indentation that stays, give it a few more minutes. The edges should also be pulling away from the sides of the pan just a tiny bit. And if you get close (don't burn your nose!), the cake should feel warm but not hot.
My mom always said you should be able to comfortably rest your hand on the pan without pulling it away quickly. That's actually pretty solid advice, though I still use a timer because, again, my judgment is questionable.
Cooling Times by Cake Type
This is where things get interesting, because not all cakes are created equal. The cooling time that works perfectly for a sponge cake will absolutely ruin a cheesecake. Let me break down what I've learned for each type.
Cheesecakes: The Ultimate Exception
Okay, so remember that 10 to 15 minute rule I just told you about? Forget it completely when it comes to cheesecakes. These creamy beauties are the drama queens of the baking world, and they demand special treatment.
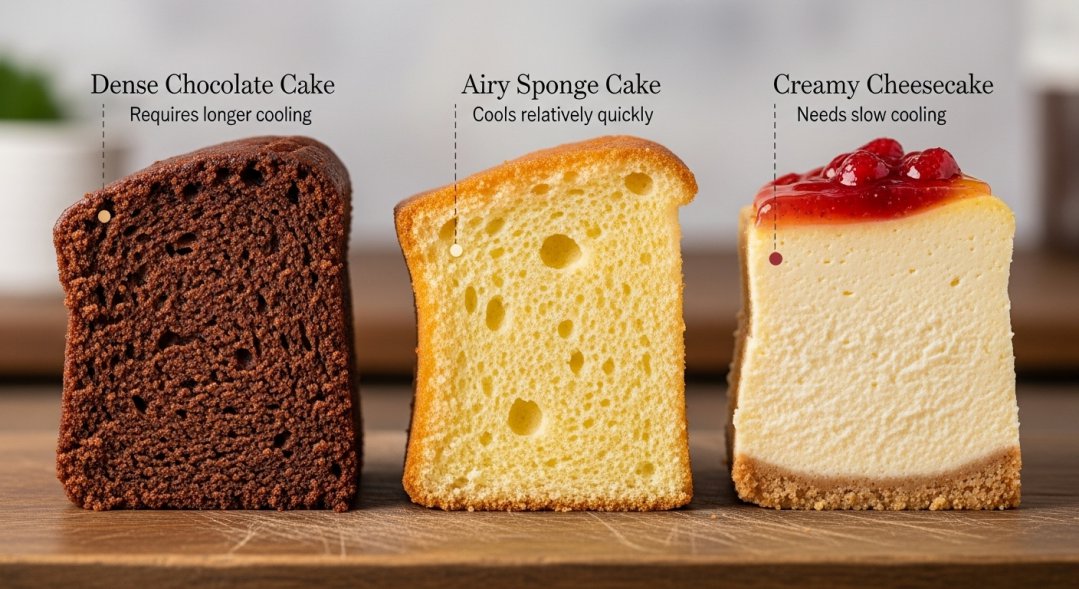
Cheesecakes need to cool completely in the pan—and I mean completely. We're talking two to four hours sitting on your counter at room temperature. After that, they should go into the refrigerator, still in the pan, for at least another four hours or preferably overnight.
I know, I know. It's torture. I once made a cheesecake for a dinner party and completely underestimated the cooling time. I ended up serving it at my next dinner party instead, and honestly, it tasted even better after sitting in the fridge for 24 hours.
The reason cheesecakes are so high-maintenance is their texture. They're essentially a custard, held together by eggs and cream cheese rather than flour and structure. If you remove the sides too early, the center will still be jiggly and soft, and you'll end up with a crater in the middle or, worse, the whole thing sliding apart.
Here's my cheesecake cooling method that's never failed me: Let it cool in the oven with the door cracked open for about an hour after turning off the heat. This prevents that dramatic temperature change that causes cracks. Then move it to the counter for another hour or two. Finally, refrigerate it overnight, still fully assembled in the pan. The next day, run a thin knife around the edge, release the clasp, and marvel at your patience paying off.
Dense Cakes: The Patient Ones
Pound cakes, flourless chocolate cakes, and dense butter cakes need a bit more time than your average cake—about 15 to 20 minutes before releasing the springform sides.
These cakes are heavier and more compact, which means they hold onto heat longer. I made a flourless chocolate cake once and got antsy at the 10-minute mark. Big mistake. The center was still quite warm, and when I removed the sides, the middle sort of slumped outward. It tasted amazing, but it looked like it had melted.
The extra density also means these cakes can handle the longer cooling time without drying out. In fact, they benefit from it. That gradual temperature drop helps the texture become more uniform throughout.
One thing I've noticed with dense cakes is that they actually pull away from the sides more noticeably than lighter cakes. If you see a visible gap all the way around, that's your green light.
Light and Airy Cakes: The Quick Release Crew
Sponge cakes, chiffon cakes, and angel food cakes are the opposite problem. These delicate, airy creations actually shouldn't sit in the pan too long—10 to 15 minutes maximum, and sometimes even less.
I learned this with a lemon sponge cake that I left in the pan for 20 minutes because I got distracted by a phone call. When I finally released it, the bottom had become slightly soggy from all the condensation trapped in the pan. The top was fine, but that bottom layer had lost its lovely light texture.
These cakes have so much air whipped into them that they need to finish cooling in open air. Keeping them enclosed in the pan too long traps moisture and can make them gummy. Plus, they're usually sturdy enough despite being light that they can handle an earlier release.
For angel food cakes specifically, many bakers actually flip them upside down to cool (if your pan has feet or you can balance it on a bottle). This prevents the delicate structure from collapsing under its own weight.
Tortes and Layered Cakes: The Goldilocks Zone
Multi-layered cakes and tortes typically follow that standard 10 to 15 minute cooling window. These are the cakes where the rule actually works as intended.
I make a hazelnut torte for holidays that has three layers, and I've found that 12 minutes is the sweet spot. Long enough that the layers have set and won't fall apart, but quick enough that they don't start steaming and getting soggy.
One pro tip I've picked up: if you're planning to assemble layers with frosting or filling, you actually want to remove them from the pan slightly earlier rather than later. You'll be adding more moisture with your filling, so starting with a slightly firmer, less moist cake base works better.
The trickiest part with layered cakes is that you're often dealing with delicate components. I always make sure to let them cool on the base of the springform pan even after removing the sides. That gives me a stable platform to work with, and I can slide them onto my serving plate later.
Frozen and No-Bake Cakes: The Cold Crew
Ice cream cakes, frozen mousse cakes, and no-bake creations are a completely different beast. These need to be thoroughly set in the freezer or refrigerator before you even consider removing the pan—we're talking at least four to six hours, and sometimes overnight.
I make an Oreo ice cream cake every summer that stays in the springform pan in my freezer for a full 24 hours before I release it. Even then, I let it sit at room temperature for just five minutes before unclasping the sides. The slight warming makes the release smoother without melting the cake.
With no-bake cheesecakes, I've found that refrigerating overnight is non-negotiable. I tried releasing one after just four hours once because I was hosting brunch the next morning and forgot to make it the day before. The texture was still too soft, and I had to quickly re-clamp the pan and stick it back in the fridge for another few hours. Not my finest moment.
The Step-by-Step Removal Process
Okay, so you've waited the appropriate amount of time, and you're ready to release your cake. Here's exactly how I do it every single time now that I've learned from my mistakes.
Step 1: The Initial Cooling Setup
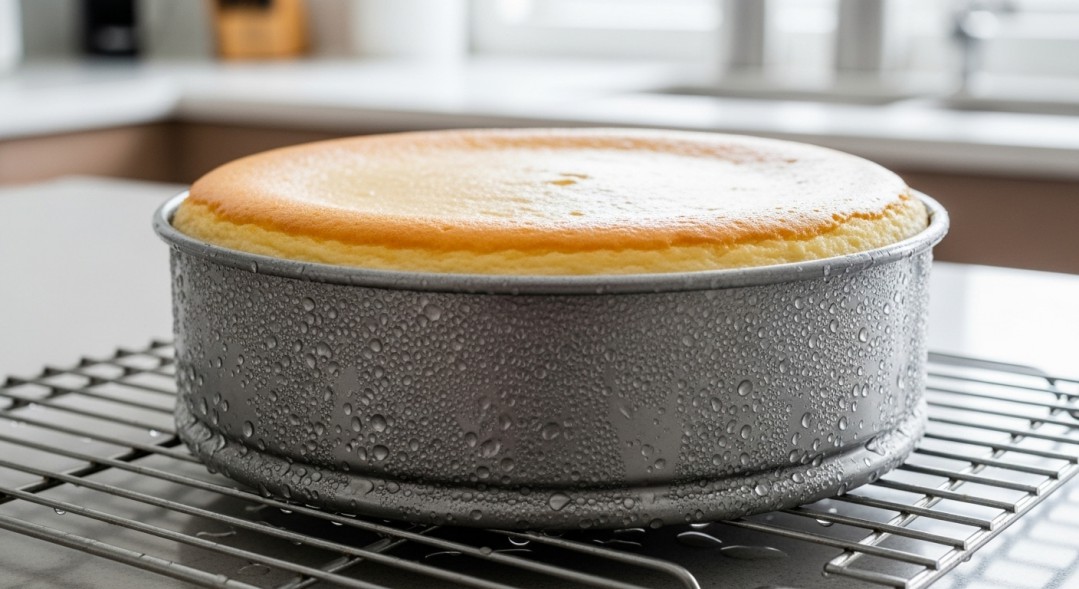
As soon as your cake comes out of the oven, place the entire springform pan on a wire cooling rack. This is important because it allows air to circulate underneath, preventing condensation from building up on the bottom. I used to just set my pans on the countertop, and I'd always end up with a slightly soggy bottom layer. The wire rack solved that problem completely.
Step 2: The Waiting Game
Set that timer based on your cake type. Use this time to clean up, make your frosting, or just stare at your beautiful creation through the oven door if that's your thing (no judgment here).
Step 3: The Edge Release
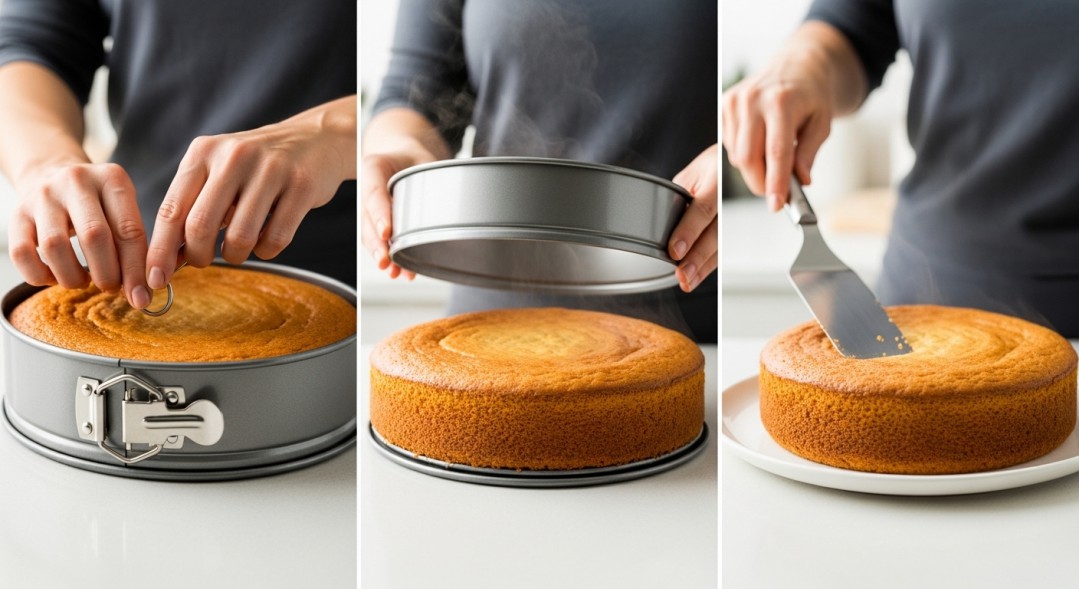
This step is crucial and one that I used to skip in my impatient early baking days. Take a thin knife or an offset spatula—I prefer offset spatulas because they're more flexible—and run it around the inside edge of the pan. Apply gentle pressure and make sure you're going all the way to the bottom.
I make it a point to go around twice. The first pass loosens everything, and the second pass catches any spots I missed. This prevents those heartbreaking moments where part of your cake sticks and tears as you remove the sides.
Step 4: The Release
Here's where the magic happens. Unlatch the clasp on your springform pan slowly. And I mean slowly—this isn't the time to yank it open like you're opening a present on Christmas morning.
I hold the base with one hand and gently lift the ring straight up with the other hand. If you feel any resistance, stop immediately. That means something is still sticking, and you need to run your knife around again.
Step 5: The Bottom Removal (Optional But Recommended)
Now your cake is sitting pretty on the springform base, and you have a decision to make. For casual situations, I sometimes just leave it on the base and transfer the whole thing to my serving plate. It's easier, and the metal base provides extra support.
But if I'm trying to impress people or need to transport the cake, I remove the base too. Here's how: slide a large, thin spatula between the cake and the metal base, working your way around gently. Then, with one smooth motion, slide the cake onto your serving plate. I've found that using two spatulas—one on each side—gives me more control and reduces the risk of the cake breaking.
Step 6: Final Cooling
If your cake isn't completely cool yet, let it finish cooling on your serving plate or on the wire rack. At this point, it's structurally sound and can handle the rest of the cooling process in the open air.
A few pro tips I've picked up: Always make sure your serving plate is ready before you start the removal process. I once successfully removed a cake and then realized I hadn't washed my nice cake stand. Juggling a warm cake while trying to rinse and dry a plate is not fun.
Also, if you're working with a particularly delicate cake, pop the whole thing in the fridge for 15 minutes before trying to slide it off the base. That extra firmness from the cold can make the transfer much easier.
What Happens If You Remove It Too Early?
Let me paint you a picture from my own kitchen disasters. It was my first attempt at a raspberry cheesecake for my husband's birthday. I'd read the recipe but somehow convinced myself that 30 minutes of cooling would be "close enough" to the recommended overnight chill.
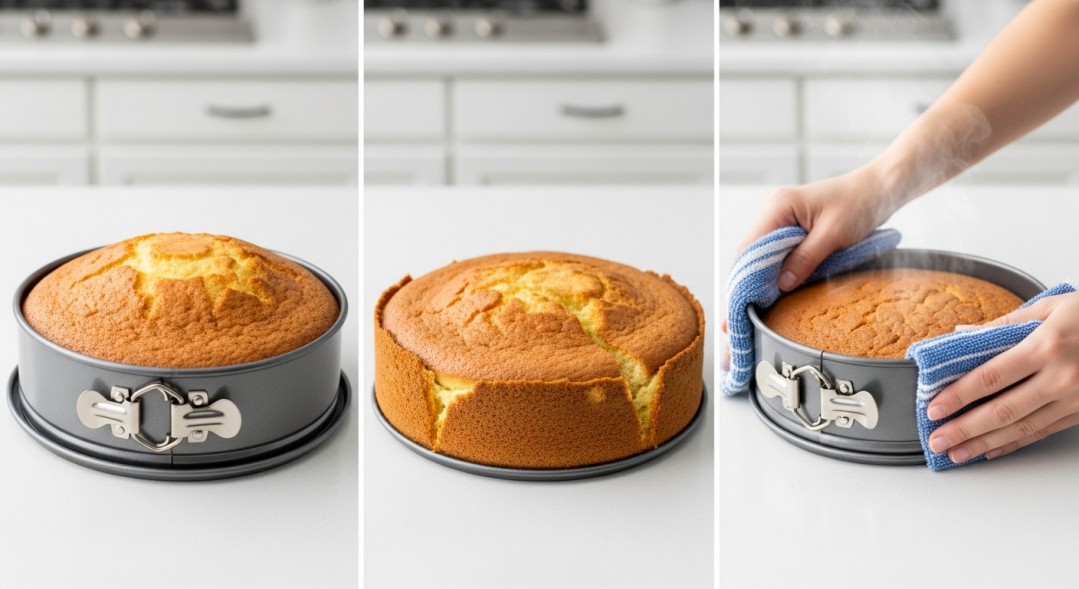
I unclasped that springform pan with confidence, and within seconds, I watched the entire middle section sink into itself like a deflating balloon. The edges stayed relatively firm, but the center was still soft and jiggly. I ended up with what looked like a cheesecake volcano crater.
When you remove a cake too early, several things can go wrong. The structure hasn't fully set yet, so you get cracks, sinking, or complete collapse. The cake is still expanding and contracting with temperature changes, and without the pan sides for support, it can't handle the stress.
I've also had cakes stick worse when removed too early. The outside has firmed up, but the interior is still steaming, creating this moisture barrier between the cake and the pan. It's like trying to remove a sticker that's only half dry—it just tears and makes a mess.
Can you salvage an early release? Sometimes. If you catch it immediately and the damage is minimal, you can try gently pressing the sides back into place and refrigerating it to firm up. I've also covered up sins with extra frosting, whipped cream, or a strategic arrangement of berries. One time I crumbled up my failed cake and turned it into a trifle. Nobody knew it wasn't intentional.
But honestly? It's so much easier to just wait the proper amount of time in the first place. I know that's not what you want to hear when you're staring at a beautiful cake and dying to dig in, but trust me on this one.
What Happens If You Wait Too Long?
Here's the good news: waiting too long is rarely as catastrophic as removing a cake too early. In fact, for most cakes, you'd have to wait hours and hours for it to become a real problem.
The main issue with extended cooling is condensation. If you leave a warm cake in a closed pan for too long, moisture condenses on the inside of the metal, drips down, and can make parts of your cake soggy. I've had this happen with a carrot cake I forgot about for three hours. The top was fine, but the bottom edges had absorbed so much moisture they were almost gummy.
Ironically, sticking can also be worse if you wait too long with certain cakes. As cakes cool completely, sometimes they sort of "glue" themselves to the pan. I've had better luck releasing slightly warm cakes than completely cold ones, at least with the sides.
There's also a texture consideration. Some cakes, especially those light, airy ones I mentioned earlier, can become denser if left enclosed too long. It's not a huge difference, but if you're going for that perfect, cloud-like sponge, don't let it sit in the pan for more than 20 minutes.
But here's the exception that proves the rule: cheesecakes. You literally cannot wait too long with these. I've left cheesecakes in the springform pan in my fridge for two full days before releasing them, and they turned out absolutely perfect. If anything, the extra time helped the flavors develop and the texture become even creamier.
Special Circumstances and Troubleshooting
Real-life baking doesn't always happen in perfect conditions, and I've learned to adjust my timing based on various factors that recipes never seem to mention.
High-Altitude Baking
I spent a summer in Colorado, and let me tell you, baking at high altitude is a whole different game. The lower air pressure means cakes rise faster and set more quickly on the outside while the inside is still underdone.
At altitude, I found I needed to extend my cooling time by about five minutes. The cakes would look done on the outside, but the inside needed that extra time to finish setting. If you're baking above 3,000 feet, factor this in. It's better to wait a bit longer than to end up with a cake that looks fine until you cut into it and discover the center is basically pudding.
Humid Environments
My mother-in-law lives in Florida, and I've baked at her house several times. The humidity there is no joke, and it affects cooling times more than I expected.
In very humid conditions, I actually reduce my cooling time slightly—maybe by two to three minutes. The air is already saturated with moisture, so your cake isn't releasing moisture as efficiently. Leaving it in the pan too long can make the exterior almost sticky.
I also make sure to use the wire rack without fail in humid climates. The air circulation is even more critical when you're battling moisture in the air.
When Your Cake Is Sticking
Despite your best efforts, sometimes cakes stick. It happens to everyone, and I've developed a few tricks to handle it.
If the sides are sticking after you've run a knife around, try this: take a kitchen towel, run it under hot water, wring it out, and press it against the outside of the springform ring for about 30 seconds. The warmth helps release any stuck bits. Then try running your knife around again.
For cakes stuck to the bottom, the hot towel trick works here too, but apply it to the base. Sometimes I'll place the whole thing on a burner that's been turned on low for literally five seconds—just long enough to barely warm the metal. This has saved several cakes for me.
Prevention is easier though. I now line my springform pan bottoms with parchment paper every single time. I trace the bottom onto parchment, cut it out, and place it in before adding batter. This one simple step has eliminated probably 90% of my sticking issues.
Dealing with Cracked Tops
Cracks in cakes, especially cheesecakes, can happen for lots of reasons, but cooling time is definitely a factor. Rapid temperature changes cause the surface to contract faster than the interior, leading to cracks.
If you notice cracks forming while your cake cools, there's not much you can do to fix them at that point. But for next time, try the gradual cooling method: turn off the oven, crack the door, and let the cake cool in the oven for 30 to 60 minutes before moving it to the counter.
I've also learned that some cracks are just cosmetic and totally fine. A dollop of whipped cream, a fruit topping, or a dusting of powdered sugar can make them disappear. I used to stress about cracks until I realized most people are too busy enjoying the cake to care about a little surface imperfection.
Expert Tips for Perfect Results Every Time
After years of trial and error (mostly error, if I'm being honest), here are the tricks that have transformed me from a springform pan disaster artist to someone who can actually pull off a clean release.
The Parchment Paper Insurance Policy
I cannot stress this enough: line your pan with parchment paper. I cut a circle for the bottom and sometimes even a strip for the sides if I'm making something particularly sticky like a caramel-based cake.
This changed my baking life. Even if my timing is slightly off or I forget to grease properly, the parchment paper saves me. It's like baking insurance that costs pennies.
The Grease and Flour Combo
Even with parchment paper, I still grease my pans. I use butter rather than cooking spray because it gives a better release and adds a tiny bit of flavor to the edges. For chocolate cakes, I dust with cocoa powder instead of flour because white spots on a chocolate cake look weird.
Here's a trick I learned from a professional baker: after greasing, pop your empty pan in the freezer for five minutes. The cold solidifies the butter, creating a better non-stick barrier. It sounds fussy, but it takes almost no effort and really works.
Wire Rack Positioning Matters
Always, always, always use a wire rack. But here's something I didn't know for years: the type of wire rack matters. Those flimsy ones with wide gaps don't provide enough support. I invested in a sturdy, tight-grid cooling rack, and it made a noticeable difference, especially with heavier cakes.
Room Temperature Reality Check
Your "room temperature" and my "room temperature" might be very different. I keep my house pretty cool, around 68°F, so my cakes take the full cooling time or even a bit longer. My friend who keeps her house at 75°F finds her cakes are ready a few minutes earlier.
In winter, when my kitchen is cooler, I add a couple minutes to my cooling time. In summer, when it's warmer, I might shave off a minute or two. Pay attention to your environment.
The Refrigerator Shortcut (Use Wisely)
Sometimes you're in a hurry, and I get it. Putting your cake in the fridge can speed up cooling, but there are rules.
For regular cakes, never refrigerate them immediately after baking. Let them cool for at least 10 minutes at room temperature first. Then you can carefully transfer the whole springform pan to the fridge for another 10 to 15 minutes if you're desperate.
For cheesecakes, you can move to the fridge sooner, but still let them come to room temperature first for at least an hour. The gradual cooling prevents cracks and texture issues.
The Professional's Secret
I took a baking class once, and the instructor shared something that stuck with me: she said the best way to know if your cake is ready is to learn what it looks and feels like through experience. Write down your cooling times and results for different recipes. After a few attempts, you'll develop an instinct.
I keep a little notebook with my baking experiments. "Chocolate torte: 12 minutes perfect. 10 minutes too early, sides stuck." This might seem obsessive, but it's made me so much more consistent.
Frequently Asked Questions
Can I speed up cooling in the refrigerator?
Yes, but with caveats. You can use the fridge to speed things along, but never put a piping hot pan directly into your refrigerator. The temperature shock can crack your cake, and it also forces your fridge to work overtime, potentially affecting other food.
Let your cake cool for at least 10 to 15 minutes at room temperature first, then you can carefully move it to the fridge if you're in a time crunch. I've done this successfully with birthday cakes when I underestimated my timing, but it's definitely not my preferred method.
Should I remove the sides and bottom at the same time?
Generally, no. I remove the sides first, let the cake continue cooling on the base, and then transfer it to my serving plate. The metal base provides stable support during that vulnerable period right after releasing the sides.
The only exception is if I'm making a very sturdy cake like a pound cake, and I'm confident it can handle being moved. Even then, I usually play it safe and do the two-step process.
What if I need to transport the cake in the pan?
This is actually a great question because I've had to do this for potlucks and parties. If you need to transport your cake, leave it fully assembled in the springform pan. The sides provide structure and protection during transit.
I wrap the whole thing in plastic wrap and place it on a flat surface in my car. Once I arrive at my destination, I can release it there. Just make sure you bring your tools—an offset spatula and knife—because you'll need them for the removal process.
How do I store a cake that's still in the springform pan?
If your cake needs to stay in the pan (like a cheesecake during its overnight chill), wrap the top loosely with plastic wrap or aluminum foil. Don't seal it too tightly while it's still warm, or you'll trap moisture and create condensation.
For cheesecakes specifically, I wait until they're completely cool before wrapping tightly and refrigerating. The loose covering during the initial cooling period prevents moisture buildup while still protecting the surface.
Do different pan sizes affect cooling time?
Absolutely. A 9-inch cake has more mass than a 6-inch cake, so it retains heat longer. Smaller cakes might be ready after just 8 minutes, while larger ones might need the full 15 minutes or even a bit more.
I have springform pans in 6-inch, 8-inch, and 10-inch sizes, and I've learned to adjust my timing accordingly. My rule of thumb: subtract about 2 minutes for each inch smaller, add about 2 minutes for each inch larger than the standard 9-inch.
Can I flip the cake to remove it?
Please don't, at least not with springform pans. The whole point of using a springform is that you have delicate cakes that can't handle being flipped. The removal mechanism is designed to avoid that.
The only cakes I ever flip are angel food cakes for the initial cooling (hanging them upside down), but even then, I don't flip them out of the pan in the traditional sense—I still release the sides carefully.
Wrapping It All Up
So here's what it all comes down to: patience is your best friend when working with springform pans. That standard 10 to 15 minute cooling window works beautifully for most cakes, but knowing when to break the rule is what separates okay results from great ones.
Cheesecakes demand your patience with their hours-long cooling process, but they reward you with creamy, crack-free perfection. Light cakes need a quicker release to maintain their airy texture. Dense cakes benefit from those extra few minutes. And no matter what you're baking, those visual and tactile cues—the firmness, the pulling away from the sides, the warmth that's comfortable to touch—will become second nature the more you bake.
I wish I could tell you there's a magic formula that works for every single cake, but the truth is, baking is as much about feel and experience as it is about following rules. The good news? Every cake you make, whether it turns out perfect or becomes a "learning experience," teaches you something.
My springform pan used to intimidate me. Now it's one of my favorite tools, and I reach for it constantly because I finally understand how to work with it instead of against it. You'll get there too.
So set that timer, trust the process, and remember: if all else fails and your cake falls apart, there's always the trifle option. Nobody needs to know it wasn't planned that way.
Now go forth and bake something amazing. And when that timer goes off and you're tempted to release the pan early because you just can't wait? Take a deep breath, scroll back up to the section about your specific cake type, and give it the time it needs. Your patience will be rewarded with a perfectly released, beautiful cake that makes all that waiting worthwhile.
Leave a Reply