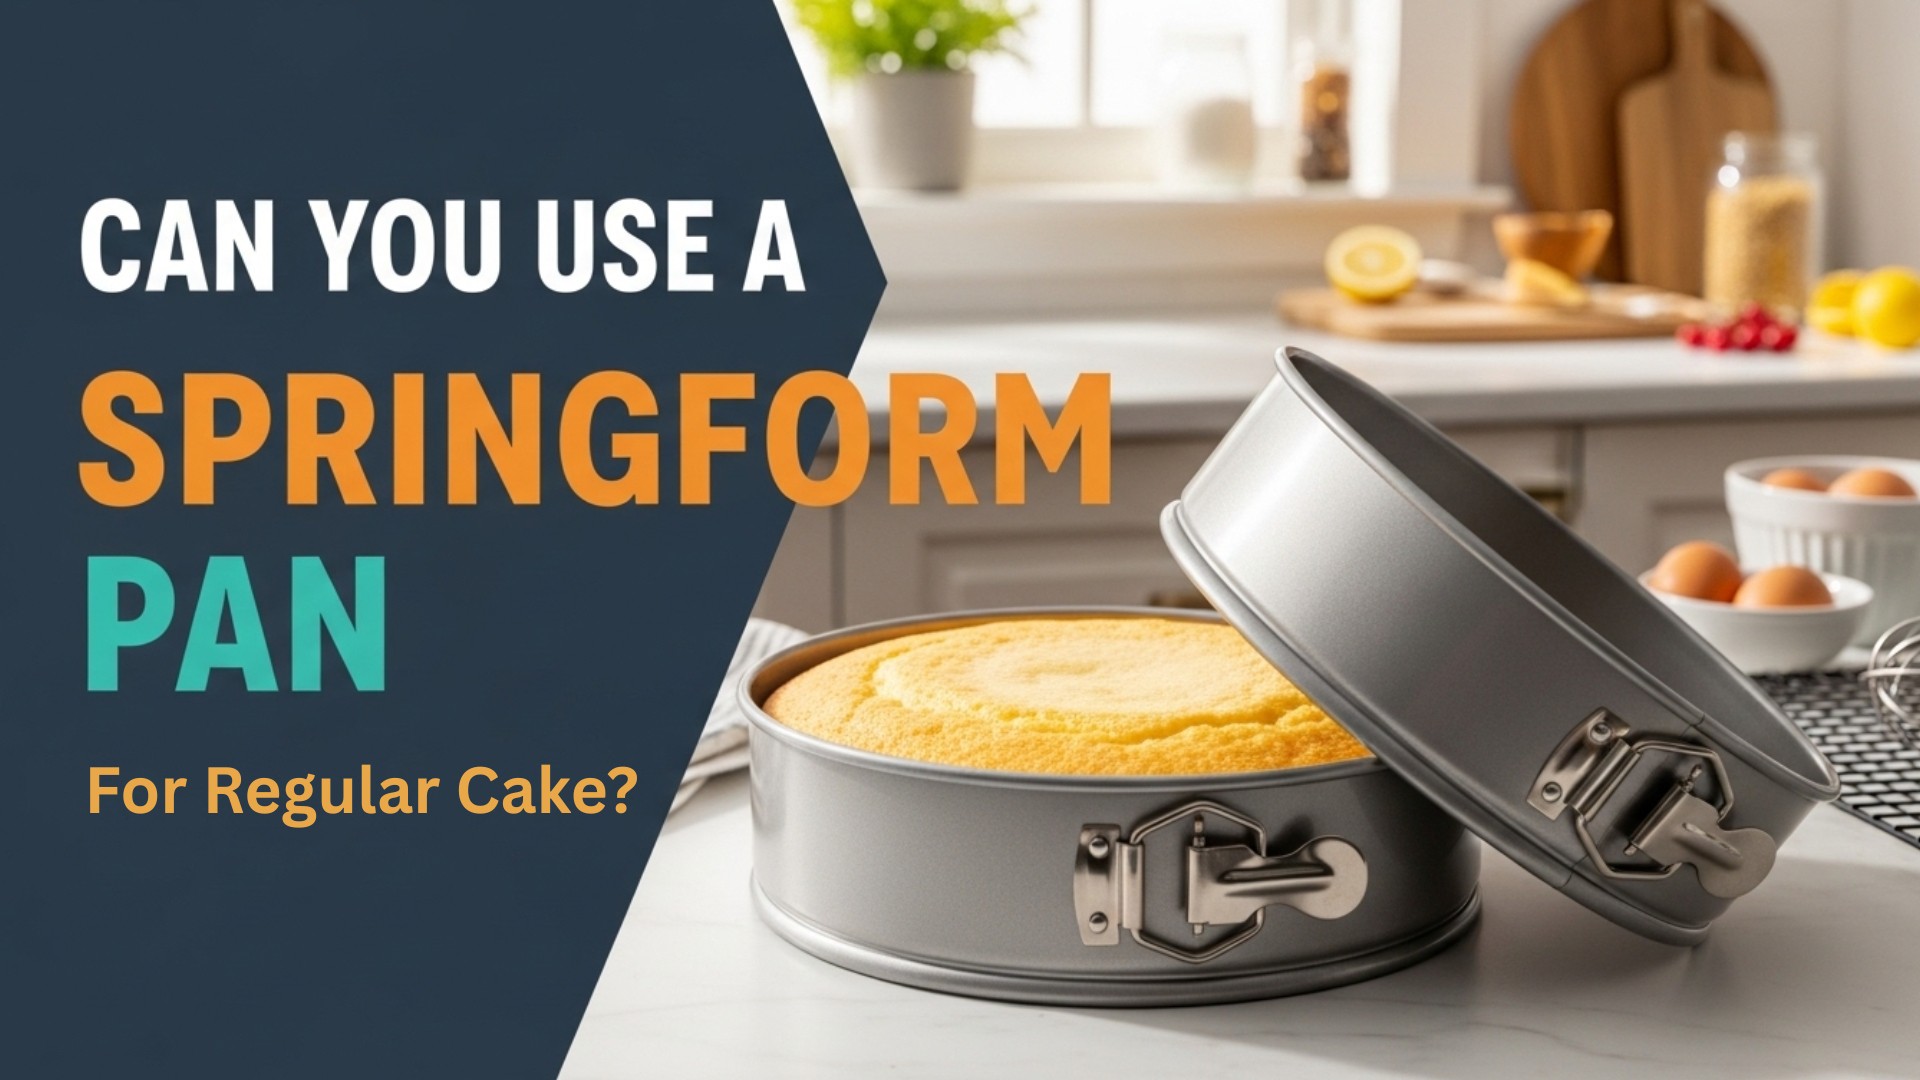
I'll never forget the first time I reached for my springform pan to bake a regular birthday cake. My traditional round pans were dirty, sitting in the sink from an earlier baking session, and I had frosting to make, decorations to prep, and guests arriving in a few hours. That springform pan sitting in my cabinet suddenly looked like a lifesaver.
But then doubt crept in. Aren't these just for cheesecake? Will my batter leak everywhere? Will it even bake properly?
If you've ever found yourself asking these same questions, you're not alone. The truth is, springform pans are far more versatile than most people realize, and yes—you absolutely can use them for regular cakes. But like anything in baking, there's a right way and a wrong way to go about it.
Let me walk you through everything I've learned from years of experimenting with my trusty springform pan.
What Exactly Is a Springform Pan Anyway?
Before we dive into whether you should use a springform pan for regular cake, let's make sure we're on the same page about what we're talking about.
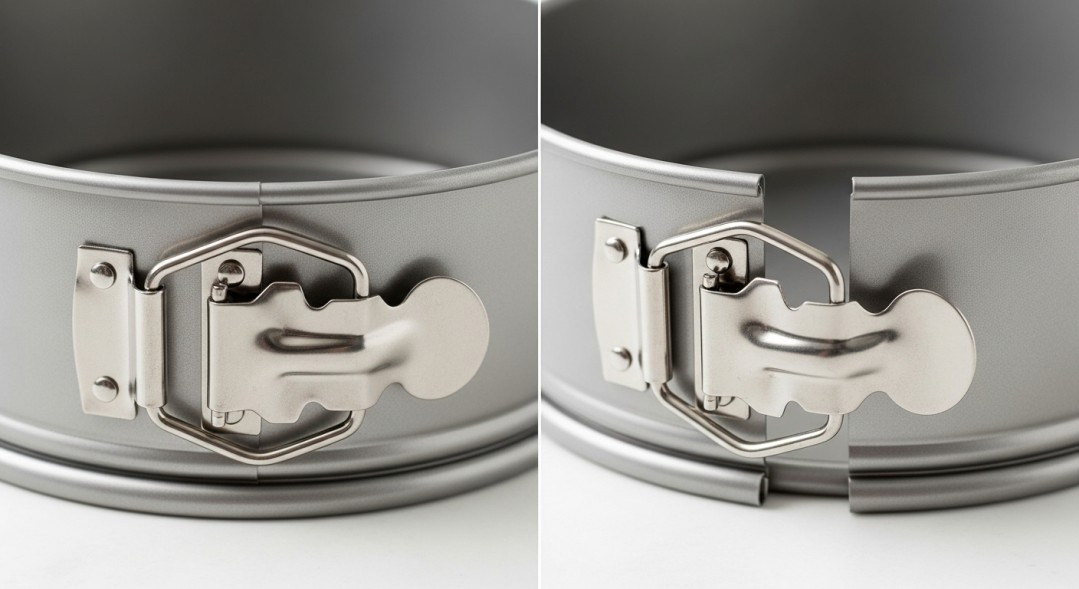
A springform pan is that clever two-piece pan with a removable bottom and sides that clasp together with a latch mechanism. You've probably seen them before—they look like regular round cake pans, but with a band around the outside that you can unlatch and remove.
The magic happens when you're ready to serve. Instead of flipping your cake upside down and hoping it doesn't stick, you simply unlatch the sides and lift them away. The cake stays perfectly intact on the base, ready to be transferred to a serving plate or served directly from the pan bottom.
Most home bakers have a 9-inch or 10-inch springform pan tucked away somewhere, usually purchased specifically for making cheesecake. These pans typically come about 2.5 to 3 inches deep, which is slightly deeper than your standard cake pan.
The key difference between a springform and a regular cake pan? That seam where the bottom meets the sides. It's both the pan's greatest feature and its potential weakness—more on that in a minute.
The Short Answer: Absolutely, Yes!
Here's what you came here to find out: Can you bake a regular cake in a springform pan?
Yes, you definitely can. I've done it dozens of times with excellent results.
I've baked everything from simple vanilla layer cakes to dense chocolate pound cakes in my springform pan. The key is understanding which cakes work best and how to prep your pan properly to avoid any mishaps.
Springform pans are particularly fantastic when you're making a cake with delicate decorations on top, cakes with gooey centers, or layer cakes where you want pristine edges. There's something deeply satisfying about unlatching those sides and seeing your cake standing there perfectly formed, no flipping or prying required.
That said, you do need to take a few extra precautions that you wouldn't worry about with a traditional solid pan. But trust me, these extra steps take maybe two minutes and are absolutely worth it.
Which Cakes Work Best in Springform Pans?
Not all cakes are created equal when it comes to springform pan success. Through trial and error (and yes, one memorable batter leak onto my oven floor), I've figured out which types work beautifully and which ones you should probably skip.
The Rock Stars: Dense and Sturdy Cakes
Pound cakes are absolutely perfect for springform pans. The thick, dense batter doesn't leak, and the easy release means you get those gorgeous straight edges that make pound cake look so elegant. I've made lemon pound cake, marble pound cake, and cream cheese pound cake in my springform, and every single one turned out beautifully.
Coffee cakes with crumb toppings are another winner. Being able to remove the sides without disturbing that delicate streusel on top? Chef's kiss. No more sad coffee cake with half the topping stuck to an inverted pan.
Butter cakes and standard layer cakes work well too. I've found that traditional birthday cake recipes—the kind that produce a sturdy but tender crumb—do just fine in a springform as long as you prepare the pan correctly.
The Middle Ground: Layer Cakes
You can absolutely make layer cakes in a springform pan, but you need to be realistic about what you're working with. If your recipe makes a very thin, delicate batter, you might see some seepage. Thicker batters handle much better.
I like using my springform for layer cakes when I'm doing something fancy with the presentation. Being able to remove the sides without touching the cake means your frosting stays perfect and your layers stay aligned.
The "Maybe Skip It" Category: Light and Airy Cakes
Angel food cake and chiffon cakes? Hard pass on the springform pan. These cakes need to be inverted while cooling to maintain their airy structure, and springform pans aren't designed for that. Plus, the batter is so light it can definitely leak through that seam.
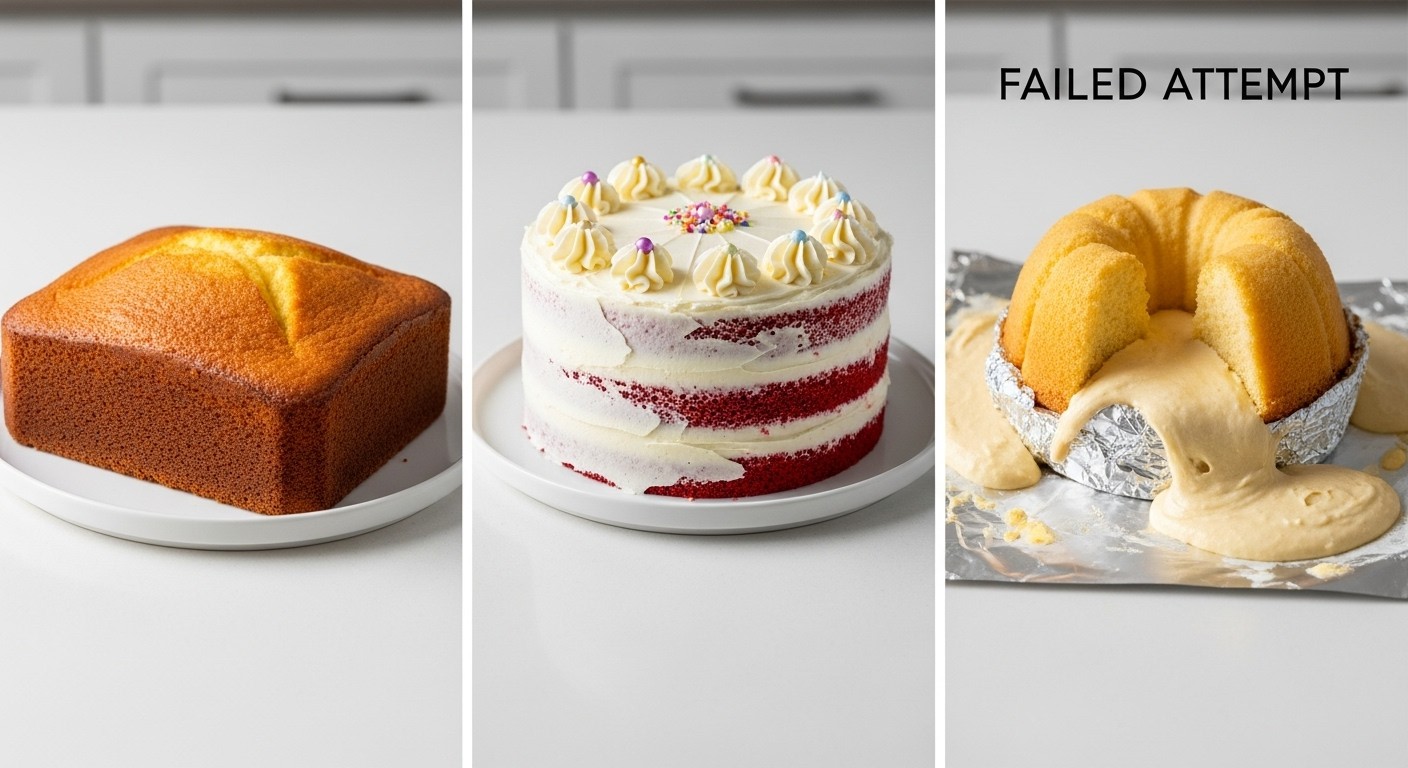
I learned this the hard way with a chiffon cake that left a puddle in my oven. It still tasted fine once baked, but I lost probably a quarter of my batter and had a mess to clean up. Not worth it.
Very thin batters—think crepe cakes or some European-style sponges—also tend to be problematic. If your batter is super liquidy, it'll find every tiny gap in that seal.
Why I Actually Love Using Springform Pans for Regular Cakes
Once I got over my initial hesitation, I started reaching for my springform pan more often than I expected. Here's why it's become one of my go-to options.
The Release Is Ridiculously Easy
There's no flipping, no praying, no holding your breath while you invert the pan and hope everything comes out in one piece. You simply unlatch the sides, lift them away, and there's your cake. For someone who's definitely had cakes stick and break apart (show me a baker who hasn't), this is genuinely game-changing.
Perfect Presentation Every Time
When I'm making a cake for company or a special occasion, the springform gives me that Instagram-worthy presentation. The sides stay perfectly straight, the edges stay clean, and I can transfer the cake to a serving plate without any drama.
I particularly love this for cakes with glazes or soft toppings. Last month I made a blueberry buckle with a crumb topping, and being able to remove the sides without touching the top meant every crumb stayed exactly where I put it.
It's Fantastic for Delicate Decorations
If you're doing intricate work on the sides of your cake—maybe fresh flowers, chocolate decorations, or careful piping—the springform lets you decorate with the sides still on for support, then remove them later. You can't do that with a regular pan.
Serving Is Simpler
Honestly? Sometimes I just leave the cake on the pan bottom and serve it that way. It's one less dish to wash, and that metal base is sturdy enough to move around easily. I just pop it onto a decorative cake stand and call it done.
The Challenges (And How I Deal With Them)
Let's be real—springform pans aren't perfect. There are some quirks you need to work around, but none of them are deal-breakers once you know what you're doing.
The Dreaded Batter Leak
This is the big one. That seam between the bottom and sides? It's not completely watertight. With thin batters or poorly sealed pans, you can end up with batter dripping into your oven.
The first time this happened to me, I was baking a vanilla cake for my daughter's birthday. About twenty minutes into baking, I smelled something burning and opened the oven to find batter slowly oozing out and hitting the oven floor. Panic mode activated.
Here's how I prevent leaks now, and I haven't had a problem since:
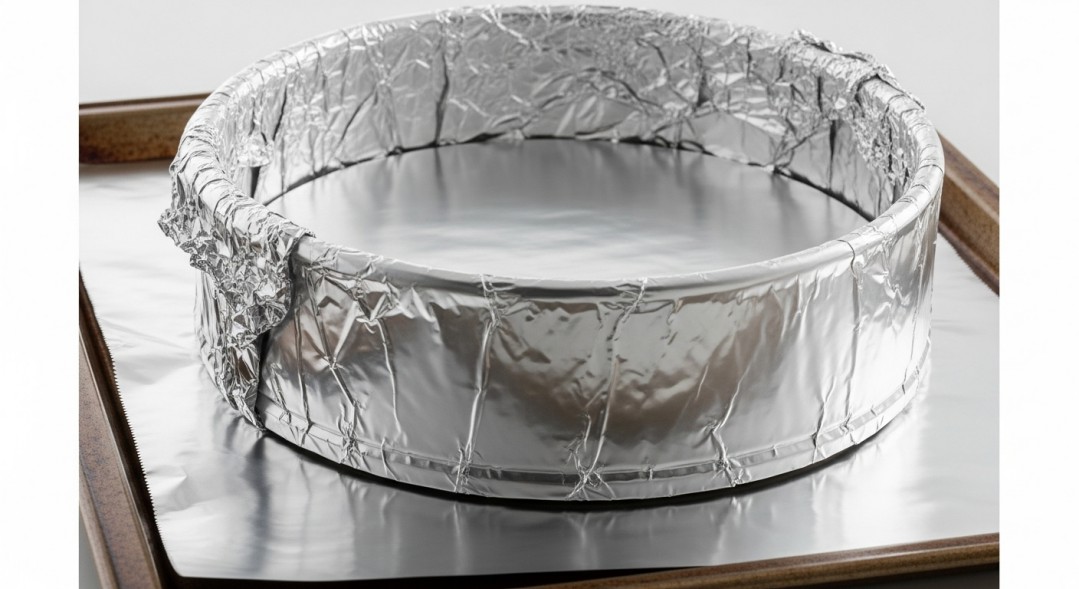
The aluminum foil method: I tear off a large piece of heavy-duty aluminum foil and wrap it around the outside bottom of the pan, bringing it up the sides a few inches. This catches any potential drips. It takes thirty seconds and has saved me countless times.
The baking sheet backup: I always place my springform pan on a rimmed baking sheet before putting it in the oven. Even if something does leak past the foil, it hits the baking sheet instead of the oven floor. Plus, it makes the pan easier to move in and out of the oven.
The seal test: Before I add any batter, I fill the pan with water over the sink and check for drips. If I see water escaping, I know I need to tighten the clasp or that my pan might be worn out. A good springform should hold water without immediate leaking, though a little seepage over time is normal.
Getting the Seal Just Right
Not all springform pans are created equal. I have one from a high-end brand that seals beautifully and one cheaper version that's always been a bit finicky. The clasp needs to be completely closed and tight, and the bottom needs to sit flush against the sides.
Sometimes I run my finger around the inside edge where the bottom meets the sides, just to make sure everything's aligned properly. It seems fussy, but it takes two seconds and prevents problems.
Slight Browning Differences
I've noticed that cakes sometimes brown slightly differently in springform pans compared to regular pans. The sides are a bit thinner metal on most springforms, so the edges can brown a touch more quickly.
My solution? I keep an eye on my cake and if the edges are browning faster than I'd like, I loosely tent some foil over the top for the last 10-15 minutes of baking. Problem solved.
My Step-by-Step Process for Success
After years of using springform pans for regular cakes, I've developed a routine that works every time. Here's exactly what I do.
Preparing the Pan
First, I check that the clasp is fully closed and the bottom is seated properly. I give it a little wiggle to make sure it's snug.
Then I grease the pan thoroughly. I use butter or baking spray and make sure to get into that corner where the bottom meets the sides—that's where sticking usually happens. I'm generous with the grease because there's no such thing as "too much" when you want easy release.
Next comes parchment paper. I trace the bottom of the pan onto parchment, cut it out, and press it into the greased bottom. Some people also line the sides with a strip of parchment, which I do for really sticky cakes or if I'm feeling paranoid, but honestly it's not always necessary.
The Anti-Leak Insurance
This is where I break out the aluminum foil. I tear off a piece about 18 inches long and center the pan on it. Then I bring the foil up around the sides, pressing it gently to conform to the pan shape without putting pressure on the clasp.
I set the foil-wrapped pan on a rimmed baking sheet. This is non-negotiable for me now. The baking sheet catches anything that escapes and makes the whole setup much easier to handle.
Filling and Baking
When I pour in the batter, I make sure not to fill the pan more than two-thirds full. Springform pans are often deeper than regular cake pans, so you usually have plenty of room, but it's still important to leave space for the cake to rise.
I bake at the temperature my recipe calls for—no adjustments needed. The baking time is usually the same as a regular pan, though I start checking for doneness about five minutes before the recipe says. Every oven is different, and that baking sheet underneath can sometimes add a minute or two.
To test for doneness, I use the same methods I would with any cake: a toothpick inserted in the center should come out clean or with just a few moist crumbs, and the cake should spring back when lightly pressed.
The Cooling and Release Process
Here's where patience becomes important. I let the cake cool in the pan on a wire rack for about 10-15 minutes. You want it to set enough that it won't fall apart, but not so long that it sticks.
For denser cakes like pound cake, I sometimes wait up to 20 minutes. For lighter layer cakes, 10 minutes is usually enough.
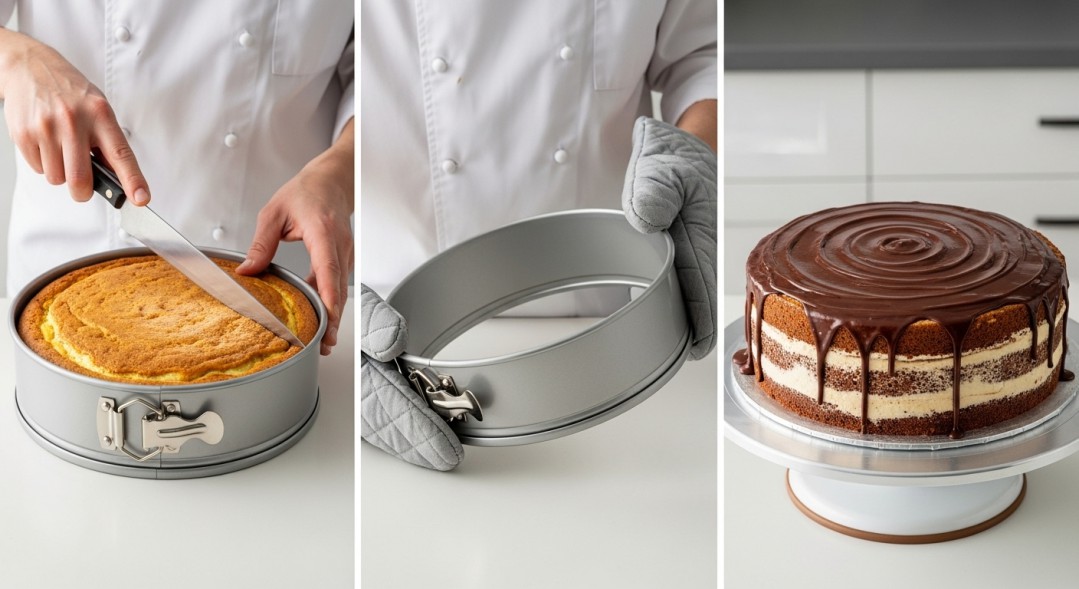
When I'm ready to remove the sides, I run a thin knife or offset spatula around the edge of the cake, gently separating it from the pan. This step is crucial—don't skip it even if your cake looks like it's not touching the sides.
Then comes the satisfying part: I unlatch the clasp and gently pull the sides apart. The band lifts straight up and away, leaving the cake sitting pretty on the base.
If I want to remove the bottom too, I wait until the cake is completely cool. Then I slide a large, thin spatula between the parchment and the pan bottom, working my way around until the whole cake lifts off. I transfer it to my serving plate or cake stand.
Pro Tips From My Kitchen to Yours
These are the little tricks I've picked up that make a real difference.
Always use that baking sheet. I can't stress this enough. Even if you're confident your pan won't leak, the baking sheet makes everything easier and safer. It's like wearing a seatbelt—you hope you don't need it, but you're glad it's there.
Invest in quality if you bake often. My cheap springform pan was fine for occasional cheesecakes, but once I started using it regularly for all kinds of cakes, I upgraded to a heavier-duty version. The difference in seal quality and durability is noticeable.
Parchment rounds are your friend. I buy pre-cut parchment rounds in my most-used pan sizes. They're cheap, and they eliminate the annoying step of tracing and cutting. Plus, they make removing the cake from the base later much easier.
Don't rush the release. I know it's tempting to unlatch that pan right away, but letting the cake cool for those 10-15 minutes prevents broken edges and structural disasters.
Check your pan regularly. Over time, springform pans can develop wear at the clasp or warping that affects the seal. Every few months, I do the water test to make sure mine is still working properly.
The depth matters. Most springform pans are about 3 inches deep, which is deeper than standard cake pans (usually 2 inches). If you're converting a recipe, keep in mind your cake might look shorter relative to the pan, but that's fine—it'll still bake properly.
Room temperature ingredients matter even more. I've found that cold butter or eggs can make batters thicker and less prone to leaking, which is actually a good thing with springform pans. So don't stress if your ingredients aren't perfectly room temperature.
When to Stick With a Regular Pan
As much as I love my springform pan, I'm the first to admit it's not always the right tool for the job.
If I'm making angel food cake or any cake that needs to be inverted to cool, the springform stays in the cabinet. These cakes require special tube pans designed for inversion, and trying to make a springform work is just asking for trouble.
When I'm in a huge hurry and don't want to deal with the extra prep steps—the foil wrapping, the baking sheet setup—I'll just use a regular pan. Sometimes simplicity wins, especially on a busy weeknight when I'm throwing together a quick dessert.
For very thin or liquidy batters, I skip the springform. If I'm making crepes or a super-light sponge with a pourable batter, I know from experience that it's going to leak, and I'd rather not deal with it.
If I need a really tall layer cake—like those dramatic four or five-layer cakes—regular pans often come in taller versions that work better. My springform is great for standard heights, but it has its limits.
How Springform Pans Compare to Regular Cake Pans
I get asked this all the time: What's actually different between baking in these two types of pans?
Release and presentation: This is where the springform really shines. Regular pans require flipping or prying, which can damage decorations or break delicate cakes. The springform's removable sides give you perfect presentation every time.
Preparation time: Regular pans win on speed. Grease, flour, maybe line with parchment, and you're done. Springforms need the foil wrap and baking sheet setup if you want to avoid potential problems.
Versatility: Regular cake pans are simpler and work for literally any cake recipe without worry. Springforms are amazing for many things but do have limitations with certain cake types.
Durability: A solid regular pan will last forever with minimal maintenance. Springform pans have moving parts that can wear out, and the seal can degrade over time.
Cleanup: Both are pretty easy to clean, though I find the two-piece nature of springform pans means I need to wash both components separately and make sure nothing's stuck in the clasp mechanism.
For me, the choice comes down to what I'm baking and how much I care about presentation. Everyday cakes? Regular pan is fine. Special occasion or delicate cakes? I'm reaching for the springform.
Your Questions Answered
Over the years, friends and readers have asked me the same questions about using springform pans for regular cakes. Here are the answers based on my real-world experience.
Do I need to adjust the baking time?
Usually not. I bake at the same temperature and start checking for doneness at the same time the recipe indicates. Occasionally, the baking sheet underneath might add a minute or two to the total time, but it's minimal. Just use the standard doneness tests and you'll be fine.
Will my cake bake evenly?
Yes, as long as your oven bakes evenly in general. I haven't noticed any significant difference in how evenly cakes bake in my springform versus regular pans. The metal conducts heat pretty similarly.
Can I make a two-layer cake using one springform pan?
Absolutely. I do this all the time. Bake your cake, let it cool, then use a long serrated knife to slice it horizontally into two layers. The removable sides actually make this easier because you can use the edge of the pan as a guide before you remove it. Just be gentle and use a sawing motion.
How do I prevent the bottom from sticking?
Grease well and use parchment paper. I've never had a problem with this two-step approach. The parchment is especially helpful if you want to remove the cake from the base entirely.
What if my batter seems really thin?
Be extra vigilant with your leak prevention. Use heavy-duty foil, make sure it's wrapped snugly, and definitely use that baking sheet. You might also consider using a higher-quality springform pan with a better seal, or honestly, just use a regular pan for that particular recipe.
You can, but you'll need to adjust. A 9-inch springform has a different capacity than a 10-inch, just like with regular pans. If you're using a larger pan, your cake will be shallower and bake faster. Smaller pan means thicker cake and longer baking time. Keep an eye on it and test for doneness rather than relying solely on the recipe's timing.
The Bottom Line on Springform Pans for Regular Cakes
After years of baking with both springform and regular pans, here's what I've learned: Springform pans are genuinely useful for regular cakes, not just cheesecake. The easy release and beautiful presentation make them worth the minimal extra effort for many types of cakes.
Yes, you need to take a few precautions—wrapping with foil, using a baking sheet, making sure the seal is tight. But these steps become second nature after you've done them a few times, and they're a small price to pay for the convenience of that removable side ring.
The key is choosing the right cakes (dense and sturdy batters work best) and preparing your pan properly. Do those two things, and you'll wonder why you didn't start using your springform for regular cakes years ago.
I still use regular pans plenty, especially for everyday baking or when I'm in a rush. But when I want that perfect presentation or I'm working with a delicate cake, the springform is my first choice.
So go ahead—pull that springform pan out of the back of your cabinet and give it a try with your favorite cake recipe. Start with something sturdy like a pound cake or butter cake, follow the prep steps I've outlined, and see what you think.
I'd love to hear about your experience! Have you tried baking regular cakes in a springform pan? What worked for you, and what didn't? Every baker's experience adds to our collective knowledge, and there's always something new to learn in the kitchen.
Happy baking, and may all your cakes release perfectly!
Leave a Reply